Easy Kingston Slice
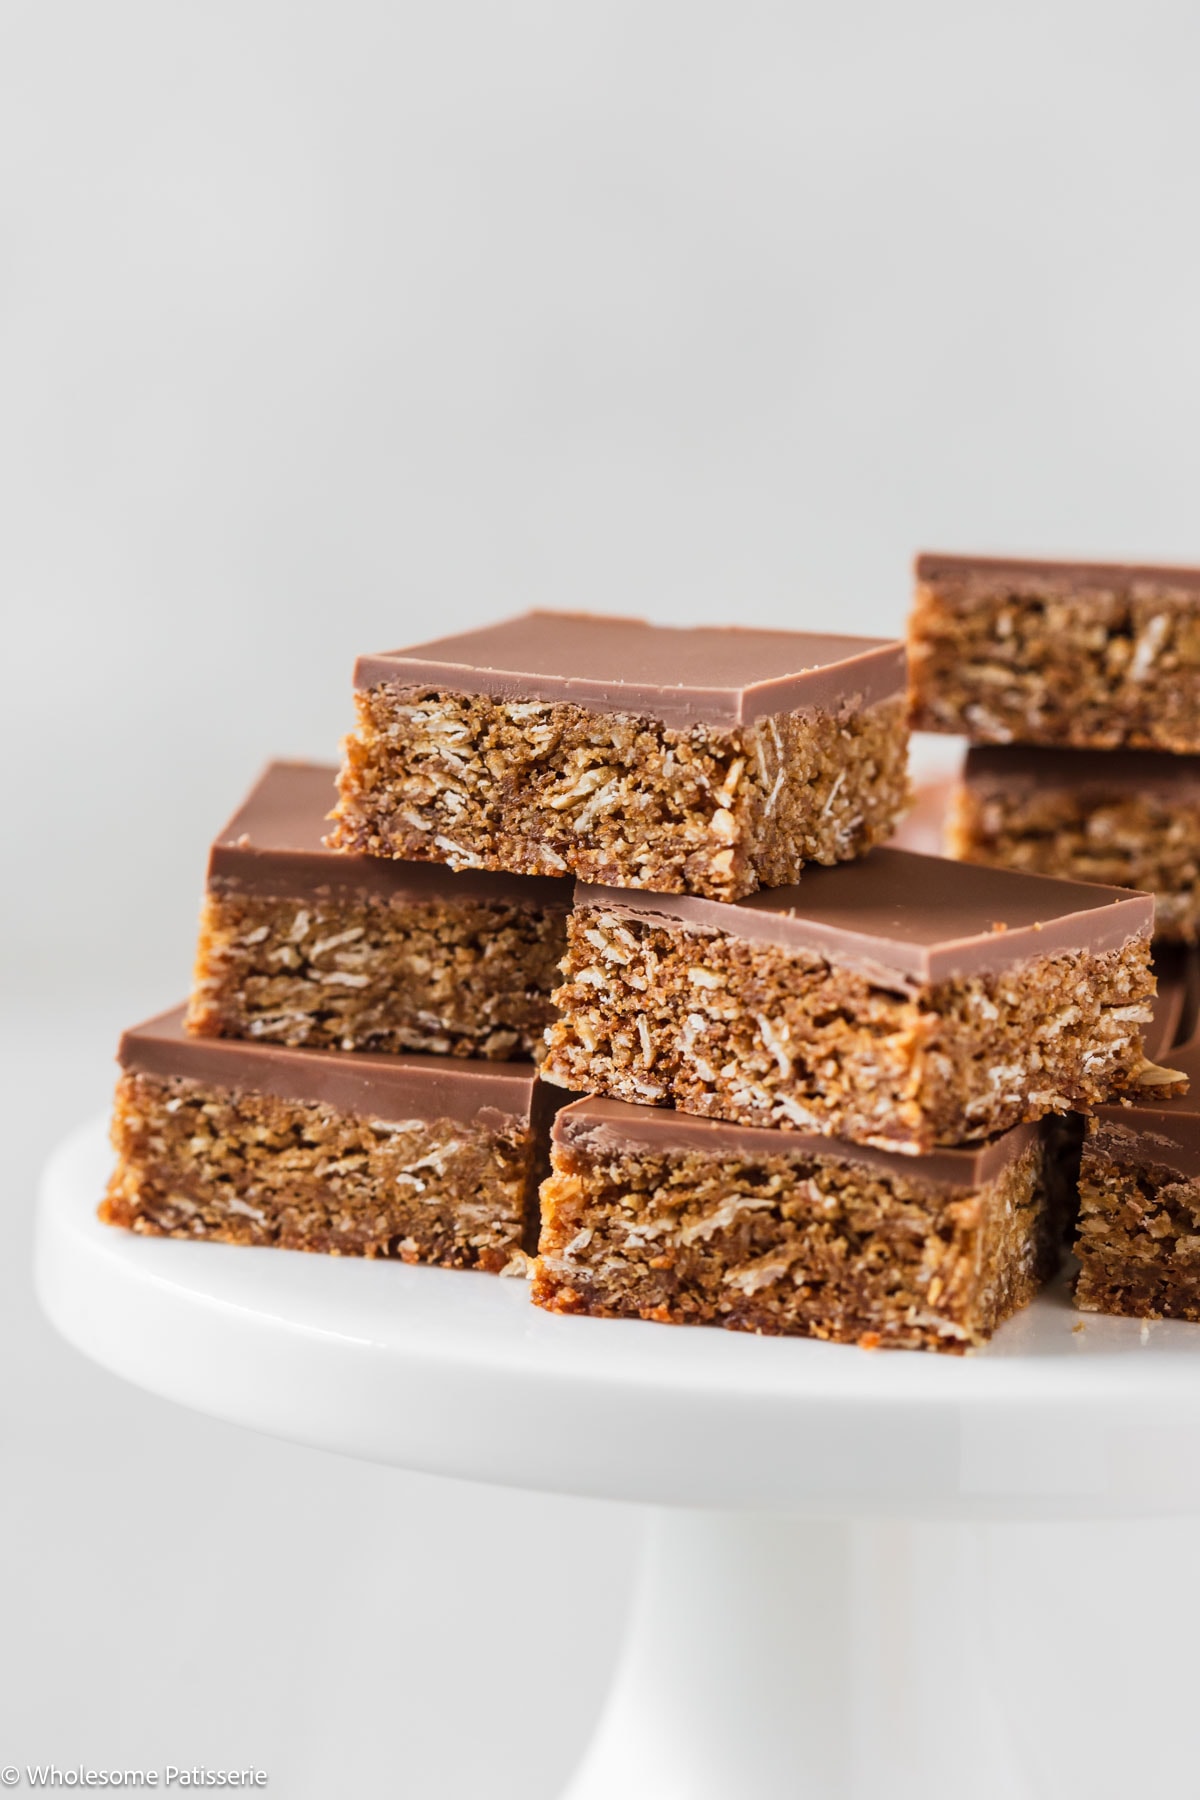
Indulge in the homemade charm of a Kingston Slice Recipe, a delightful reinterpretation of the classic Kingston biscuits. This slice embodies the nostalgic flavors of the beloved biscuit, featuring a layer of golden, crispy base topped with rich, creamy milk chocolate.

Kingston Slice
This easy Kingston slice is a tribute to the classic Arnotts Cream Favourites, but in the form of an easy slice recipe.
Perfect alongside a hot cup of tea, this Kingston slice offers a taste of nostalgia with every bite where the delightful crunch of coconut and oat meets the silky richness of melted milk chocolate topping.
This easy Kingston slice recipe captures the essence of the Australian Kingston biscuit perfectly!
Why are they called Kingstons?
Legend has it, their name comes from a town in Hobart named Kingston!
Ingredient Notes & Substitutions
A full and detailed recipe card with all the ingredients to make these chocolate mint cupcakes is at the bottom of this post.
- All-purpose flour: Also known as plain flour in Australia. Be sure to check out my guide on how to accurately measure basic baking ingredients.
- Desiccated coconut: Also known as finely shredded coconut. Do not substitute with coconut flakes or bigger shredded coconut.
- Golden syrup: Can be substituted with the same quantity of rice malt syrup.
How to Make Kingston Slice (with photos)
A full and detailed recipe card is at the bottom of this post.
Prepare Oven & Tin: Preheat your oven to 160ºC (320ºF) fan-forced. Line a 11 x 7-inch (20cm x 30cm) rectangle slice tin with parchment paper. Set aside.
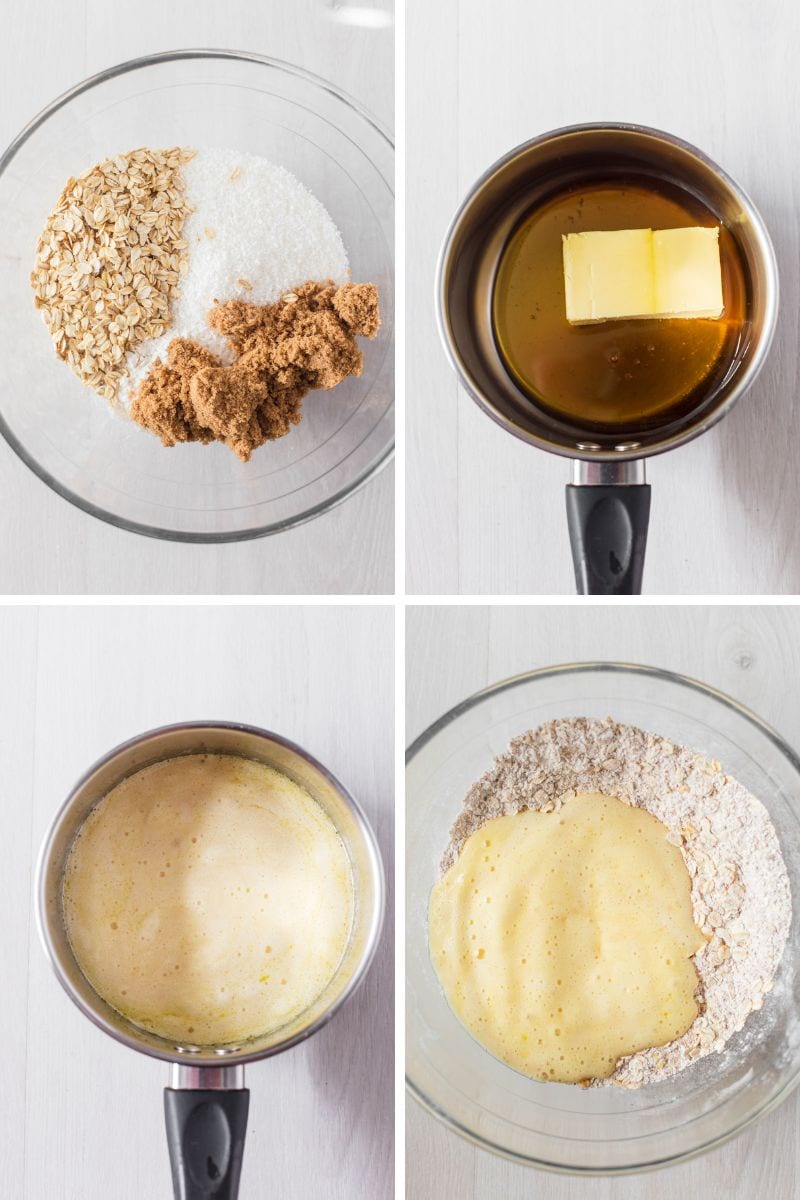
Mix Dry Ingredients: In a large mixing bowl, add flour, coconut, oats and sugar. Mix with a wooden spoon until well combined.
Heat Butter and Syrup: In a small pot, melt the butter and golden syrup over low-medium heat, stirring occasionally. Sprinkle in the baking soda and stir until it turns foamy. Immediately pour it into the dry ingredients, mixing until well combined.
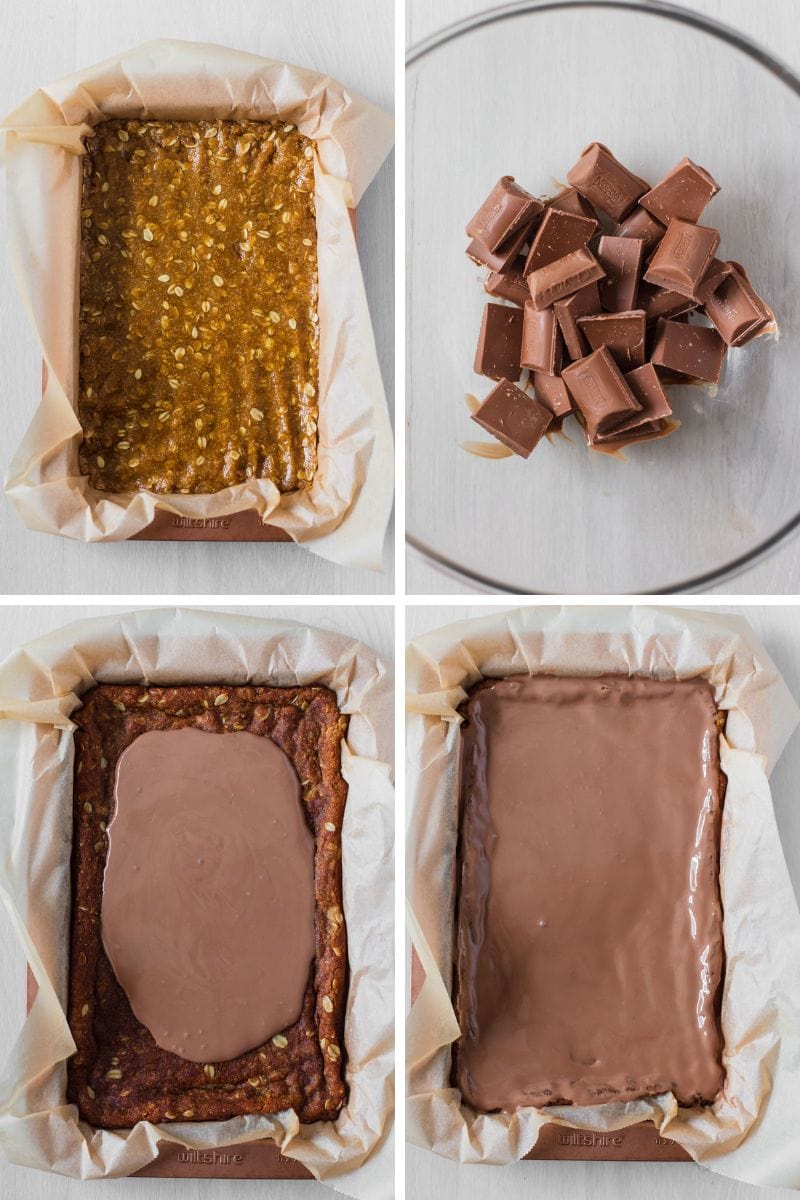
Transfer To Tin & Bake: Press the mixture firmly into the lined tin. Bake for 20 minutes until golden. Remove from the oven and allow it to cool in the tin for 1 hour or until it reaches room temperature.

Prepare Double Boiler: Set up a double boiler with simmering water in the saucepan below with a heat-proof bowl sitting on top.
Melt Chocolate: Add the broken up milk chocolate to the bowl and slowly melt over low-medium heat, stirring until melted and smooth. Stir through the coconut oil until melted and combined. Remove from the heat.
Spread Over Base: Pour the melted chocolate over the cooled slice in the tin, spreading it out evenly. Refrigerate for 1-2 hours until the chocolate is set.
Slice and Serve: Lift it out of the tin and place it on a cutting board. Let it sit for 5-10 minutes for the chocolate to come slightly to room temperature so it does not crack when you cut it. Slice into squares with a sharp knife. Enjoy!

Can I make this Kingston slice gluten-free?
For a gluten-free version, use gluten-free all-purpose flour and certified gluten-free rolled oats.
Can I make it dairy-free?
Try swapping the butter for a block of dairy-free butter using the same quantity. Replace the milk chocolate with dairy-free dark chocolate. Keep in mind I have not tested this recipe using these dairy-free substitutions.

Storage Instructions
Store: In an airtight container at room temperature or in the fridge for 1 week.
Freeze: Freeze slices by placing them in an airtight freezer-safe container or zip-lock bag in single layers separated by a sheet of parchment paper to prevent them from sticking together. Label with the name and date. Freeze for up to 3 months.
Thaw: Frozen slices at room temperature for several hours or in the fridge overnight until thawed.
Make These Aussie Favorites Next
If you enjoy this recipe, please consider leaving a ⭐️ star rating and a comment review below. I love to hear what you think and it’s much appreciated. Thank you! Your email address will not be published. Sam x

Easy Kingston Slice
Ingredients
Base
- 1 cup (150g) all-purpose flour, scoop & leveled
- 1 cup desiccated coconut
- 3/4 cup old-fashioned rolled oats
- 2/3 cup packed light brown sugar, how to pack
- 150 g unsalted butter
- 3 Tbsp golden syrup
- 1 tsp baking soda
Chocolate Topping
- 180 g milk chocolate block, broken into squares
- 1 tsp coconut oil
Instructions
Base
- Prepare Oven & Tin: Preheat your oven to 160ºC (320ºF) fan-forced. Line a 11 x 7-inch (20cm x 30cm) rectangle slice tin with parchment paper. Set aside.
- Mix Dry Ingredients: In a large mixing bowl, add flour, coconut, oats and sugar. Mix with a wooden spoon until well combined.
- Heat Butter and Syrup: In a small pot, melt the butter and golden syrup over low-medium heat, stirring occasionally.
- Add Baking Soda: Once butter has melted, sprinkle in the baking soda and stir until it turns foamy.
- Mix with Dry Ingredients: Immediately pour it into the dry ingredients, mixing until well combined.
- Transfer To Tin: Press the mixture firmly into the lined tin.
- Bake: Bake for 20 minutes until golden.
- Cool in Tin: Remove from the oven and allow it to cool in the tin for 1 hour or until it reaches room temperature.
Chocolate Topping
- Prepare Double Boiler: Set up a double boiler with simmering water in the saucepan below with a heat-proof bowl sitting on top.
- Melt Chocolate: Add the broken up milk chocolate to the bowl and slowly melt over low-medium heat, stirring until melted and smooth.
- Add Coconut Oil: Stir through the coconut oil until melted and combined. Remove from the heat.
- Spread Over Base: Pour the melted chocolate over the cooled slice in the tin, spreading it out evenly.
- Set: Refrigerate for 1-2 hours until chocolate is set.
- Slice and Serve: Lift it out of the tin and place it on a cutting board. Let it sit for 5-10 minutes for the chocolate to come slightly to room temperature so it does not crack when you cut it. Slice into squares with a sharp knife. Enjoy!
Notes
- Store: In an airtight container at room temperature or in the fridge for 1 week.
- Freeze: Freeze slices by placing them in an airtight freezer-safe container or zip-lock bag in single layers separated by a sheet of parchment paper to prevent them from sticking together. Label with the name and date. Freeze for up to 3 months.
- Thaw: Frozen slices at room temperature for several hours or in the fridge overnight until thawed.
