Chocolate Coconut Slice with Condensed Milk
This Chocolate Coconut Slice with Condensed Milk is an old-fashioned favorite made with just 5 simple ingredients! A quick no-bake chocolate slice with a cocoa biscuit base, topped with melted chocolate and coconut, perfect when you’re short on time.
What Readers Are Saying
⭐️⭐️⭐️⭐️⭐️
“Very easy – very delicious – not turning the oven on is a real bonus too” – Mik
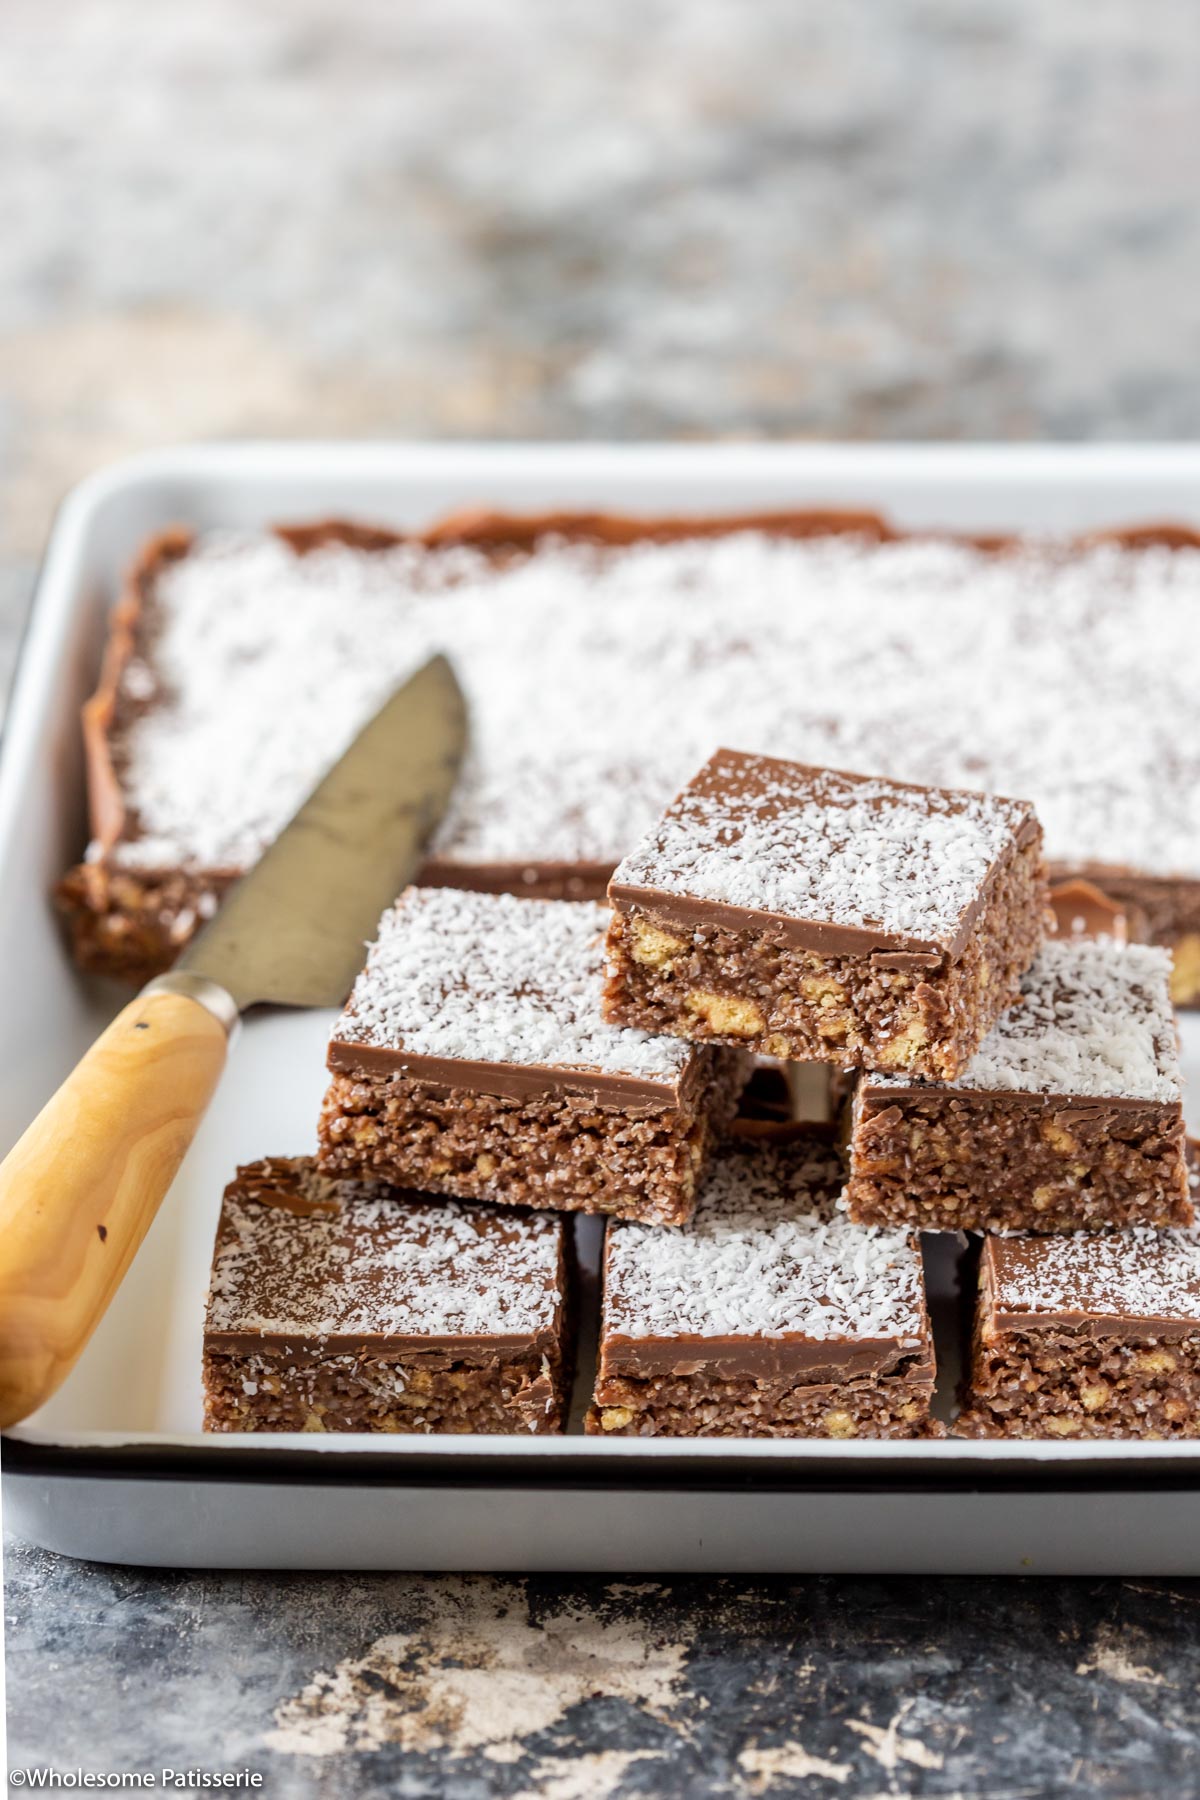

The Easiest No-Bake Chocolate Coconut Slice You’ll Ever Make.
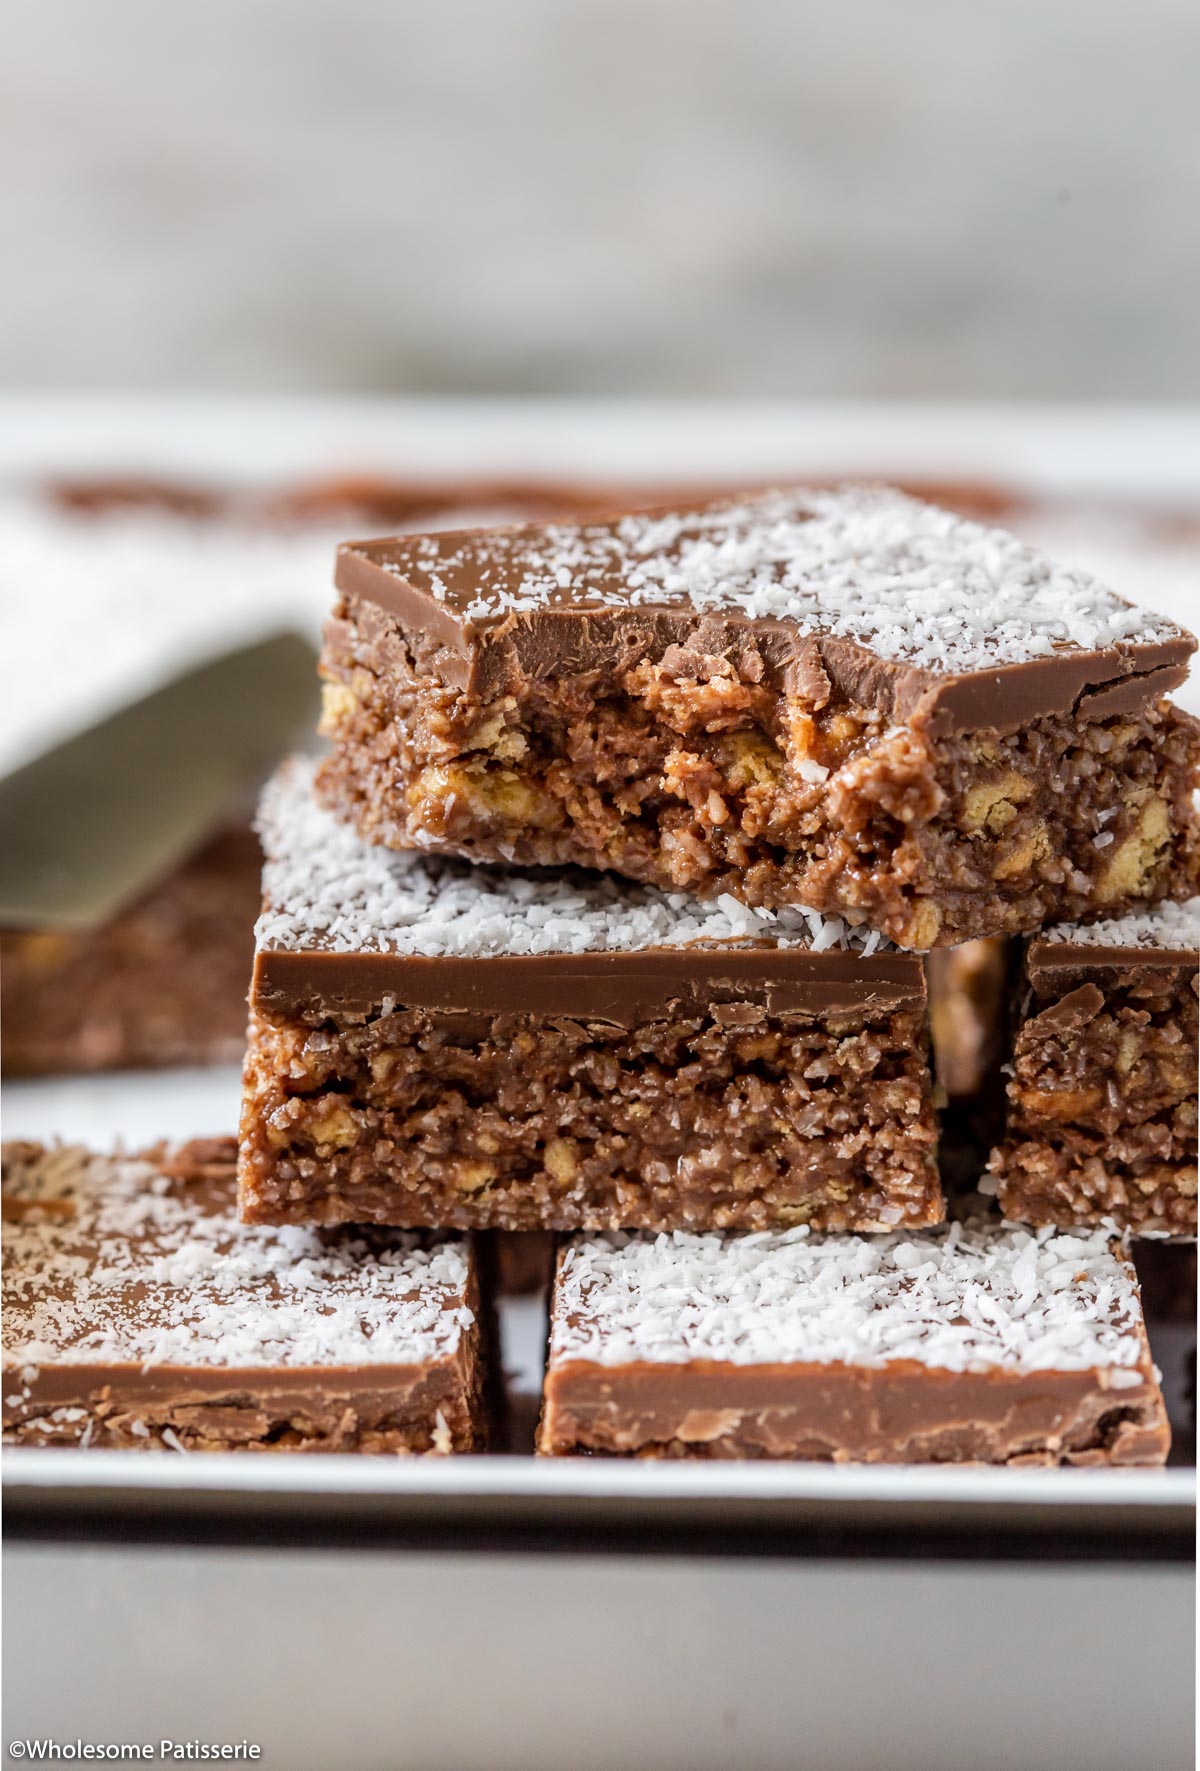
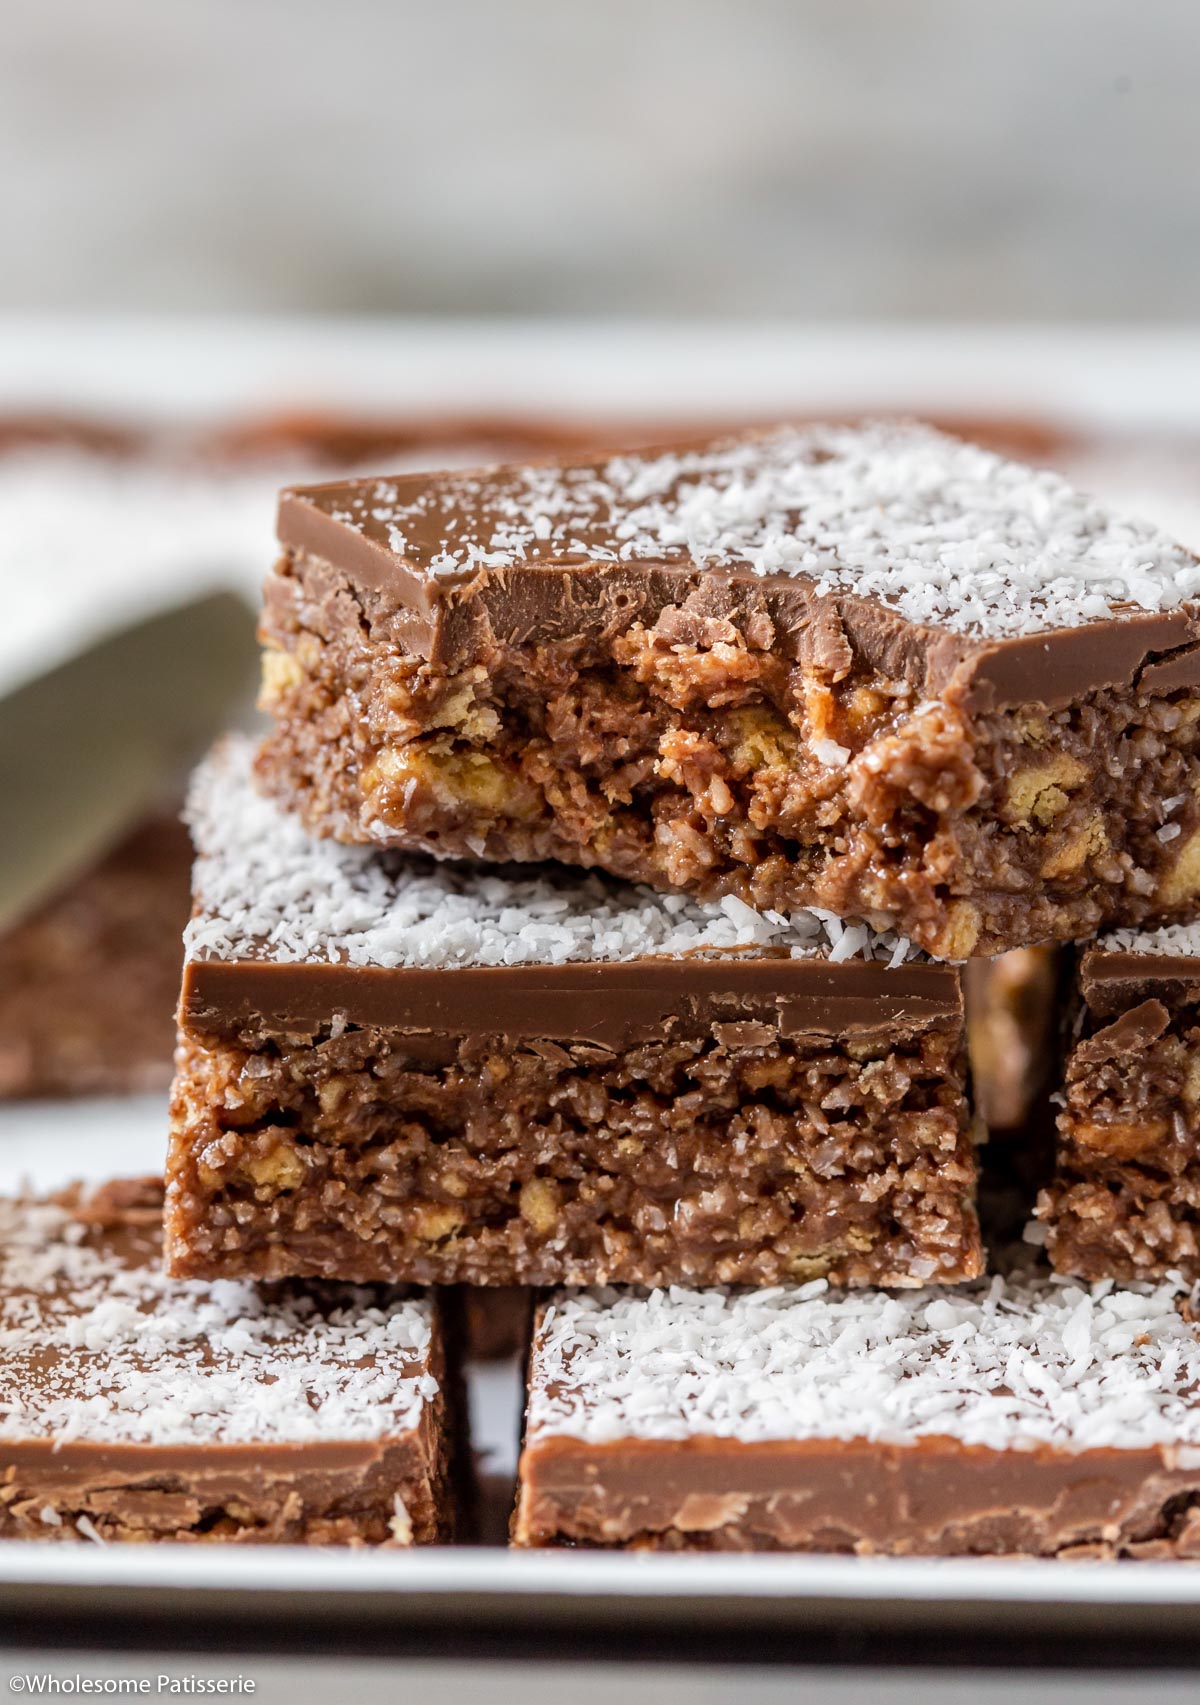
A must-try for chocolate slice lovers, this Chocolate Coconut Slice with Condensed Milk is rich, chewy, and incredibly easy to make.
With a chocolatey biscuit base held together by sweetened condensed milk, this no-bake recipe requires just five ingredients, making it perfect for when you need a quick, fuss-free treat.
The silky milk chocolate topping and light dusting of coconut add the perfect finishing touch, giving every bite a mix of smoothness and crunch.
Whether you’re making it for afternoon tea, a lunchbox treat, or just a sweet craving fix, this classic slice never disappoints. Sam x
Why you’ll love this recipe
This easy no-bake chocolate coconut slice is the perfect balance of rich chocolate, crunchy biscuit, and sweet coconut, all made with just five simple ingredients!
✔️ No-Bake & Quick to Make – Mix, press, chill, and enjoy!
✔️ Classic & Nostalgic – Just like the old-fashioned chocolate slice.
✔️ Only 5 Ingredients – Minimal effort, maximum flavor.
✔️ Can Be Gluten & Dairy-Free – Easy swaps to suit your needs.
✔️ Perfect for Freezing – Make ahead and enjoy anytime.
If you love easy slice recipes and easy no-bake desserts, this is a must-try recipe! And if you’re after a version without condensed milk, check out my No Bake Chocolate Slice Without Condensed Milk too!
Can I use shredded or flaked coconut instead of desiccated coconut?
Desiccated coconut is best for this recipe because of its fine texture, which blends evenly into the base and sits nicely on top. Shredded or flaked coconut is much larger and may result in a chunkier texture that doesn’t hold together as well. If that’s all you have, you can give it a blitz in a food processor to make it finer.

Can I make this chocolate coconut slice gluten-free?
I don’t recommend simply substituting the biscuits with a gluten-free alternative, as they absorb moisture differently and can affect the texture and consistency of the base. At this stage, I haven’t tested a gluten-free version, but if I do, I’ll adjust the ingredient ratios to ensure the best results.

How do you cut slice without cracking the chocolate?
Let the chocolate coconut slice sit at room temperature for 10-15 minutes to slightly soften the chocolate layer on top. Run a sharp knife under hot water, wipe it dry, and press down in one clean motion to prevent cracks. For extra precision, lightly score the chocolate before making full cuts.

How to store chocolate coconut slice
Refrigerate: Store in an airtight container in the fridge for up to 1 week.
Freeze: Place slices in a freezer-friendly container, ensuring they don’t touch to prevent sticking. Freeze for up to 3 months.
Thaw: Transfer to the fridge overnight or leave at room temperature until softened.
Best no-bake slice recipes
If you enjoy this recipe, please consider leaving a ⭐️ star rating and a comment review below. I love to hear what you think and it’s much appreciated. Thank you! Your email address will not be published. Sam x

Chocolate Coconut Slice with Condensed Milk
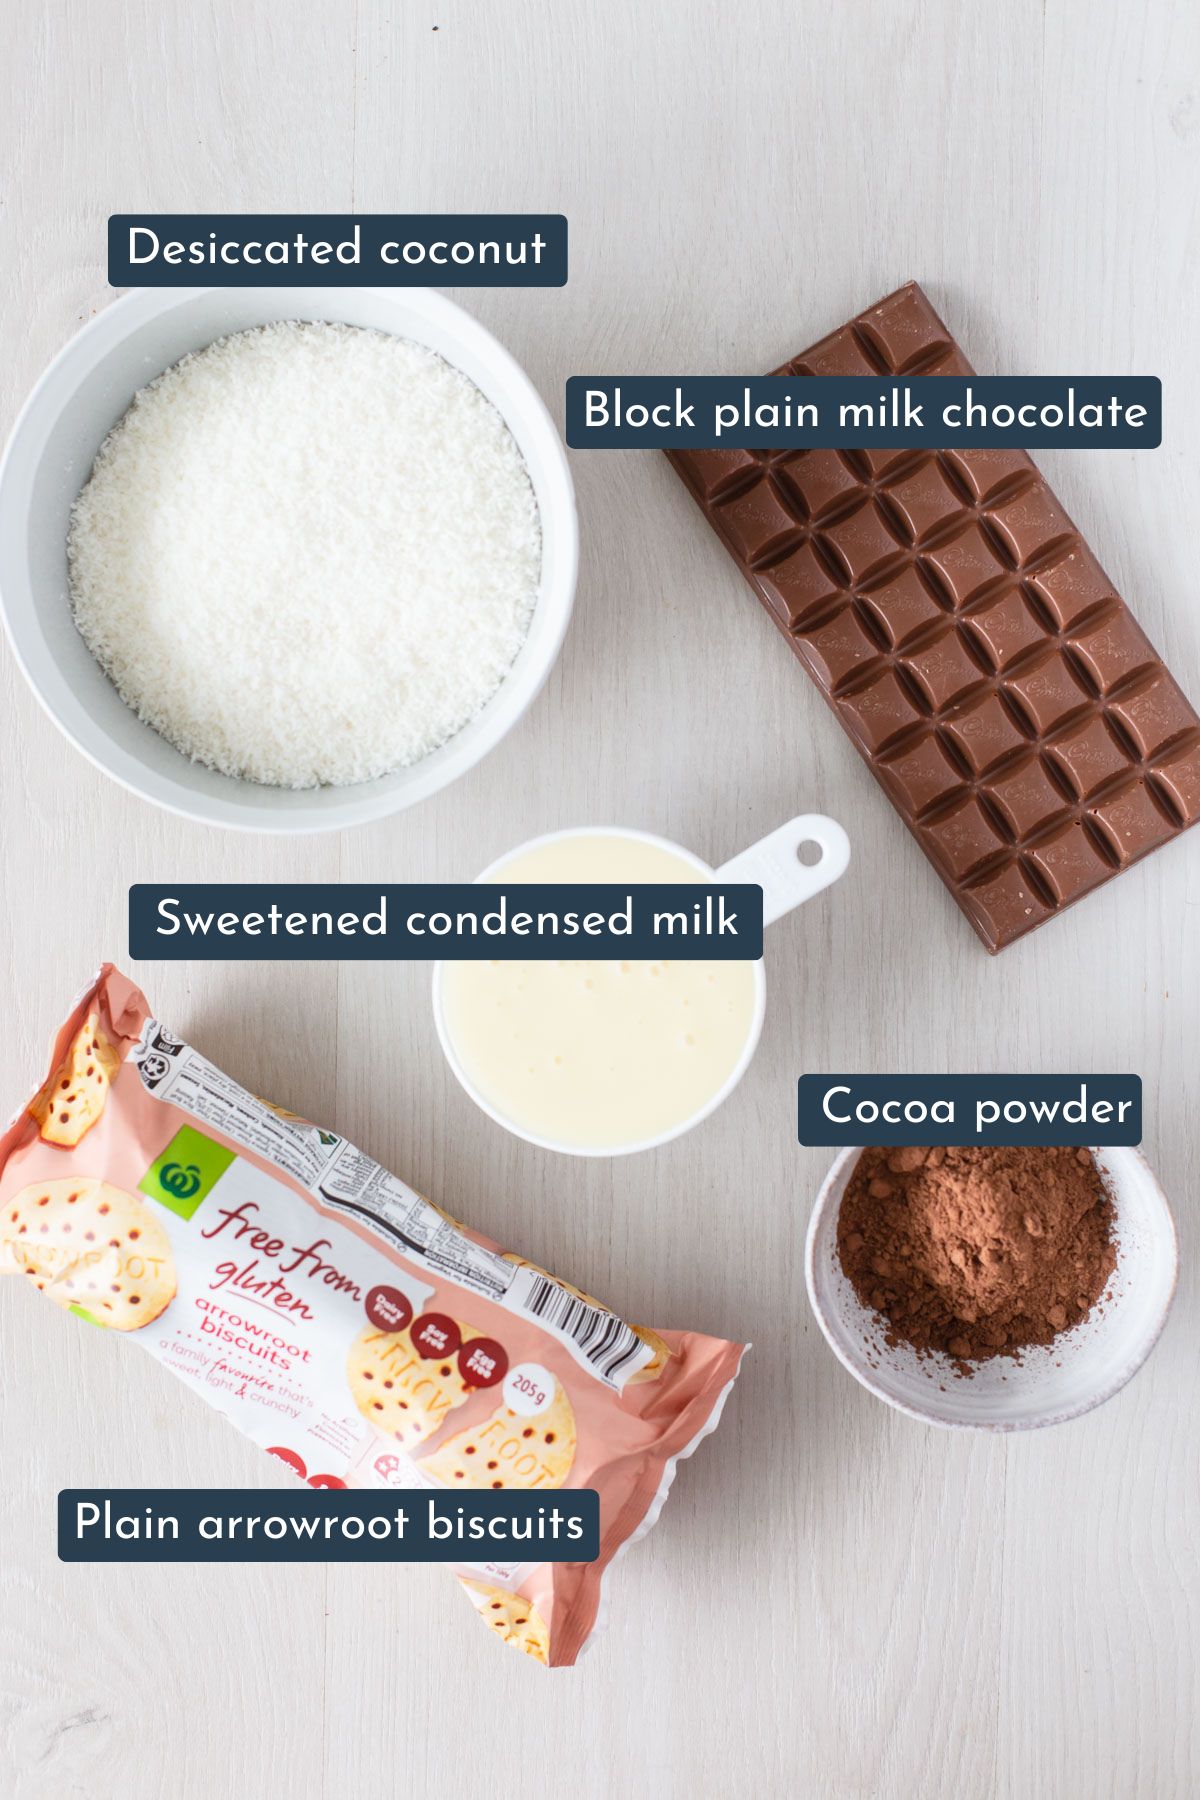
Ingredients
Method
- Line a 11 x 7-inch (20cm x 30cm) brownie pan/tin with parchment paper. Set aside.
- In a high-speed food processor, crush biscuits into crumbs.
- Pour crushed biscuits into a large mixing bowl.
- Add cocoa and coconut, and mix with a wooden spoon until well combined.
- Pour in condensed milk and mix until well combined, it’s easier to use your hands for this step.
- Press mixture firmly into the lined tin. Set aside.
- Prepare a double boiler by placing a medium-large heat-proof mixing bowl over simmering water.
- Add broken-up milk chocolate to the bowl.
- Melt over low heat, stirring occasionally, until completely melted.
- Remove from the heat.
- Pour melted chocolate over the base. Evenly spread the chocolate out with a spatula or spoon to cover the top.
- Sprinkle over the extra desiccated coconut, adding more if desired.
- Refrigerate for 1 hour or until the chocolate has set.
- Before cutting, remove it from the pan and allow it to sit at room temperature for 10-15 minutes so the chocolate topping slightly softens, making it easier to cut through. Enjoy!
Great old school style recipe.. I didn’t have quite enough coconut so I added some almond meal and finely blitzed walnuts. Topped it with dark chocolate and coconut. Yummy!!
Hi Rachel, thanks so much! Glad to hear you enjoyed this slice recipe. I love that you added walnuts, what a great addition. Thanks for sharing 🙂
very easy – very delicious – not turning the oven on is a real bonus too
Can we use something healthier than the condensed milk?
Hi Yasmin! If you can get your hands on a can of unsweetened coconut condensed milk, that will make a wonderful substitute! 🙂
Hey, I wanted to know the shelf life of this recipe.
Hi Suravi, this slice has a great shelf life! It will last approx. 1 week – 10 days (if it doesn’t get gobbled up beforehand 😉 ). Hope that helps!