How To Measure Basic Baking Ingredients Accurately
Making sure we measure our baking ingredients accurately is crucial to a successful recipe. When I’m developing my recipes, I aim to provide you with precise measurements with their equivalents. Knowing how to measure the basics and what equipment you need is the first step to take before you start baking at home. Let’s get started!
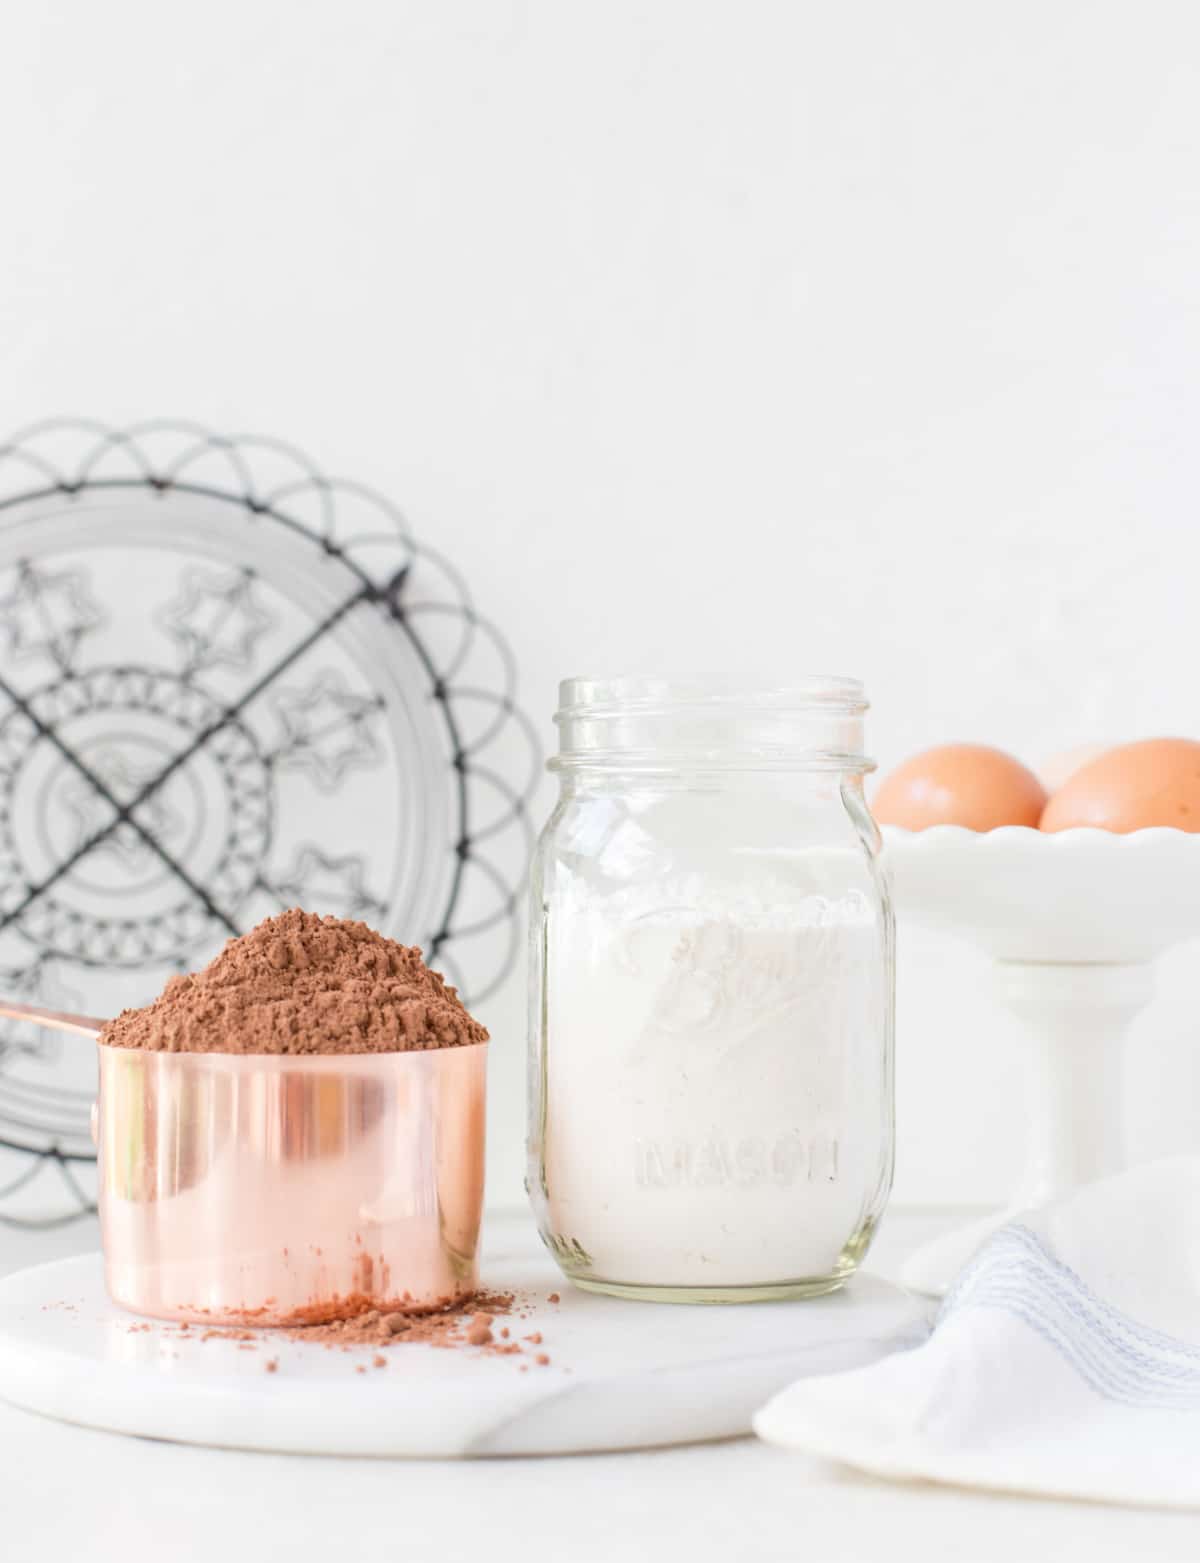
Flour
Flour is often measured incorrectly which can drastically change the recipe we’re making.
We will discover most recipes use cup measurements and many will also offer the equivalent measurements in grams and ounces. We can either use just dry measuring cups or just kitchen scales or even use both the methods together, if we are perfectionists (raises hand!).
This can get quite overwhelming and confusing which is why I strongly recommend you only follow the recipe you’re using and pay attention to any extra information the source provides for you (website or cookbook). You may find the measurements I use do not match the ones you’re familiar with, or another recipe you have used, here’s an example:
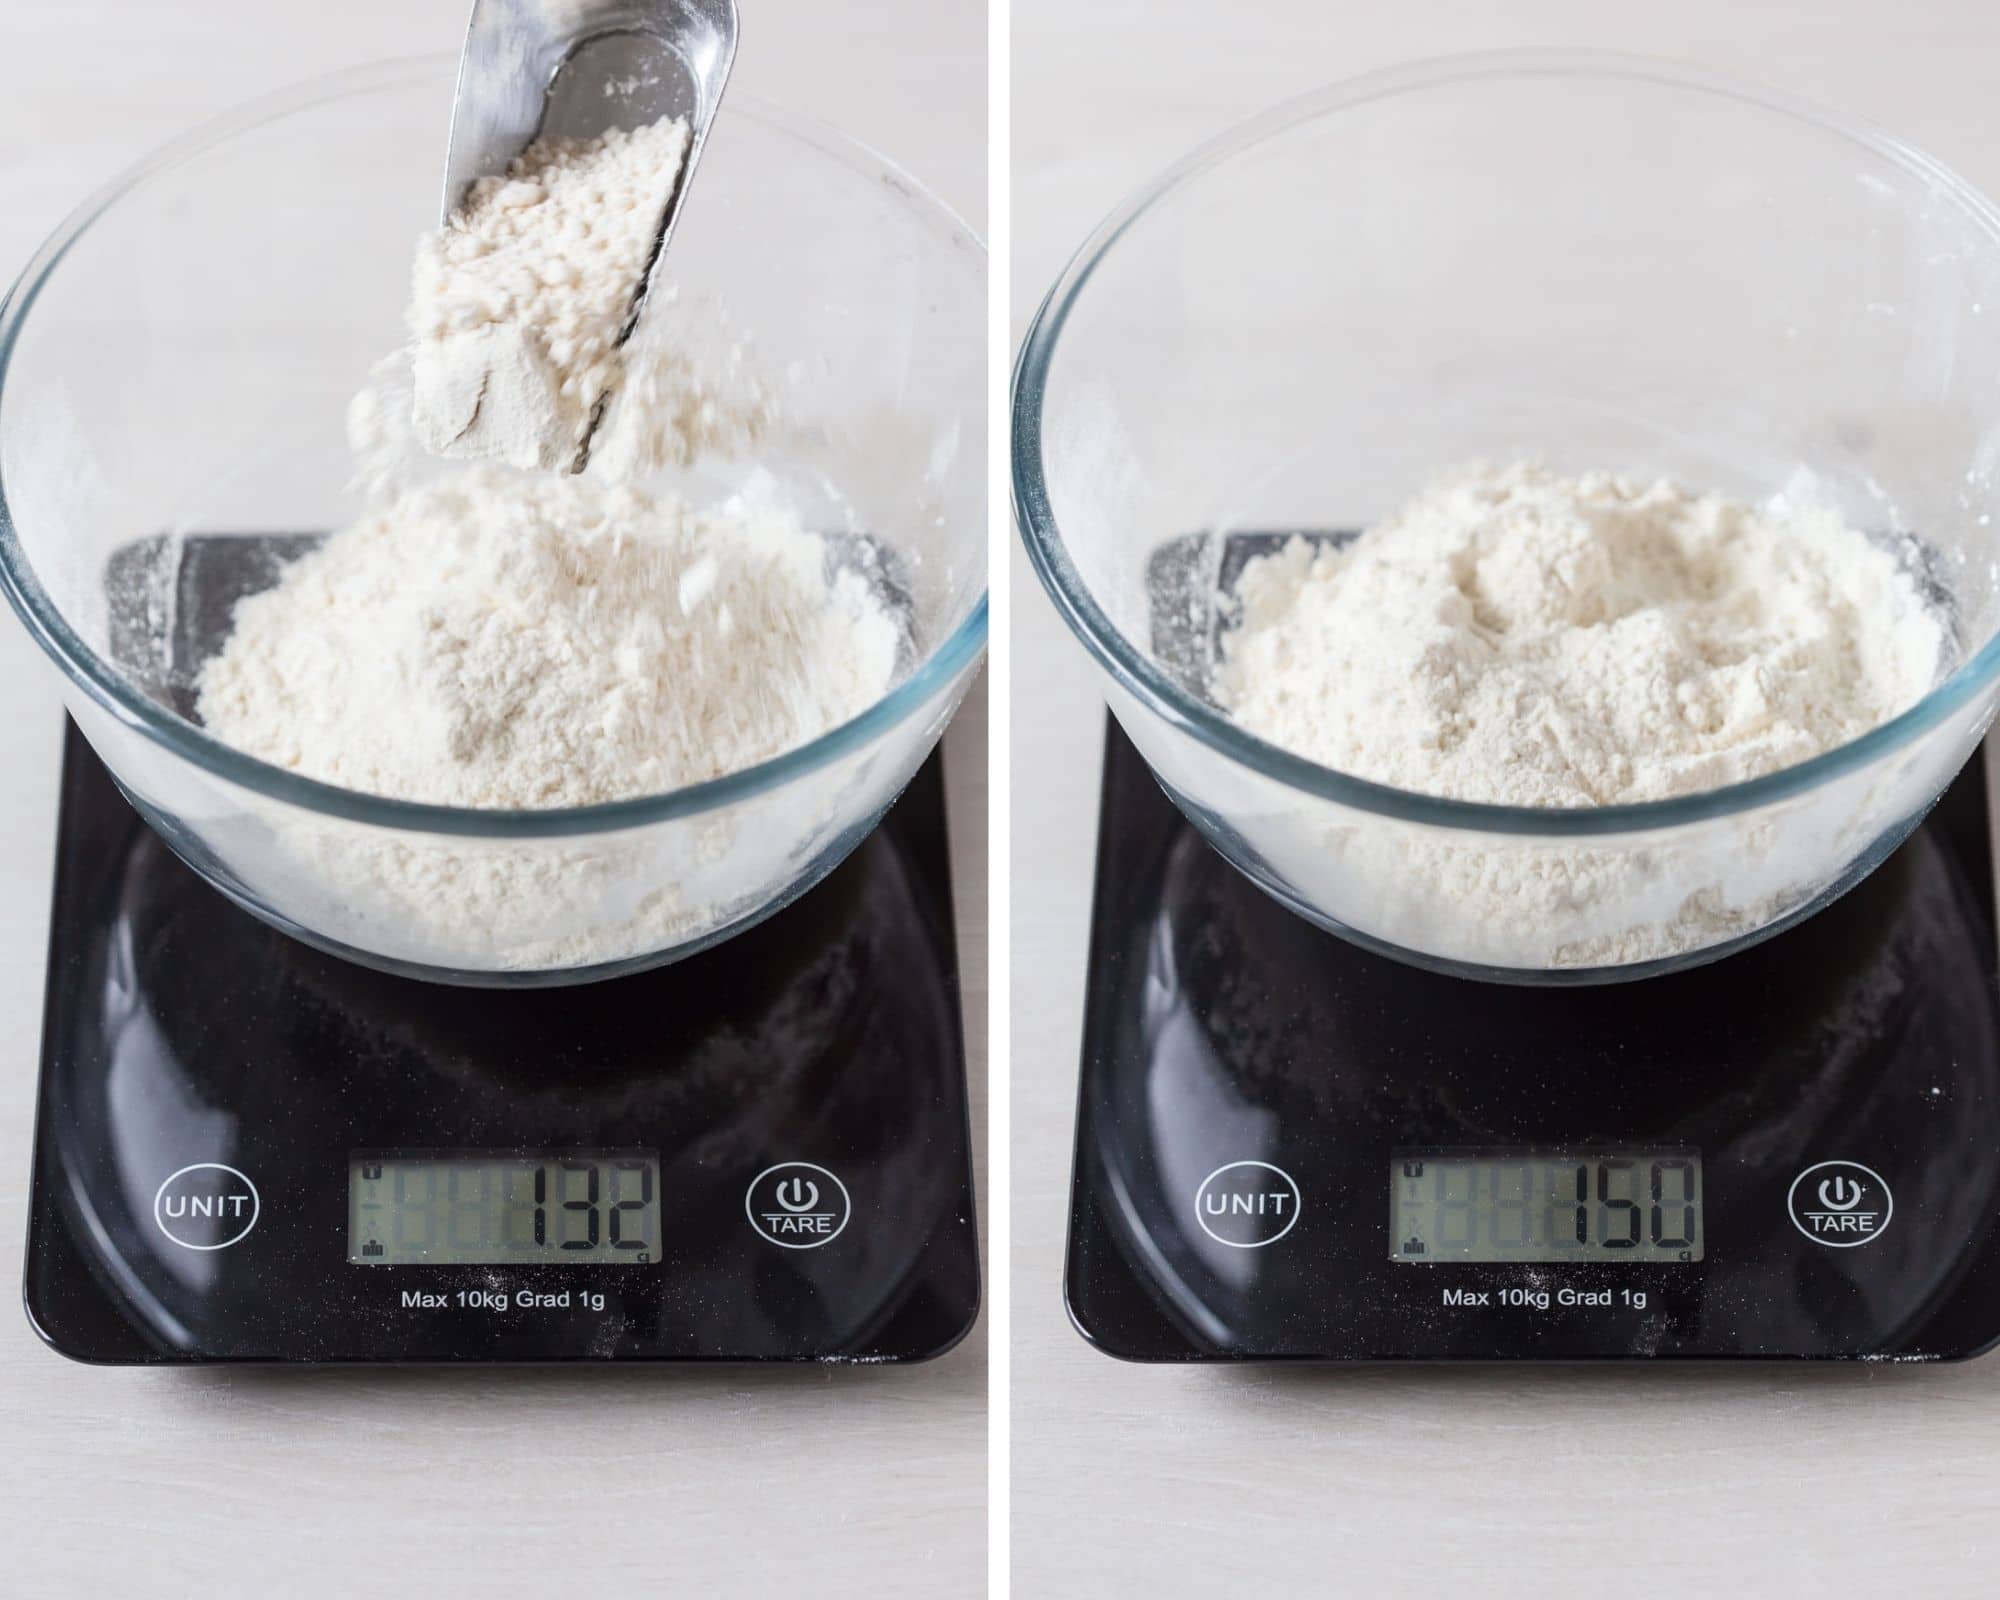
Some will say 1 cup of plain flour can weigh between 125 grams – 130 grams. Others will say 1 cup of plain flour can equal between 145 grams – 150 grams.
Let’s take a look at what methods are used to measure flour so we can determine which one is best for baking. To start, fluff up your flour in the bag/container using a spoon or scoop. This helps aerate the flour making it light and not too compact.
Weighing flour in grams or ounces using kitchen scales.
This method is my go-to and favorite. Why? Because when you weigh ingredients, you’re working with exact numbers. As opposed to measuring with cups as someones one cup will be different from another’s one cup. We can over-fill and under-fill a cup of flour but when we weigh it, we are accurate.
Dip and level using a dry measuring cup.
This method refers to dipping the measuring cup into the flour bag/container and scooping it up until it’s full. Then using the back of a butter knife to scrape across the top to remove the excess flour, which will level it off with the brim of the measuring cup.
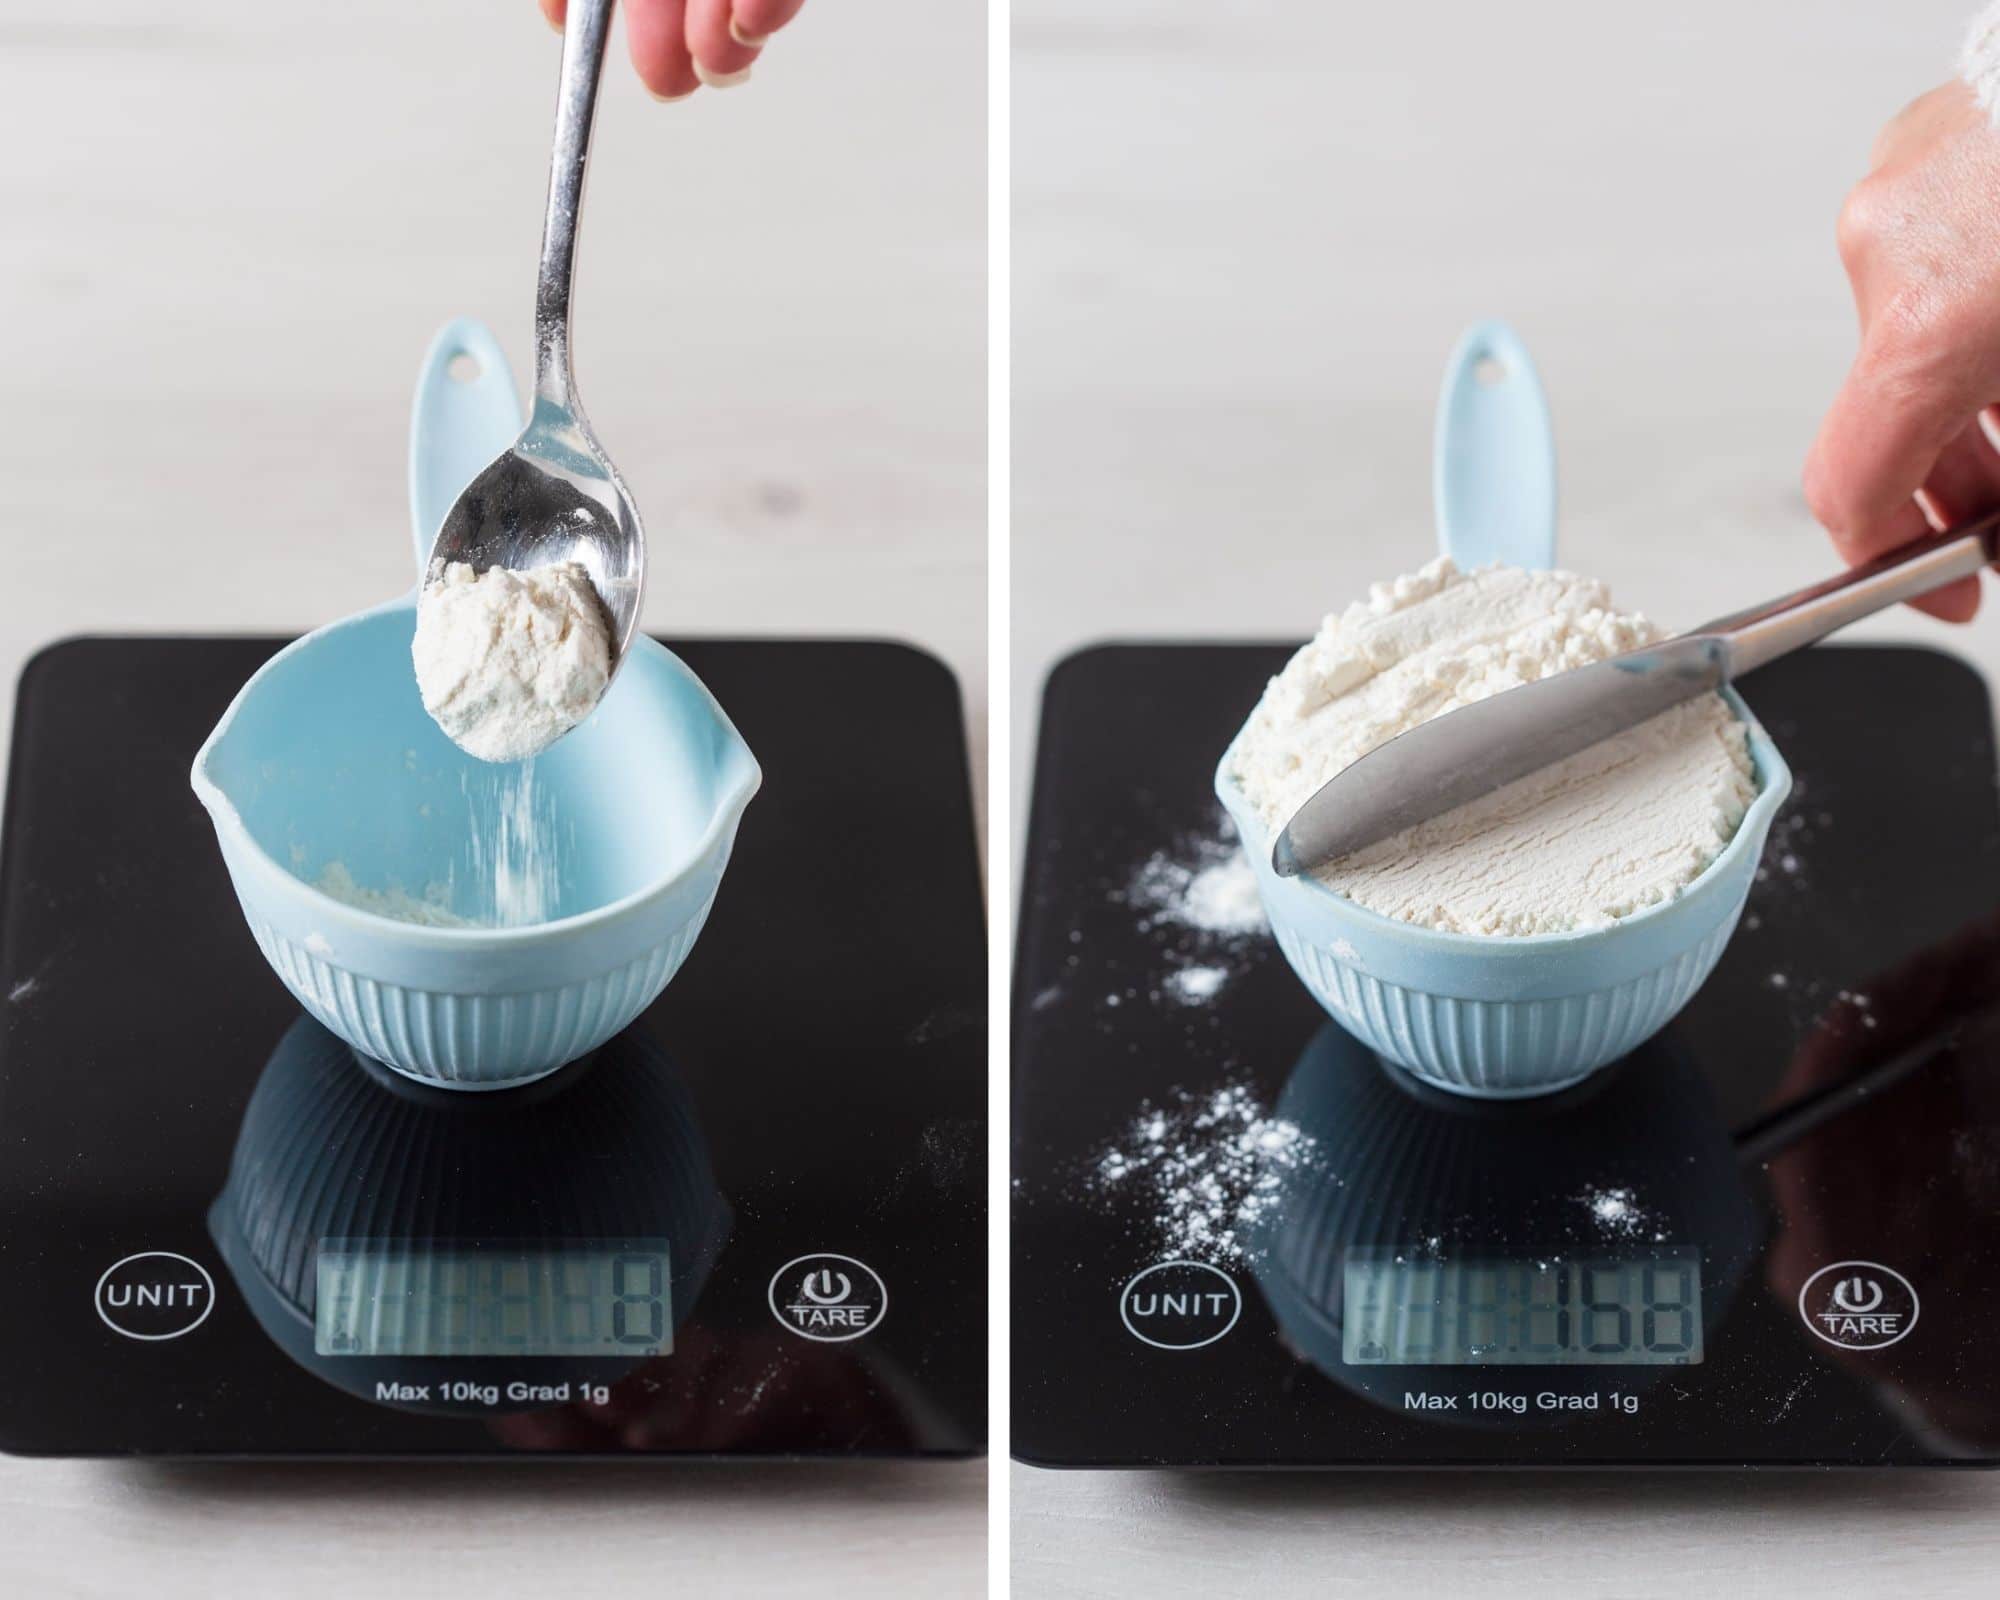
Spoon and level using a dry measuring cup.
This method refers to scooping up the flour with a dessert spoon and placing it into the dry measuring cup until it’s full. Then using the back of a butter knife to scrape across the top to remove the excess flour, which will level it off with the brim of the measuring cup.
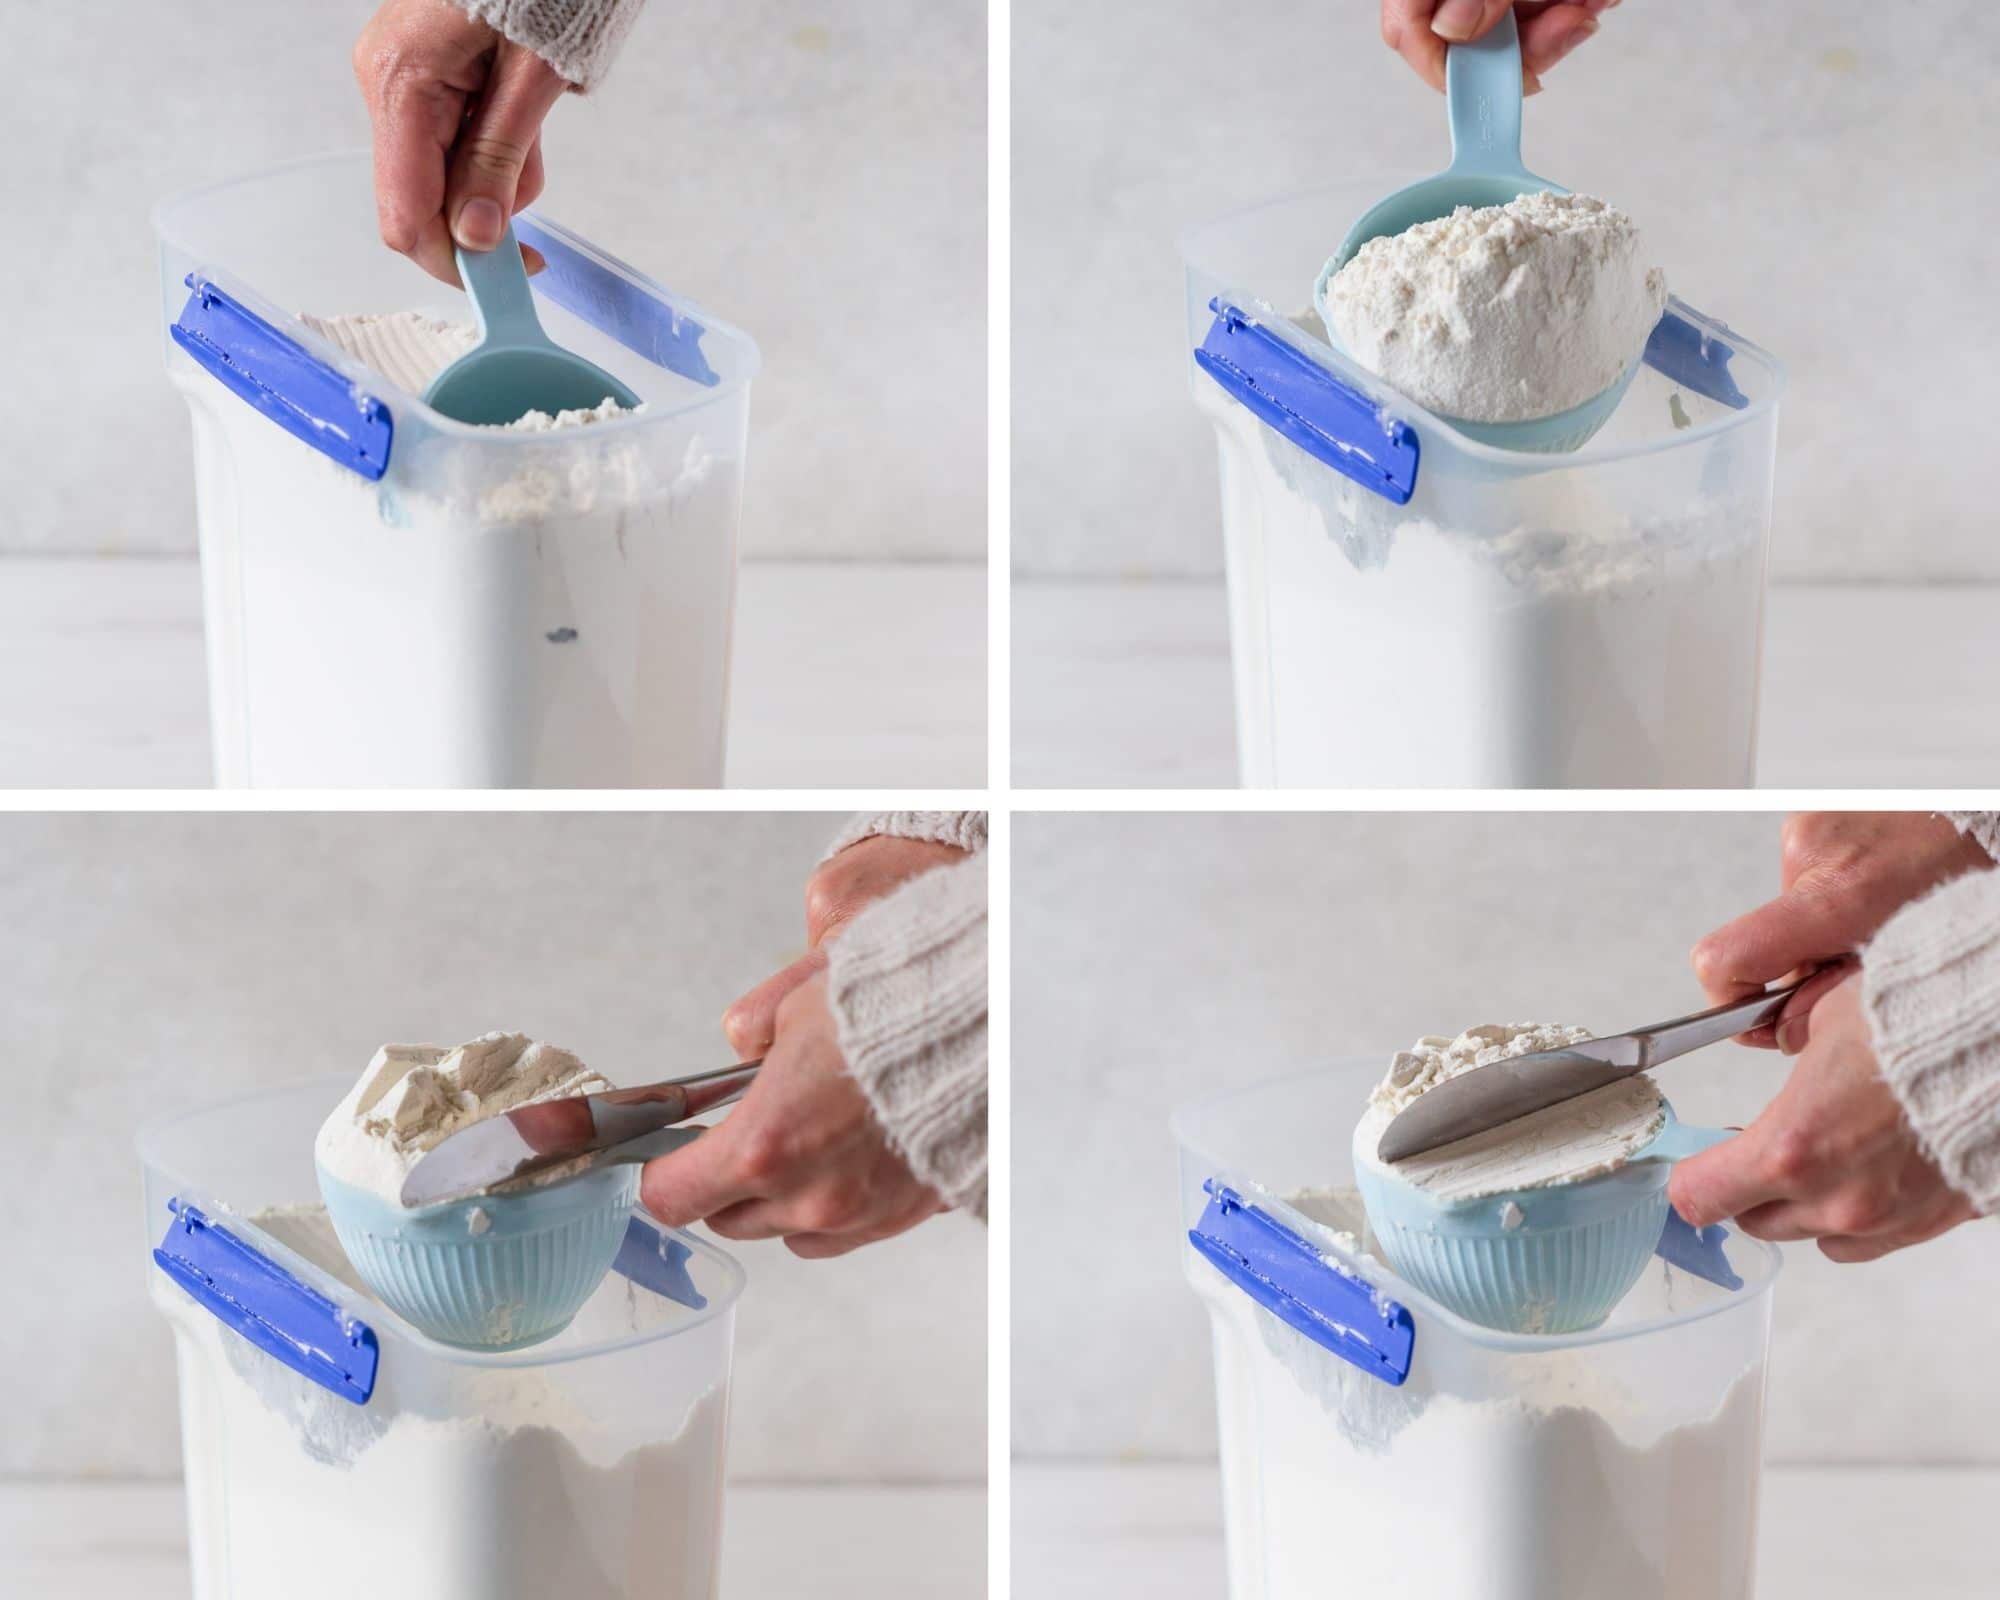
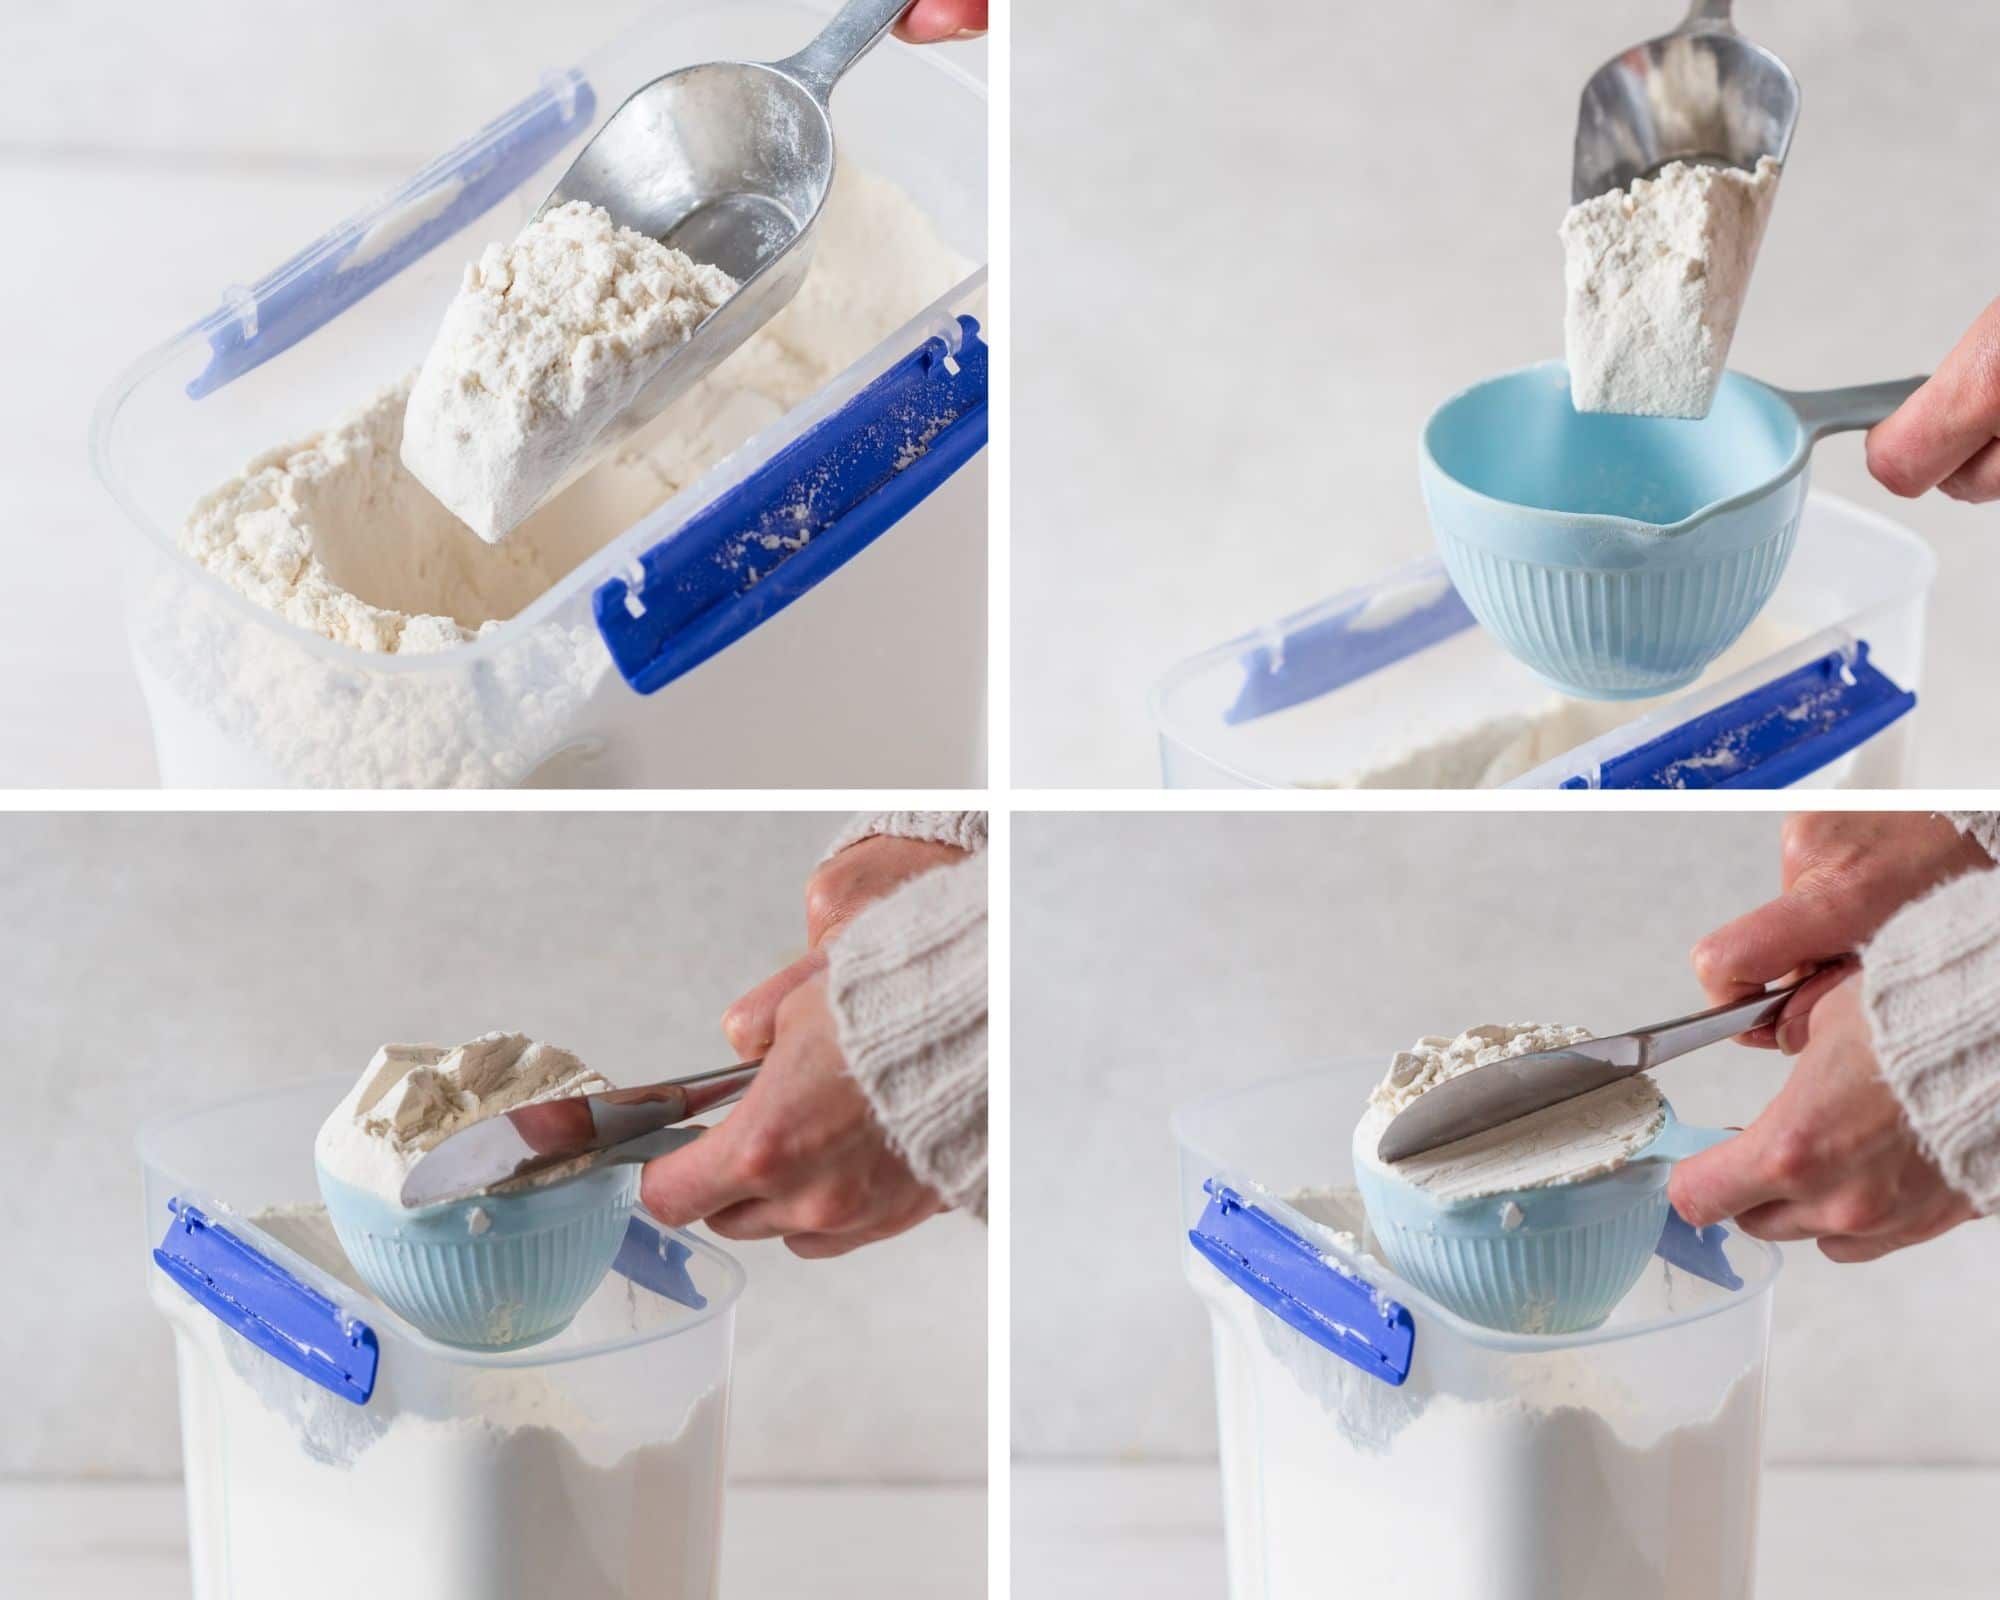
Scoop and level using a measuring scoop and a dry measuring cup.
This method is the same as the spoon and level but you’re using a measuring scoop instead of a dessert spoon. Then using the back of a butter knife to scrape across the top to remove the excess flour, which will level it off with the brim of the measuring cup.
Which method is the most accurate way to measure flour for baking? Weigh flour in grams or ounces using kitchen scales is the most accurate way. However, not everyone has a set of kitchen scales and that’s when we can use the scoop and level method using a measuring scoop and a dry measuring cup.
Why is the scoop and level method preferred over the other methods?
I find this the perfect middle ground for most at home bakers. Because how light or how heavy your hand is when you’re scooping the flour into the cup, determines the overall weight and this is just too unreliable (having to rely on how light or heavy handed you are).
How do you measure sifted flour? When a recipe calls for 1 cup plain flour, sifted, this means to measure your flour before sifting using the scoop and level method or weighing it with kitchen scales. If a recipe calls for 1 cup sifted plain flour, this means to sift your flour before measuring. The key here is to pay attention to where the word ‘sifted’ is located in the statement.
How to sift flour without a sifter? Use a wire whisk and whisk the flour in a mixing bowl for 10-15 seconds. Make sure all lumps are broken up and the flour is fluffed up. You can also use a fork if you don’t have a whisk.
Final thoughts: weighing your flour is best and is the most accurate way when baking. If the recipe you’re using provides the weight (in grams or ounces) I highly recommended following that before using cups. Investing in a kitchen scale will take your baking to the next level. Here is the one I use.
Granulated & Caster Sugar
Whether you’re using granulated sugar or caster sugar, simply scoop or spoon the sugar into your measuring cup or weigh it using kitchen scales. Sugar is more forgiving than measuring flour so we have some wiggle room around being precise.

Icing/Confectioners/Powdered Sugar
We use the same method as the flour, scoop and level the icing/confectioners sugar. If the recipes calls for sifting, the same applies as the flour, 1 cup icing/confectioners sugar, sifted this means to measure your flour before sifting. If a recipe calls for 1 cup sifted icing/confectioners sugar, this means to sift your sugar before measuring.
Organic icing/confectioners sugar often contains more lumps than regular icing/confectioners sugar so it’s best to sift it regardless if the recipes calls for it or not. Remove those lumps to prevent any unwanted dry sugar lumps in your buttercream or shortbread.
Brown Sugar
Brown sugar needs to be measured in dry measuring cups or by using a kitchen scale, if a recipe provides weight in grams or ounces. However, it’s not always straight forward with brown sugar. Many recipes will call for brown sugar, packed or packed brown sugar. Some will also state for the sugar to be loosely packed, lightly packed or tightly packed.
What does packed brown sugar mean?
Packing brown sugar means to scoop the brown sugar into a dry measuring cup and then press it back down into the cup using the back of a dessert spoon.
Why does brown sugar need to be packed?
Because of the molasses in brown sugar, there is a higher moisture content compared to granulated/caster sugar and icing/powdered sugar. Therefore it’s considered more of a wet sugar. It’s sticker in consistency because of the extra moisture.
When it’s added to a measuring cup, it can result in pockets of air within the sugar. This leaves us with inaccurate measurements. Hence why it needs to be packed and specific terms such as the ones mentioned above are stated in recipes.
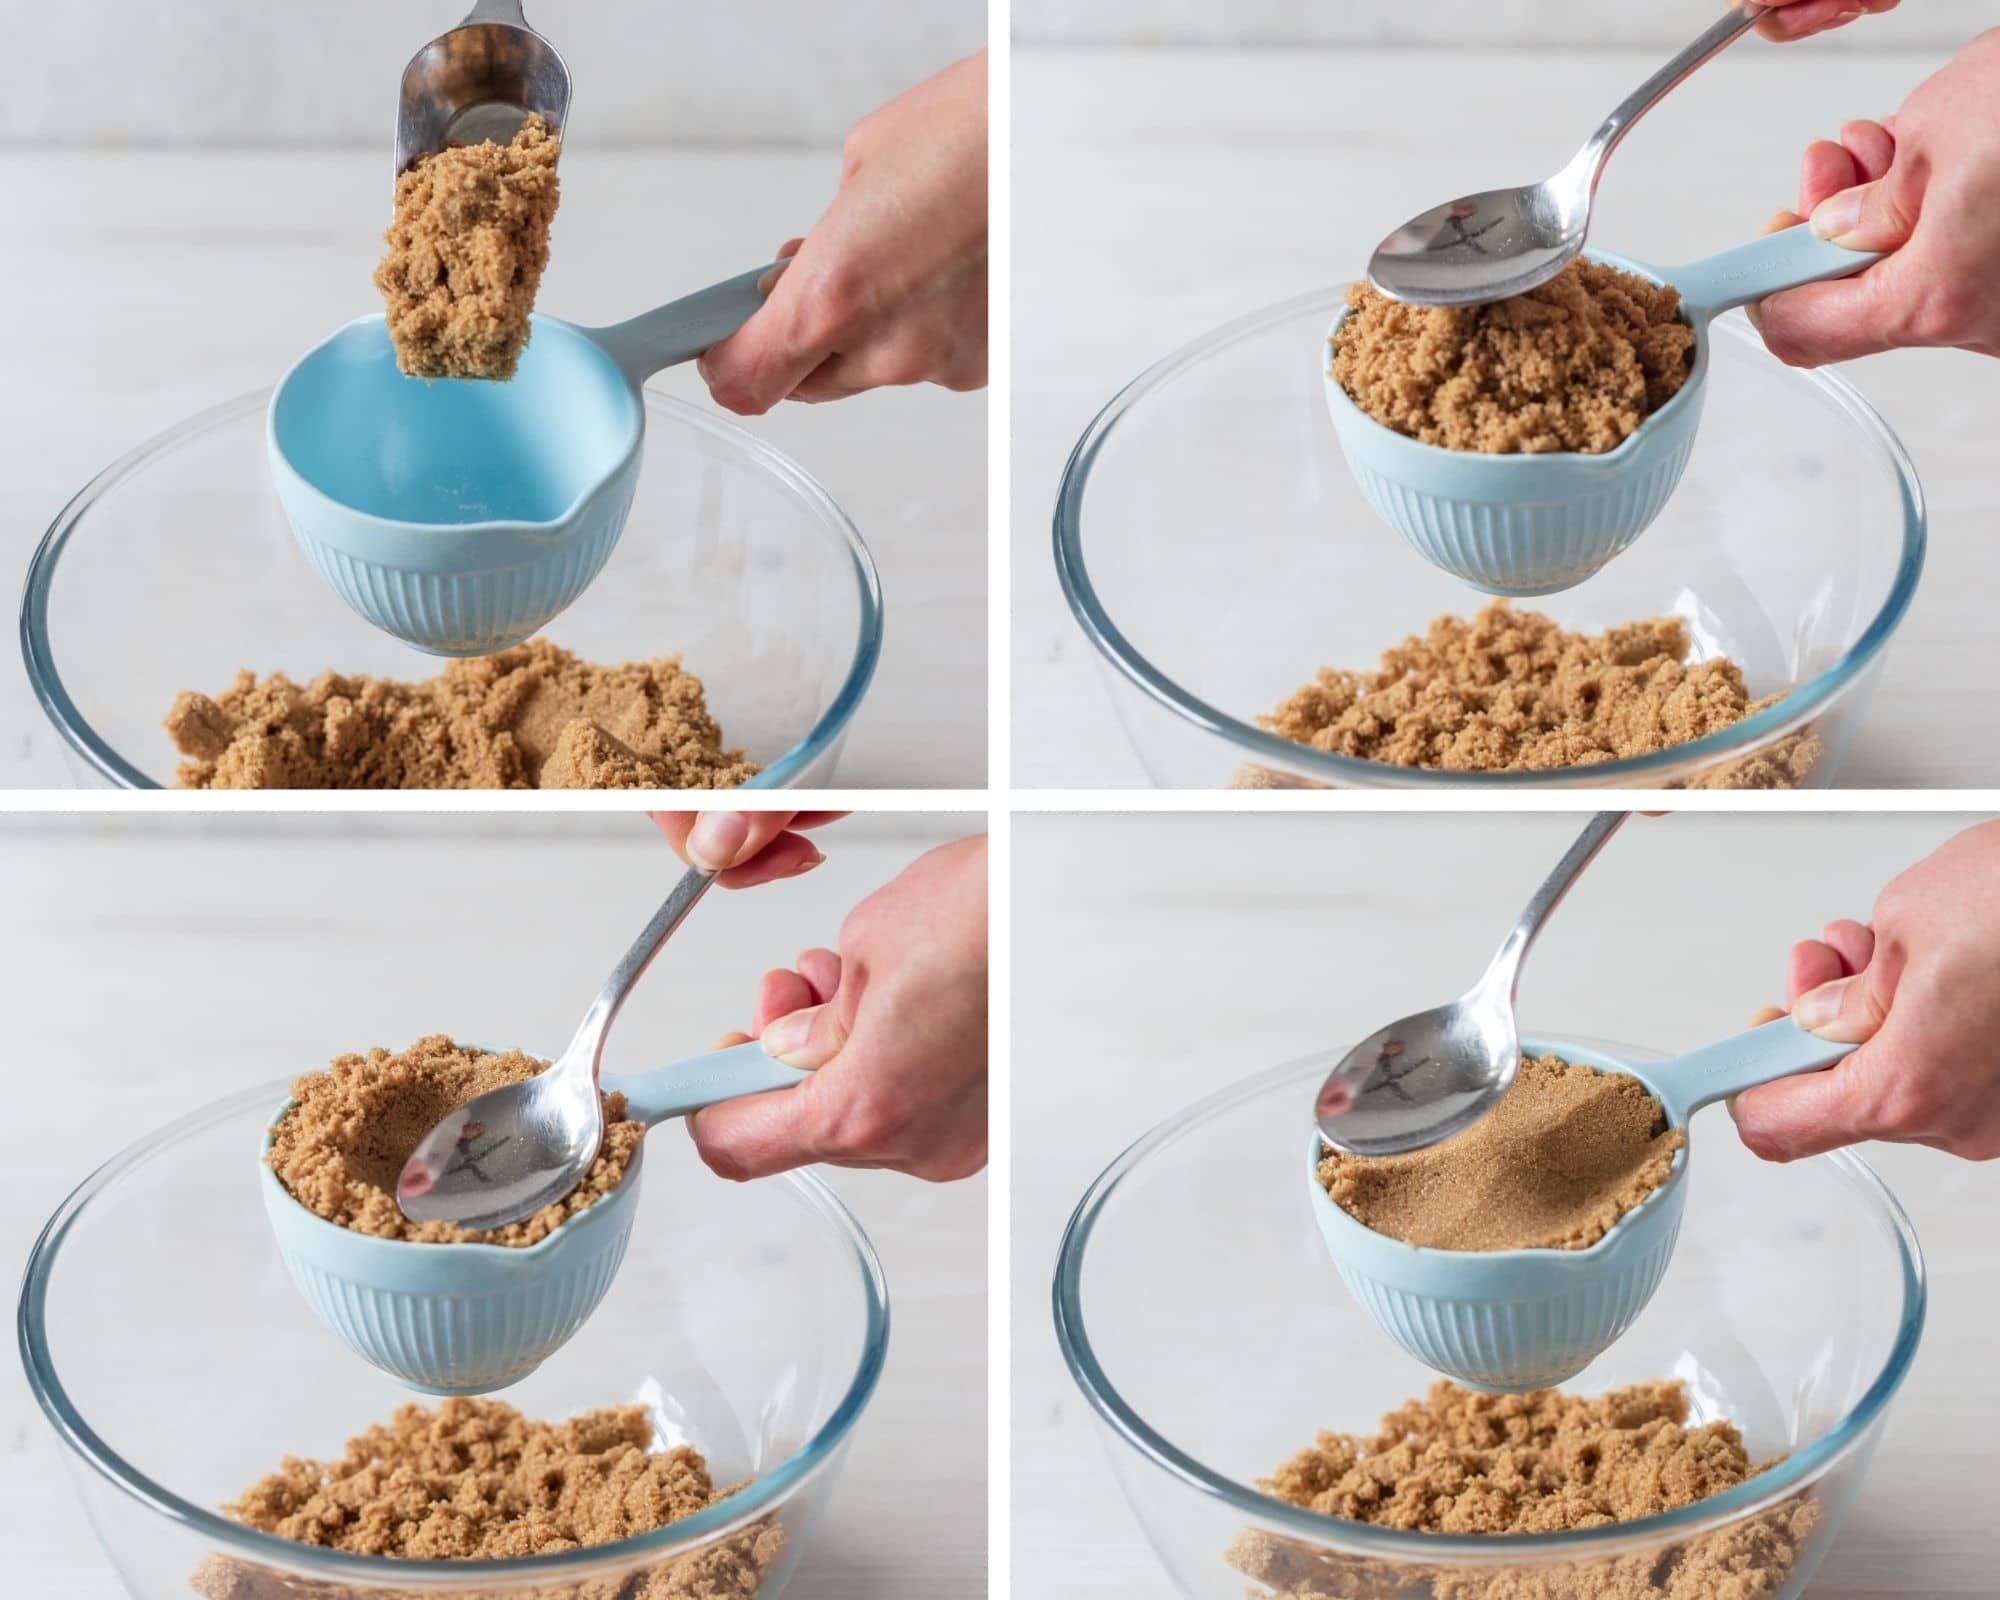
Below are the basic steps to pack brown sugar:
(1) Using a measuring scoop or dessert spoon, scoop the brown sugar into the cup until it’s over filled. It should be mounded on top.
(2) Using the back of a dessert spoon, press the sugar firmly back into the cup. Don’t use a heavy hand pressing it down aggressively, just until it’s nicely compact (unless the recipe calls for the sugar to be tightly packed). We’ll discuss below the different terms used to describe how loose or tight we need to pack the sugar.
(3) If there is still a gap between the top of the sugar and the top brim of the cup, scoop more sugar into the cup and repeat step 2 by pressing the sugar back down until the sugar is level with the brim of the cup.
If you’re using a recipe that states to loosely, lightly or tightly pack the brown sugar, see my a handy guide below. You still need to follow the above 3 step method but the secret is in how firmly you pack it into the cup or if you press it down at all.
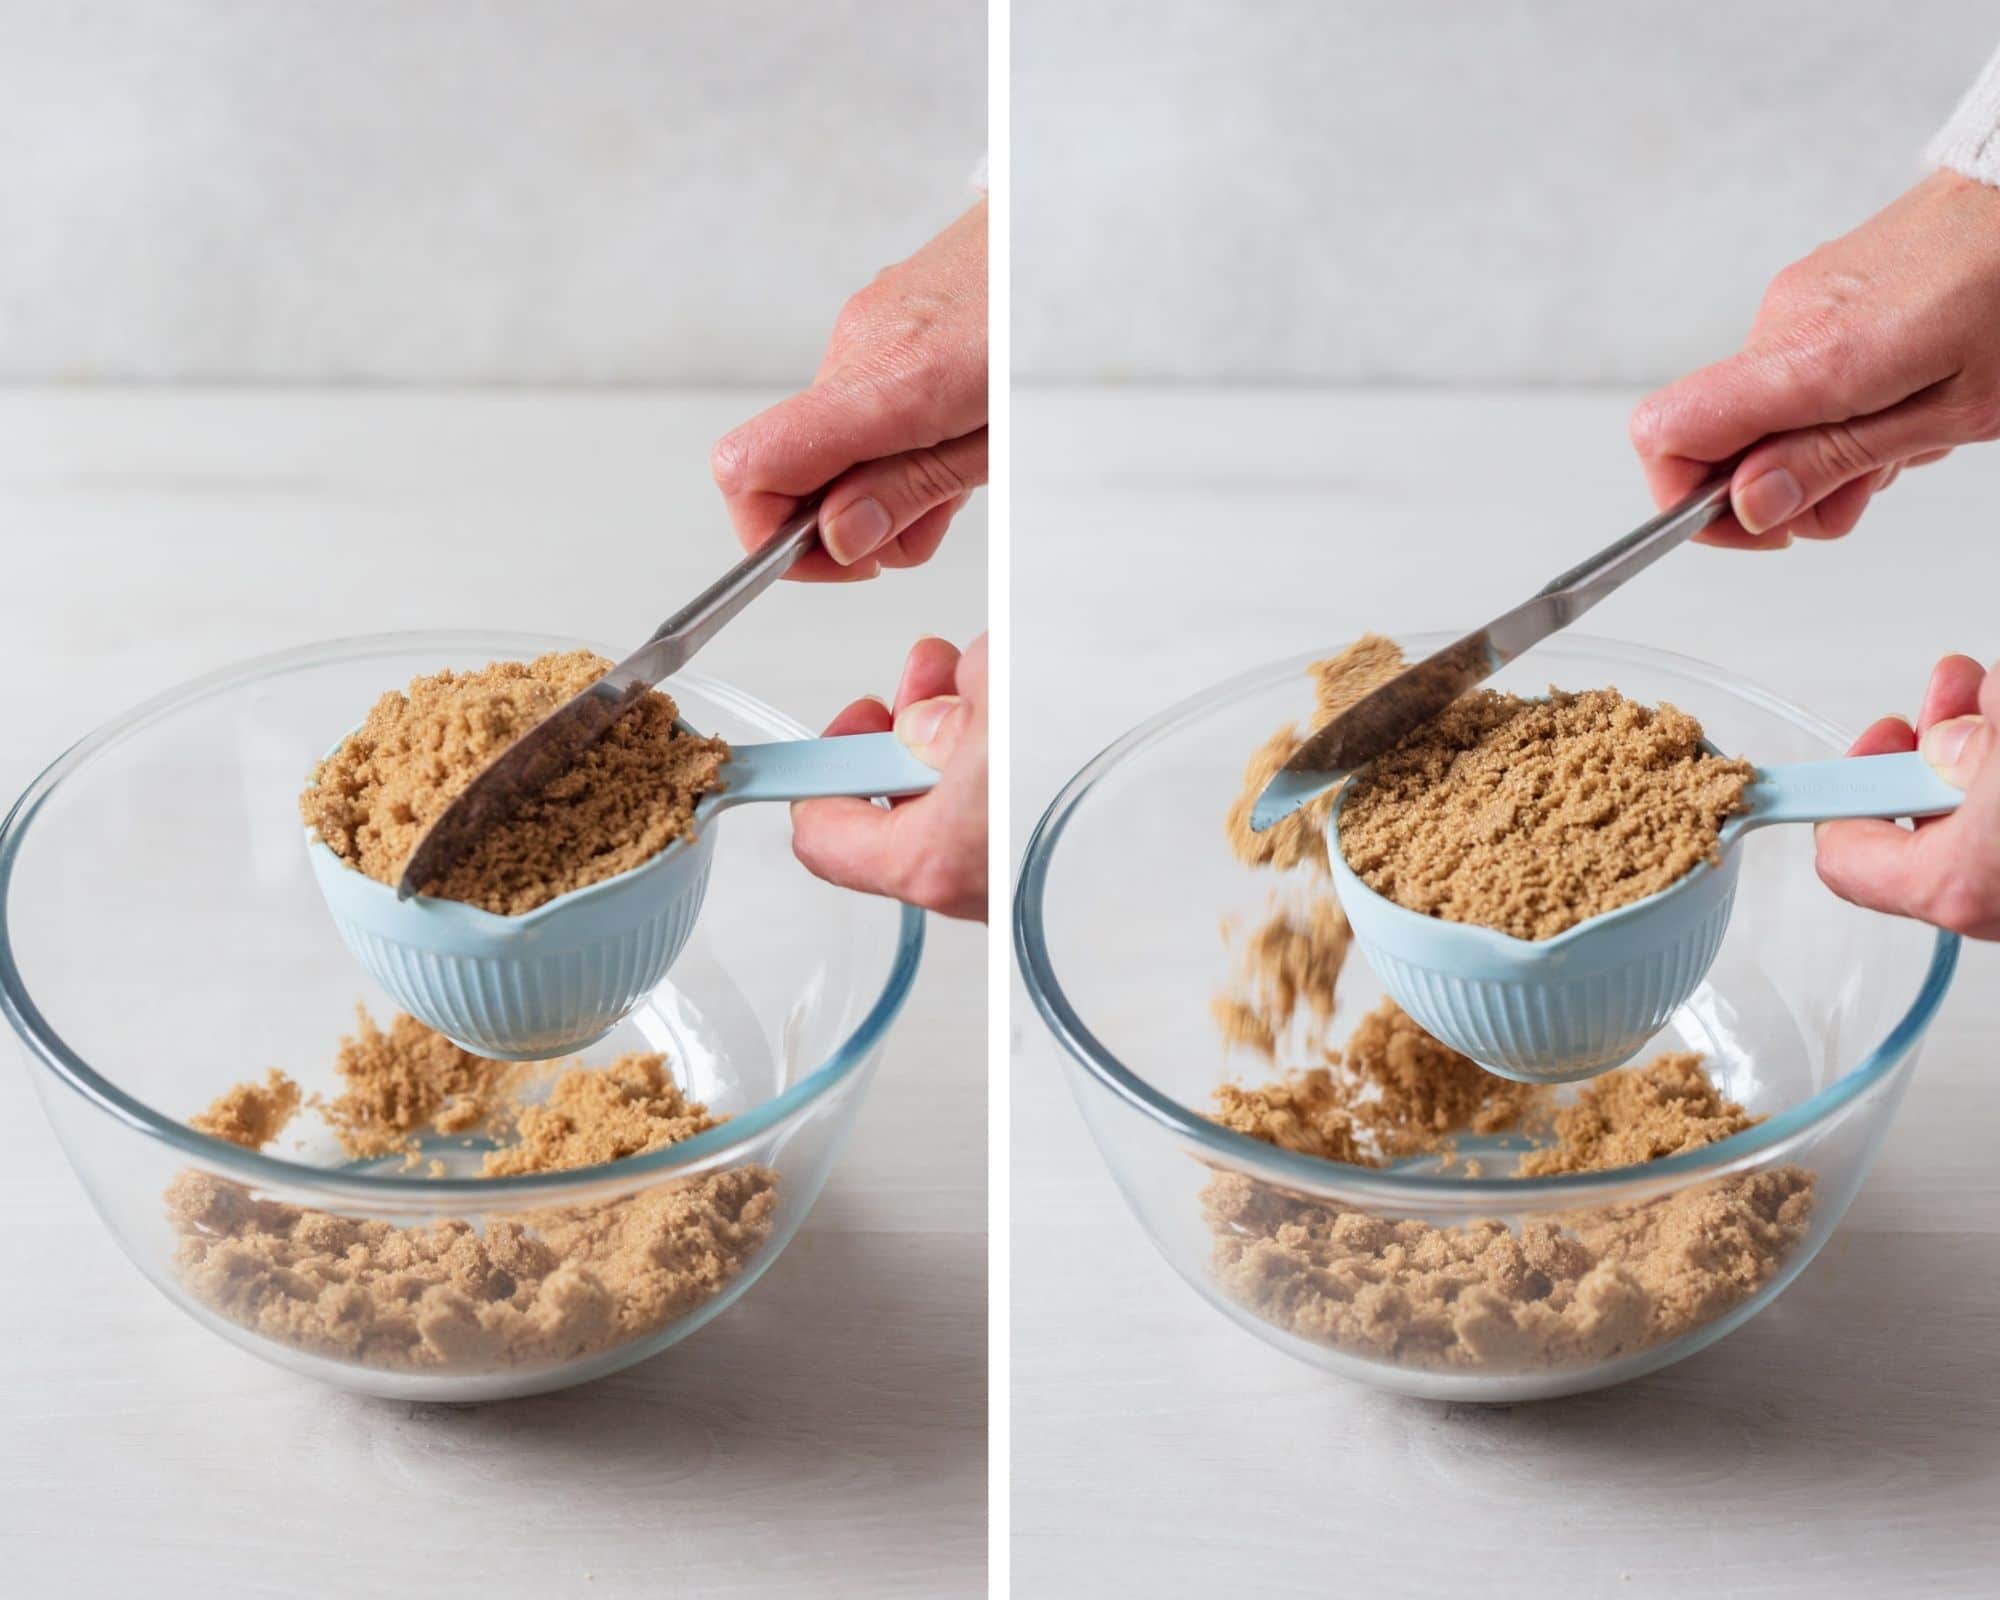
Loosely packed brown sugar: means to fill the measuring cup with brown sugar and level off the mounded top with the back of a knife until it’s level with the brim of the cup. Just like how we measure flour, no pressing down required.
Lightly packed brown sugar: means to press the sugar down into the cup using a light hand. It’s not loose but it’s not packed in too tight or firmly compact.
Tightly packed brown sugar: means to press the sugar down into the cup using a firm hand. It’s not loose, it’s not lightly packed but it’s tight and heavily compacted into the cup.
The image below demonstrates how to measure loosely packed brown sugar by levelling off the mound of sugar on top. No need to pack it down.
Baking Powder & Baking Soda
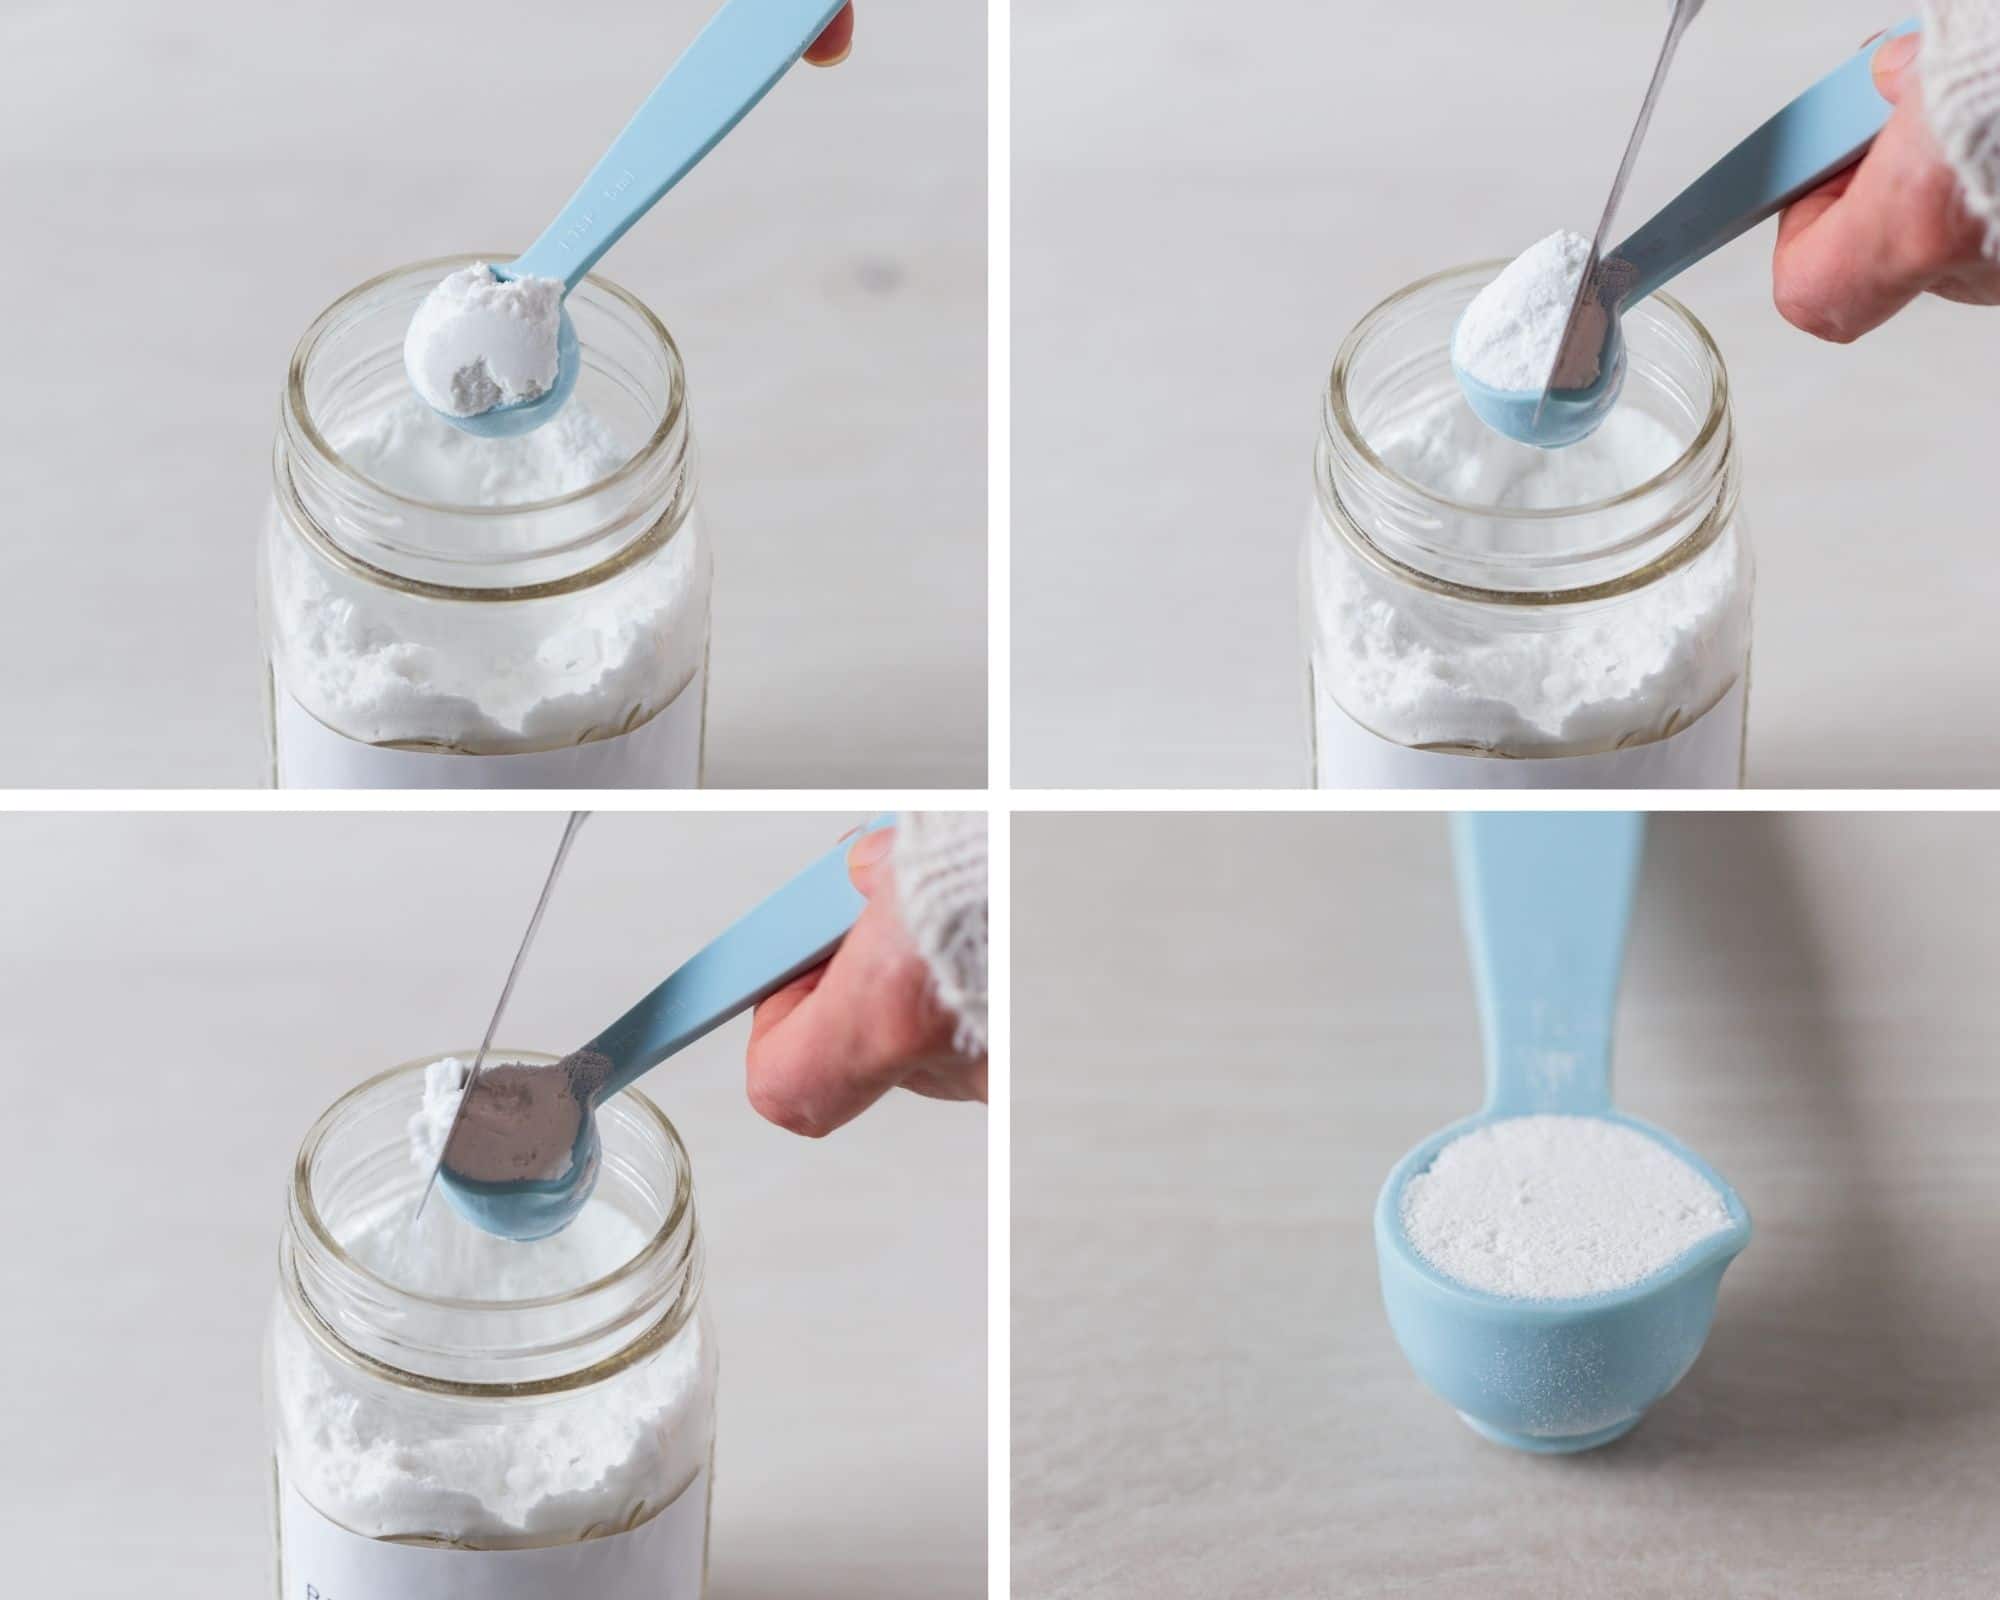
For both baking powder and baking soda, use a measuring spoon, such as a teaspoon. Scoop it out of the packet/jar/box and level it off by scraping the back of a butter knife across the top.
Bonus Tip: check the expiry date of your baking powder and baking soda to ensure it’s still within the useable date. When these expire, they will stop working in your baked goods. Due to a number of factors including how they’re stored, the temperature in which they’re stored, how air-tight they’re kept and the packaging/storage container, just to name a few.
How to test if baking powder is still good? Place 1/2 teaspoon of baking powder in a glass or bowl. Using boiling water, pour in about 2 tablespoons and if the baking powder bubbles, it’s good to use. If it doesn’t bubble, it’s time to dispose of it and open a fresh packet.
How to test if baking soda is still good? Place 1/2 teaspoon of baking soda in a glass or bowl. Pour in 1/4 teaspoon of plain white vinegar (or apple cider vinegar). Using boiling water, pour in 2 tablespoons and if the baking soda bubbles, it’s good to use. If it doesn’t bubble, it’s time to dispose of it and open a fresh packet. The vinegar is added in this test as unlike baking powder, baking soda needs an acidic ingredient to activate.
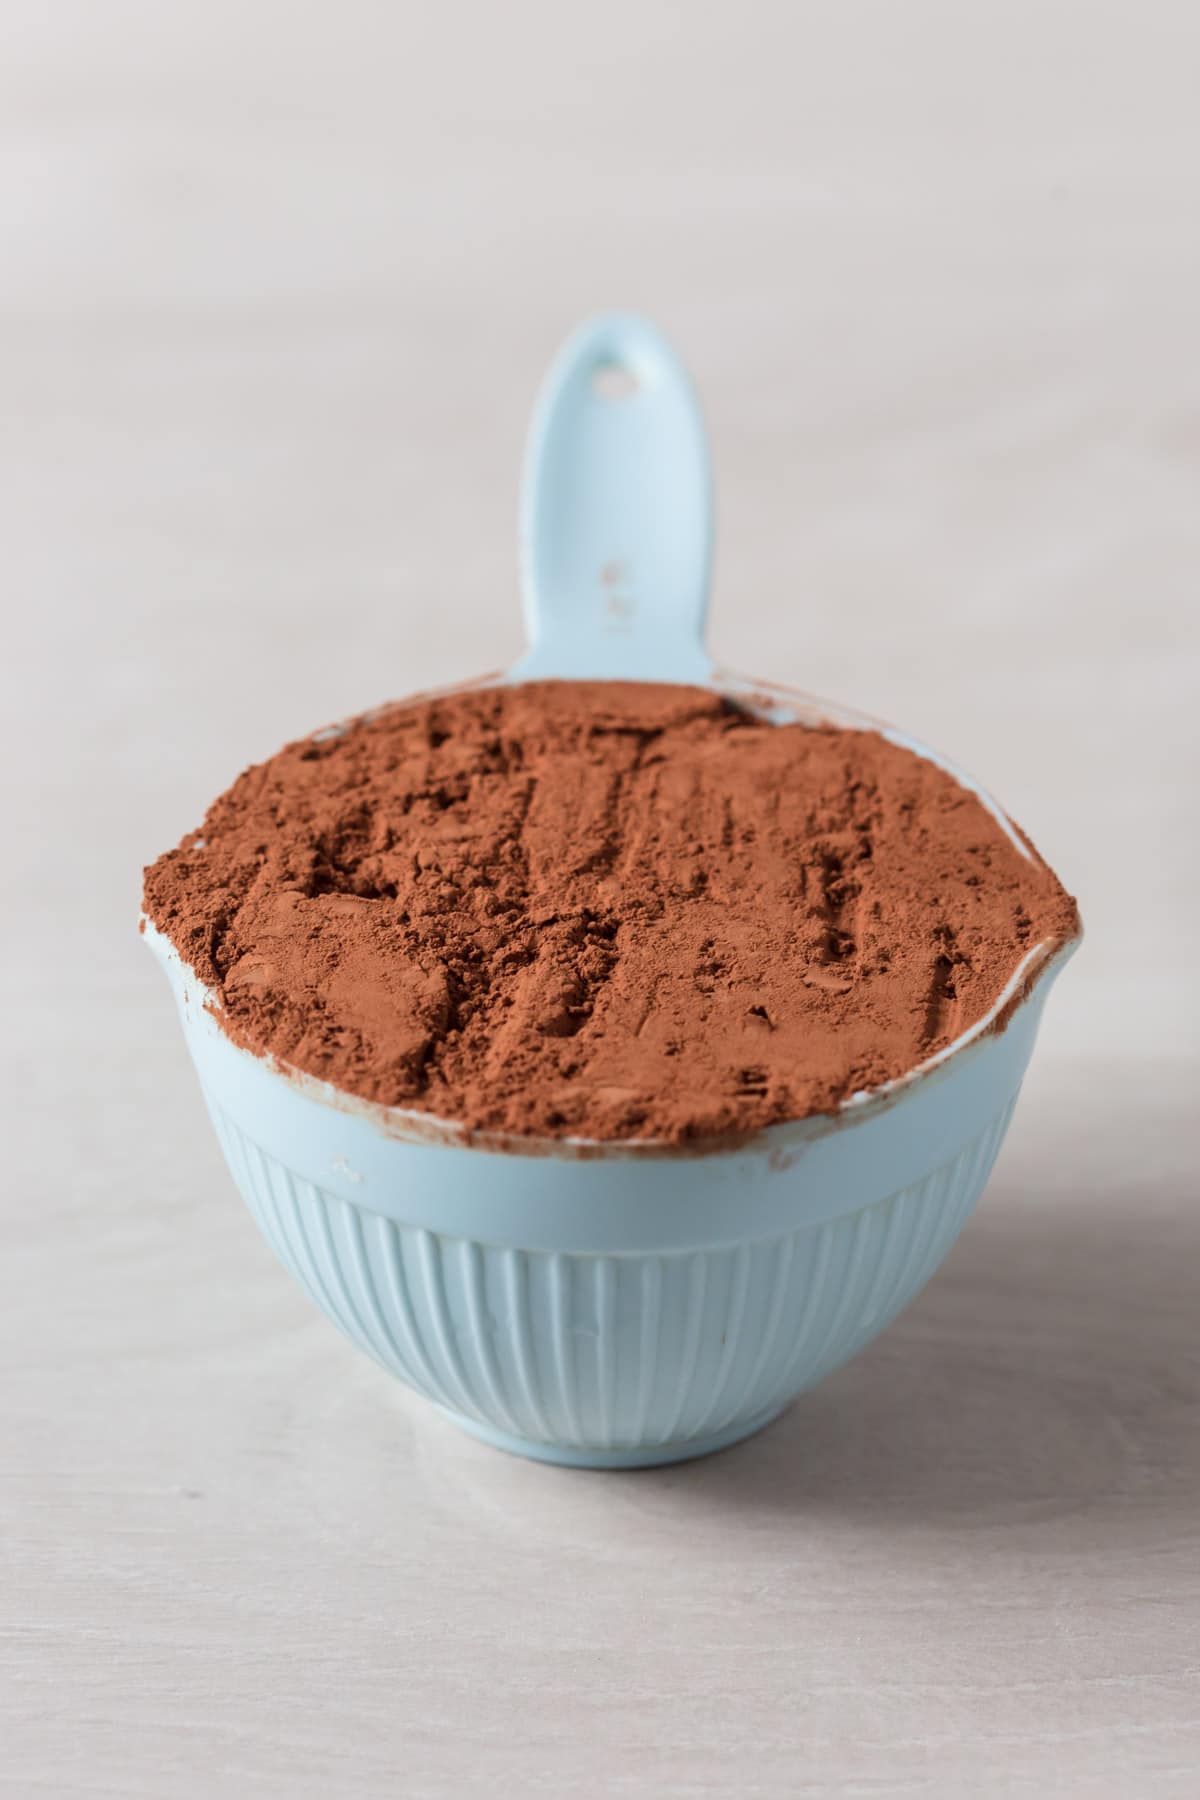
Cocoa Powder
If you’re using dutch-process cocoa, natural cocoa powder or cacao powder, use the same scoop and level method as the flour we discussed above. Or weigh it using kitchen scales if the recipe provides weight equivalents.
Liquids
Let’s talk about the liquids we typically find in baking recipes, with a sub-category of wet ingredients.
The most common liquid ingredients you’ll use in baking recipes are:
- Water
- Milk
- Buttermilk
- Thin cream
- Oil
The most common wet ingredients you’ll use in baking recipes are:
- Yoghurt
- Sour cream
- Honey
- Maple syrup
- Molasses
- Apple sauce
- Nut butters
- Mashed banana
How do we measure our liquid ingredients such as water, milk and oil?
The liquid ingredients are thinner in consistency compared to the wet ingredients. For these we use a liquid measuring jug such as this one. I have a few tips I want to share with you when it comes to measuring your liquid ingredients correctly. Let’s dive in!
Have you heard about the Meniscus?
“The meniscus is the curve in the upper surface of a liquid close to the surface of the container or another object, caused by surface tension. It can be either concave or convex, depending on the liquid and the surface.” – Wikipedia
If you’re thinking “science terminology ain’t my groove Sam!” Stay with me, I’ll keep it simple.
Let’s take a look at plain water inside our liquid measuring jug so we can discover what the meniscus looks like and where it’s located. As you can see in the image below, the meniscus is that clear space at the very top of the water. The question is, should the meniscus be above of below the marked line of the measuring jug?
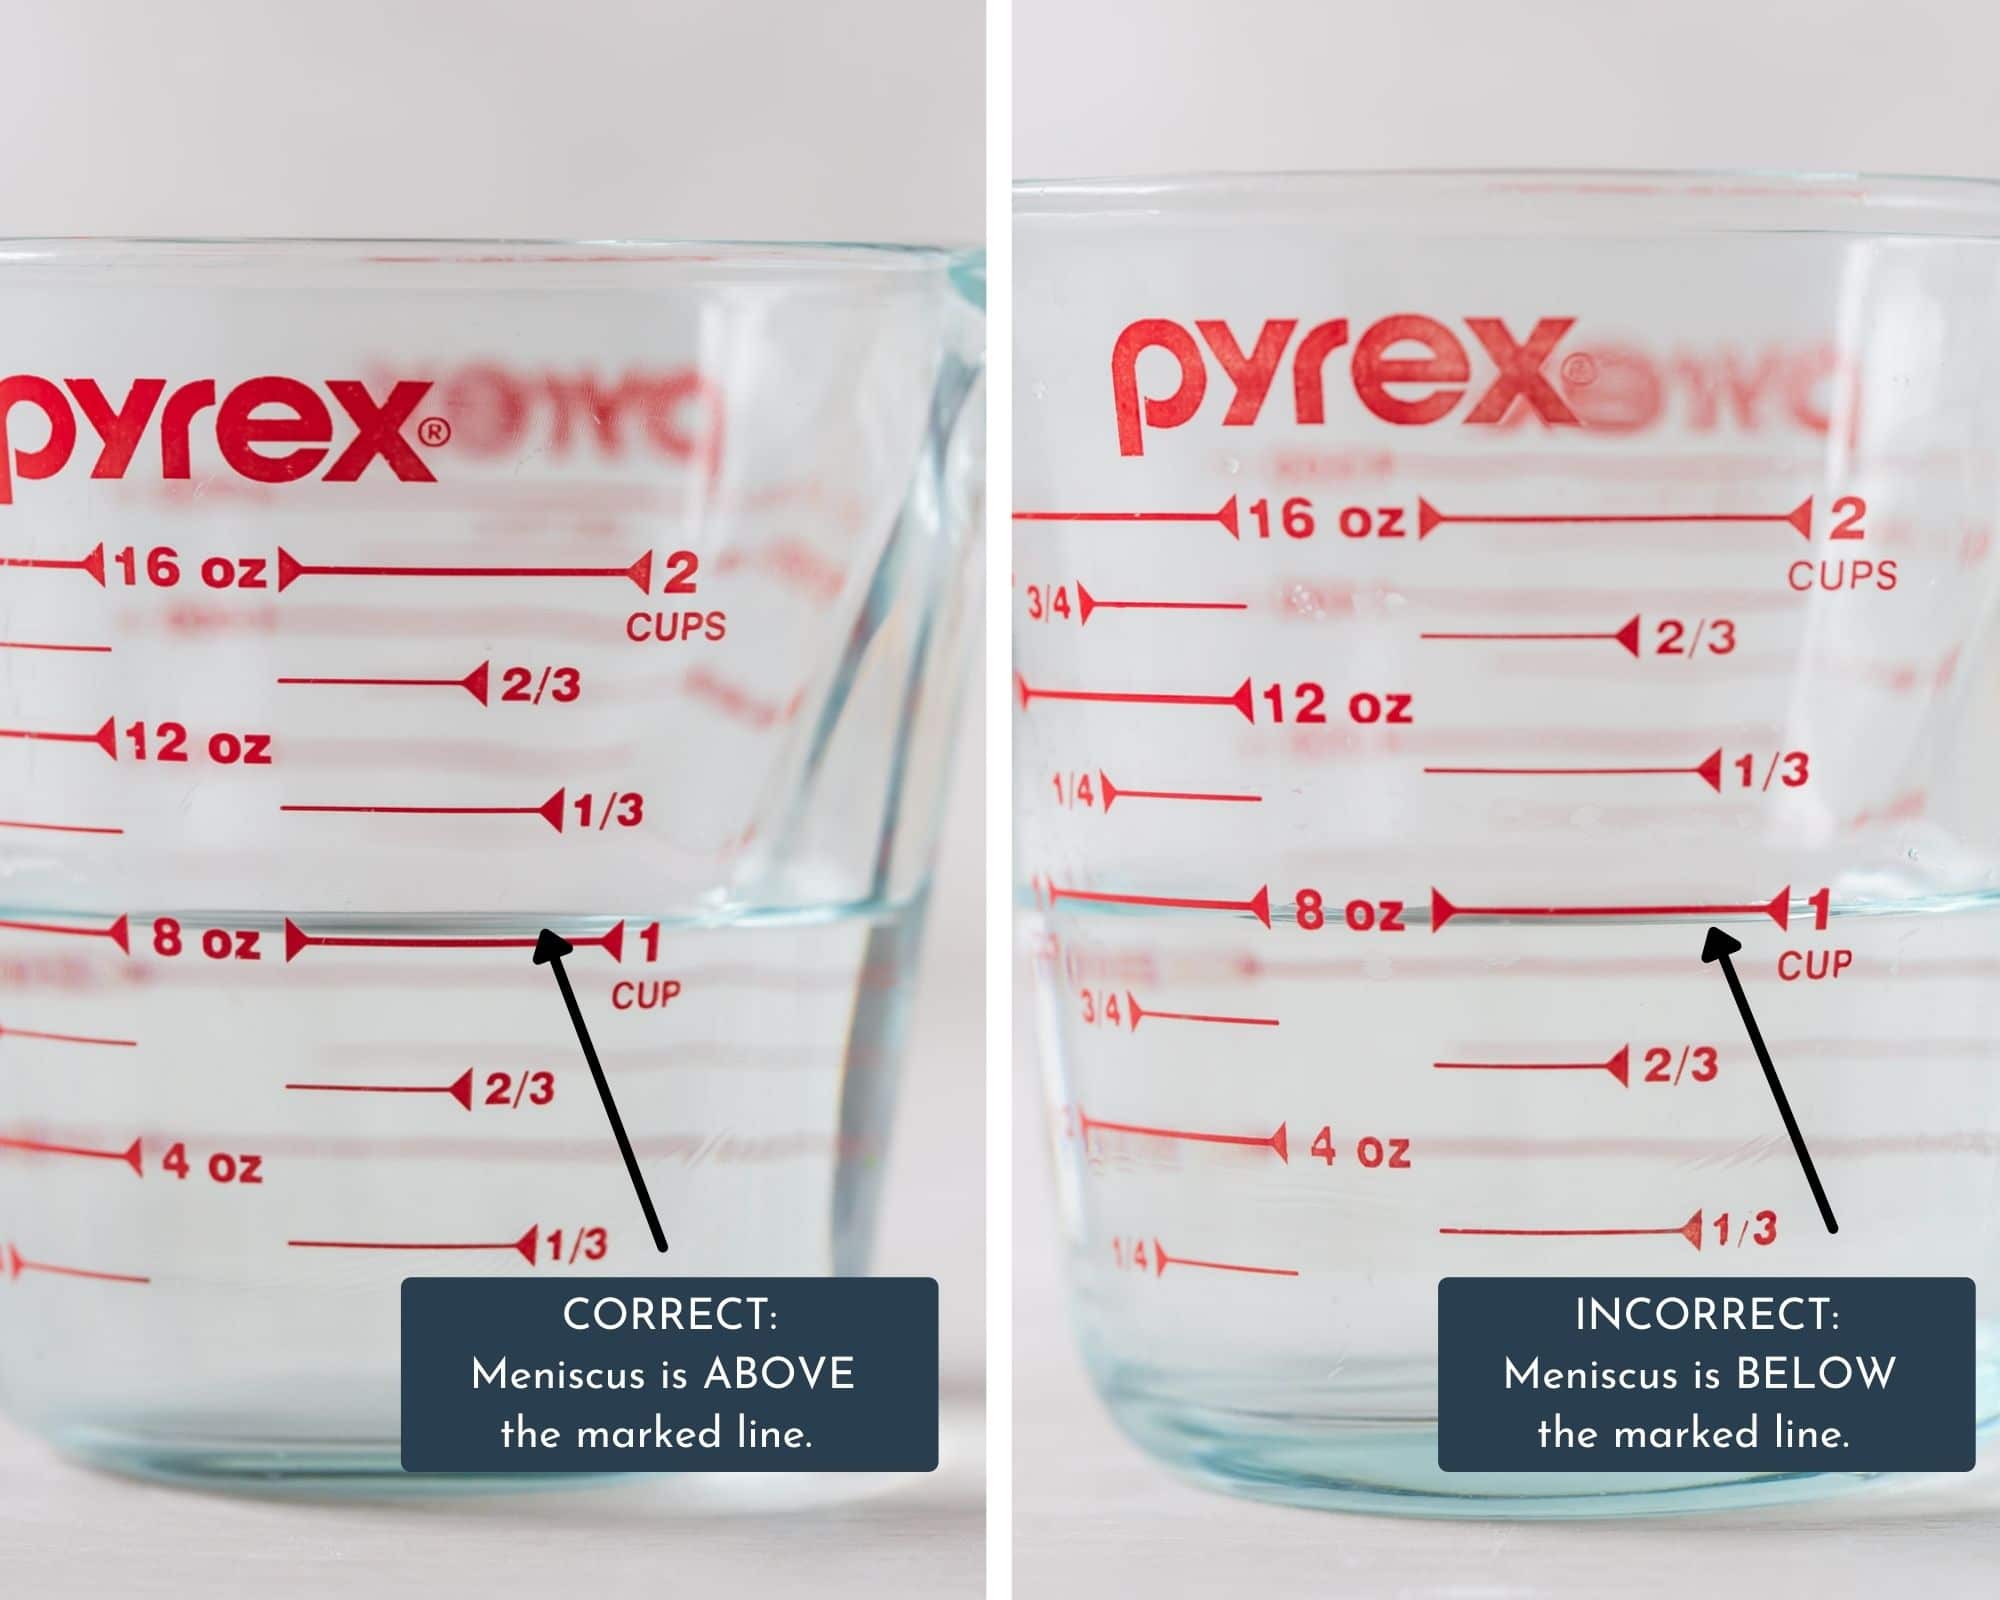
It needs to be above the marked line (first image).
If it’s below the marked line (second image), we are not measuring the exact amount needed. It may look like 1 cup but you can be missing anywhere between 1-2 tablespoons of liquid if the meniscus is below the marked line.
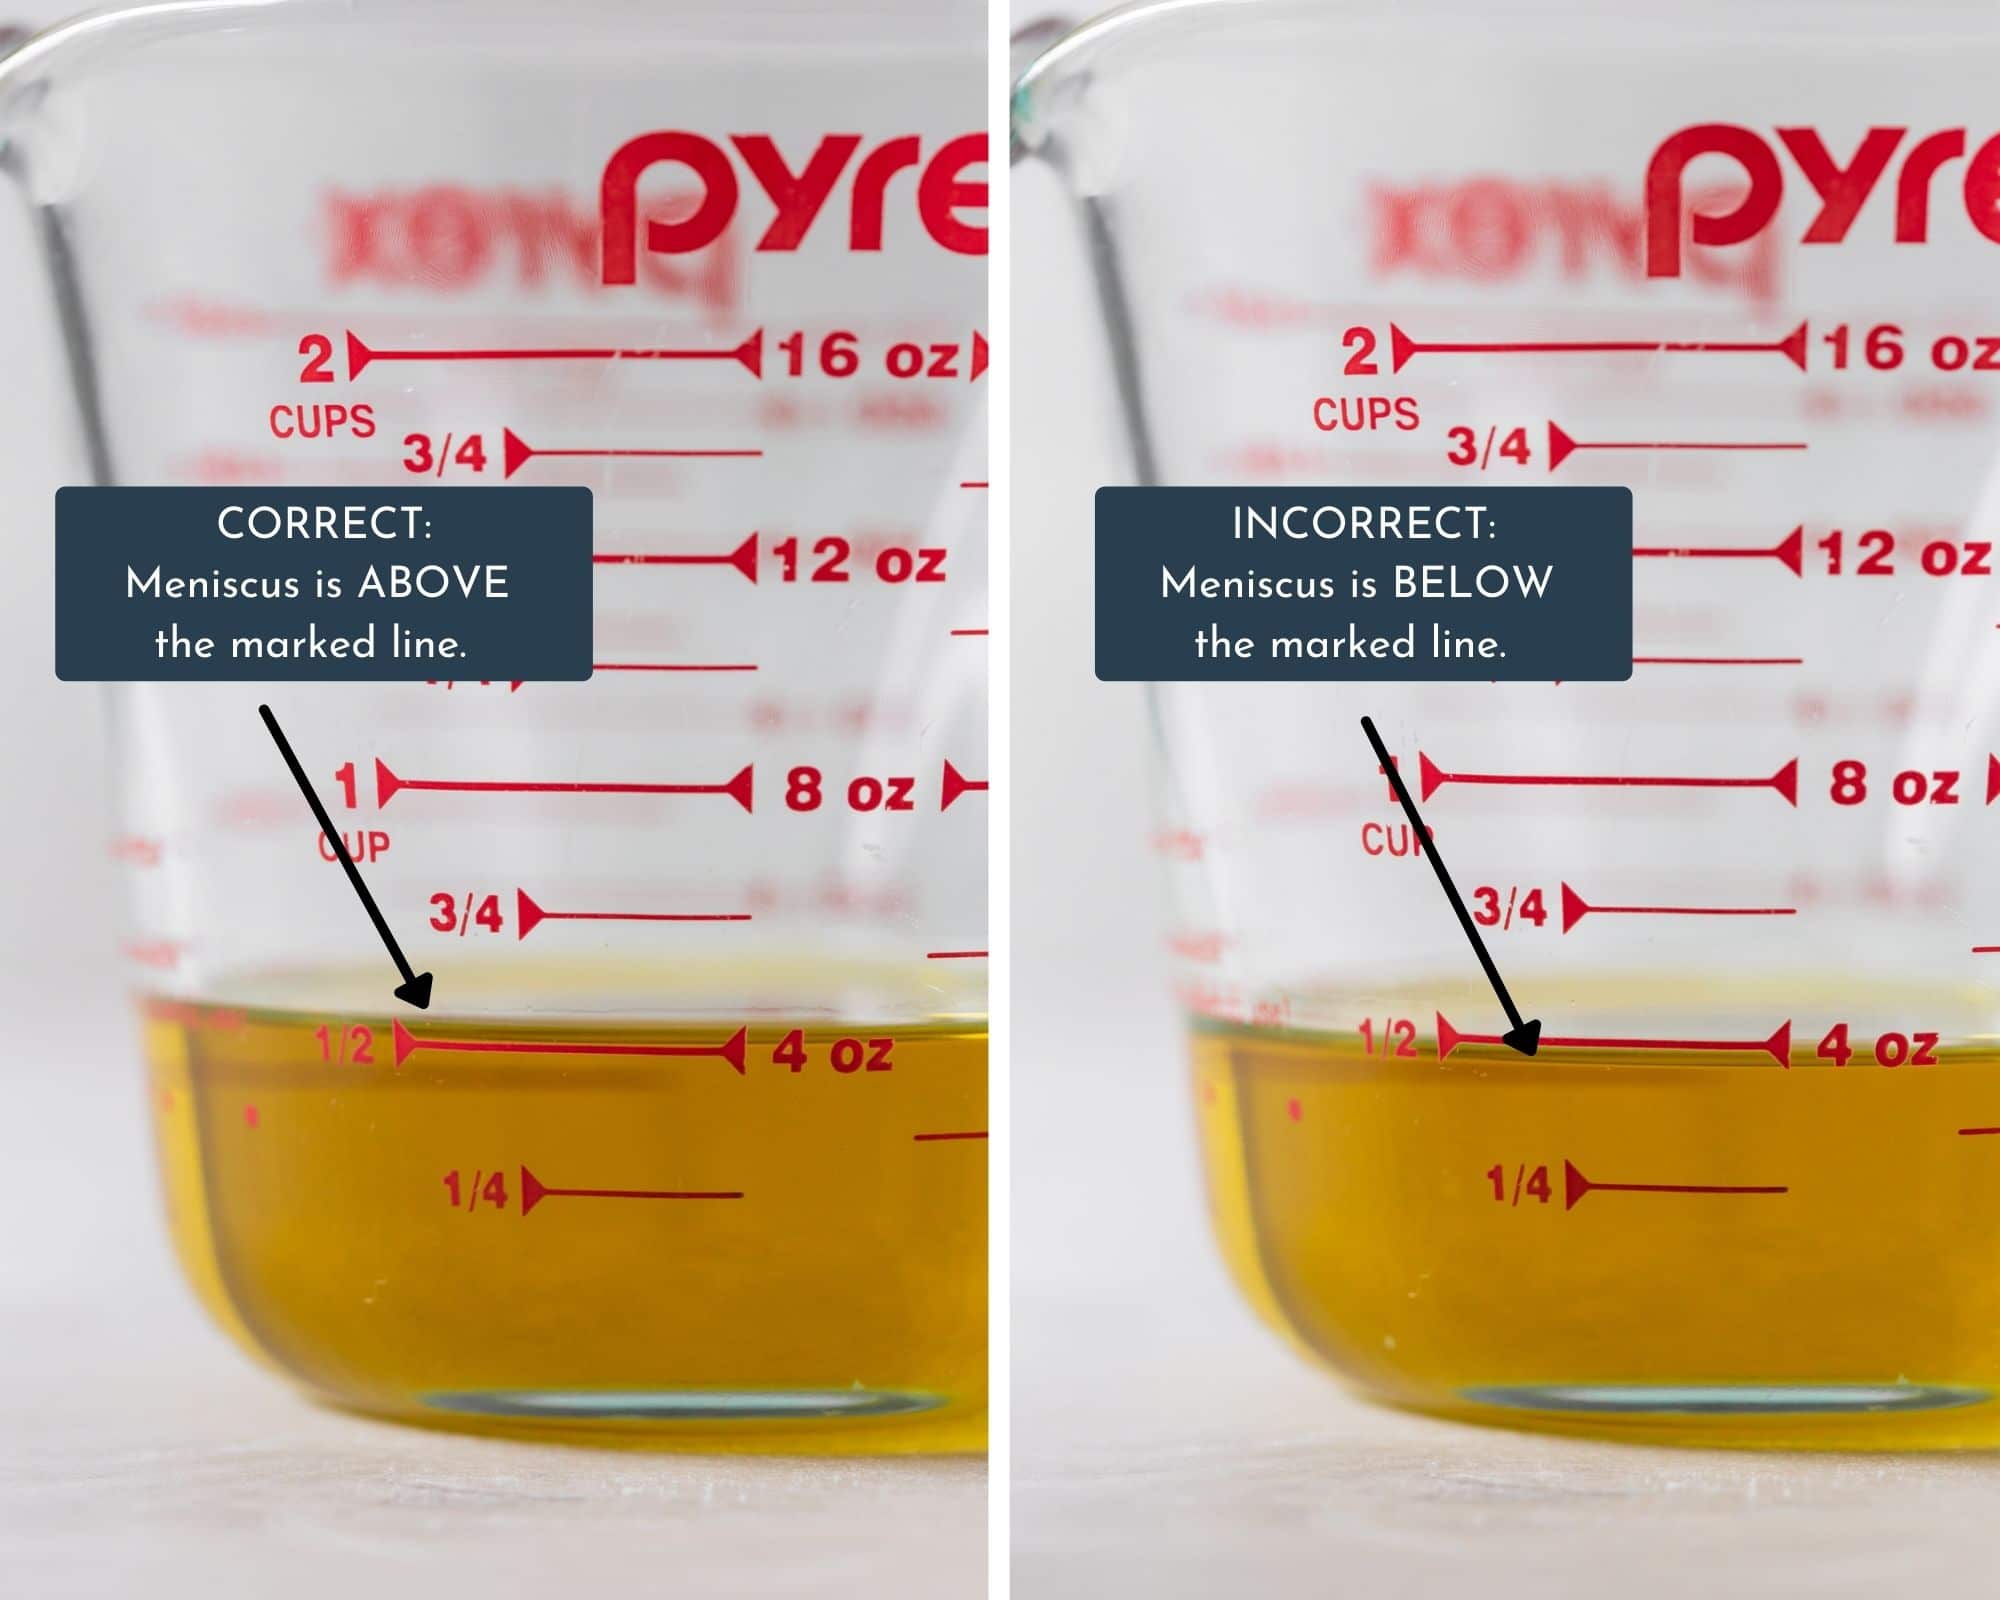
The below image is the meniscus of olive oil, which is quite obvious. Remember to have the meniscus above the marked line to get your correct measurement.
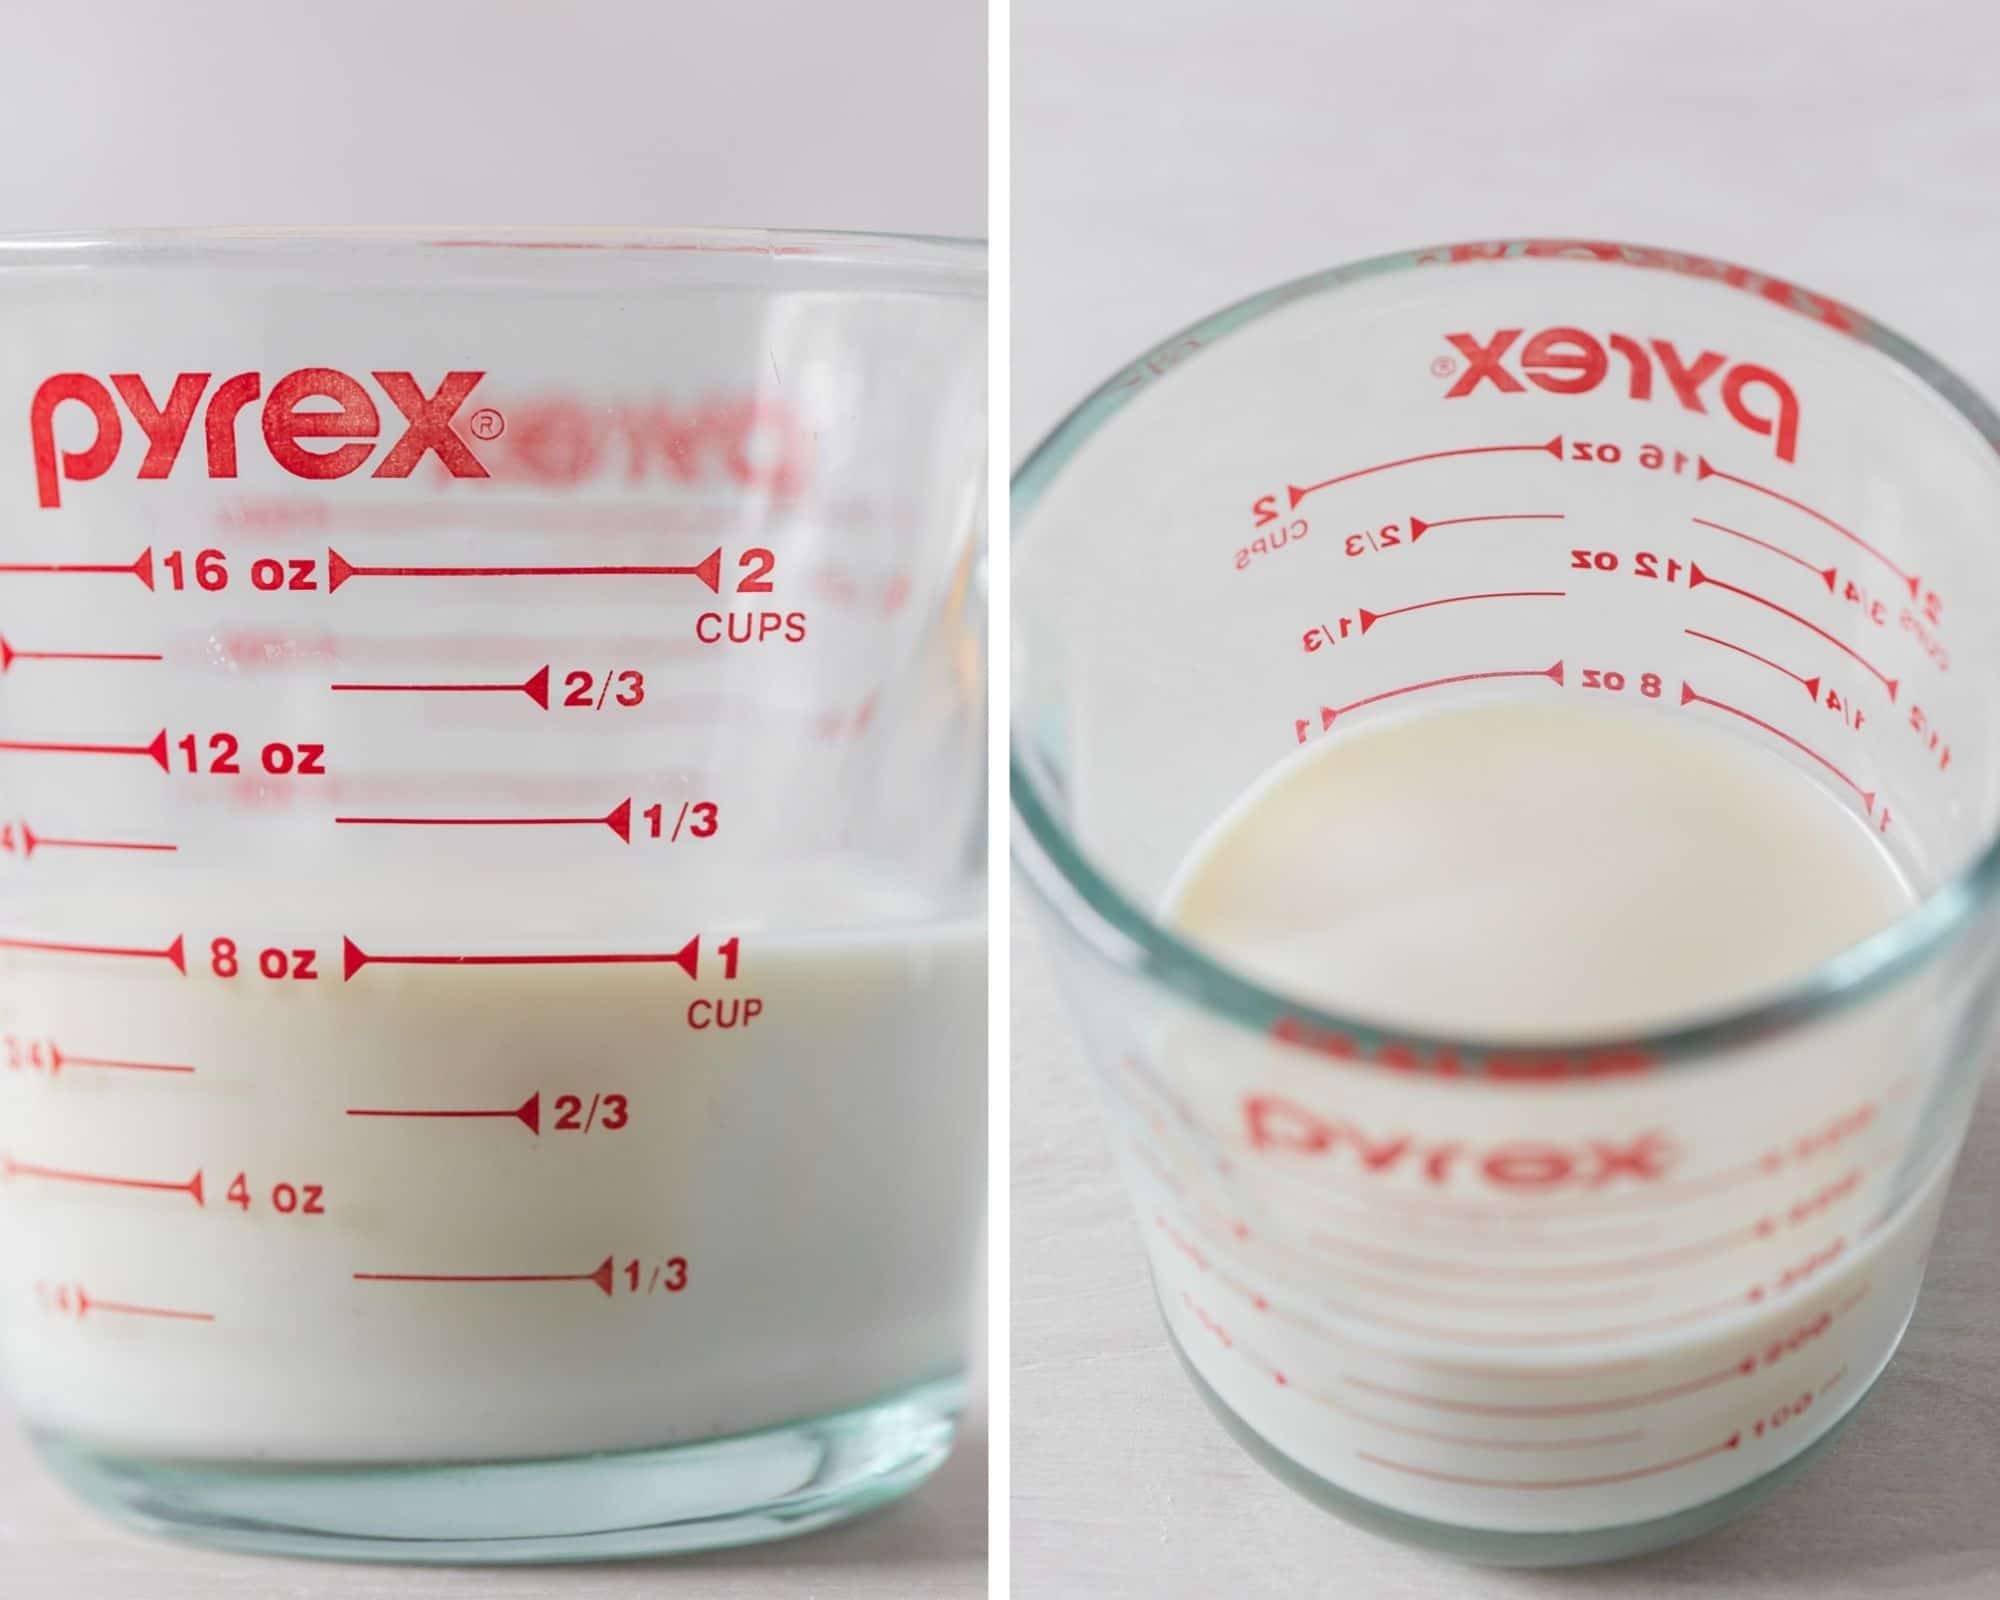
The easiest way for you determine if your measuring accurately and to see if the meniscus is correct, you to need to get down to eye level with your measuring jug and eyeball it. Because if you’re looking down into the jug from above, we can see from the images below that the measurements are completely different from what you see at eye level.
On the left we have 1 cup of milk in our liquid measuring jug looking at it from eye level. On the right we still have 1 cup of milk but we are looking at it from above in our standing position. It appears as though we have less than one cup of milk instead of 1 full cup of milk. That’s why it’s crucial for us to get down to eye level when measuring our liquid ingredients and to ensure the meniscus is above the marked line.
If the recipe you’re following offers milliliters, fluid ounces or liters in addition to or instead of cups/teaspoons/tablespoons, you should use a kitchen scale to measure these if you want to be precise. Just make sure your scales are set to milliliters/fluid ounces/liters and not grams or ounces.
Why don’t we use the other side of the liquid measuring jug which is marked with millilitres or fluid ounces? Because these can be inaccurate, especially when you need a measurement that is between the marked lines and you have to guess where that number is.
For example, in the above images we can see that there are no marked numbers between 200ml and 250ml. What if a recipe calls for 230ml? Do we guess? Preferably not. Use a kitchen scale that provides millilitres or fluid ounces to get a precise measurement. Or if your measurement is one of the marked lines, you can use the jug.
How do we measure our wet ingredients such as yoghurt, maple syrup, apple sauce and mashed banana?
Use your dry measuring cups to measure these ingredients. Generally the quantities used for these wet ingredients is under 1 cup. They’re also thicker in consistency than our liquids and don’t have a meniscus. It’s challenging and unreliable to be spooning and spreading out yoghurt or honey in a liquid measuring jug, it’s hard to get the top smooth and evened out matching with the marked lines on the jug. Stick to the dry measuring cups for these.
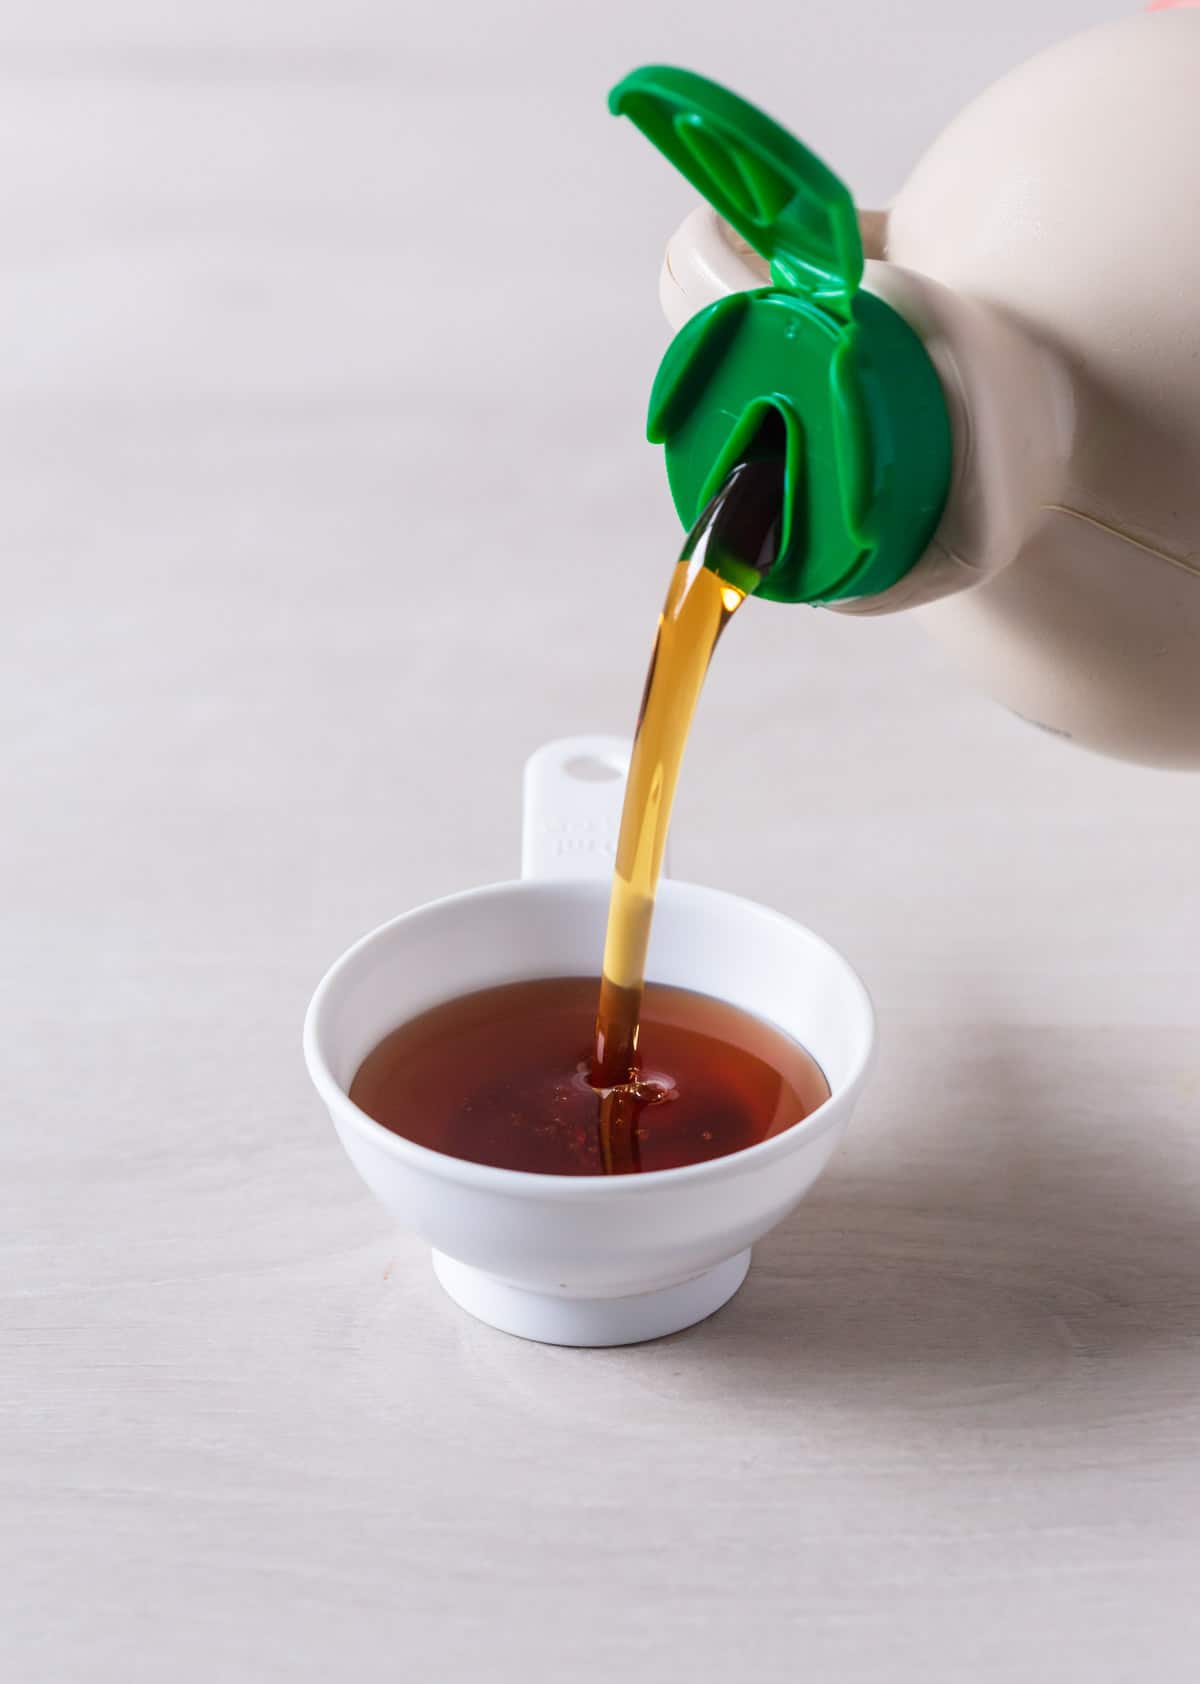
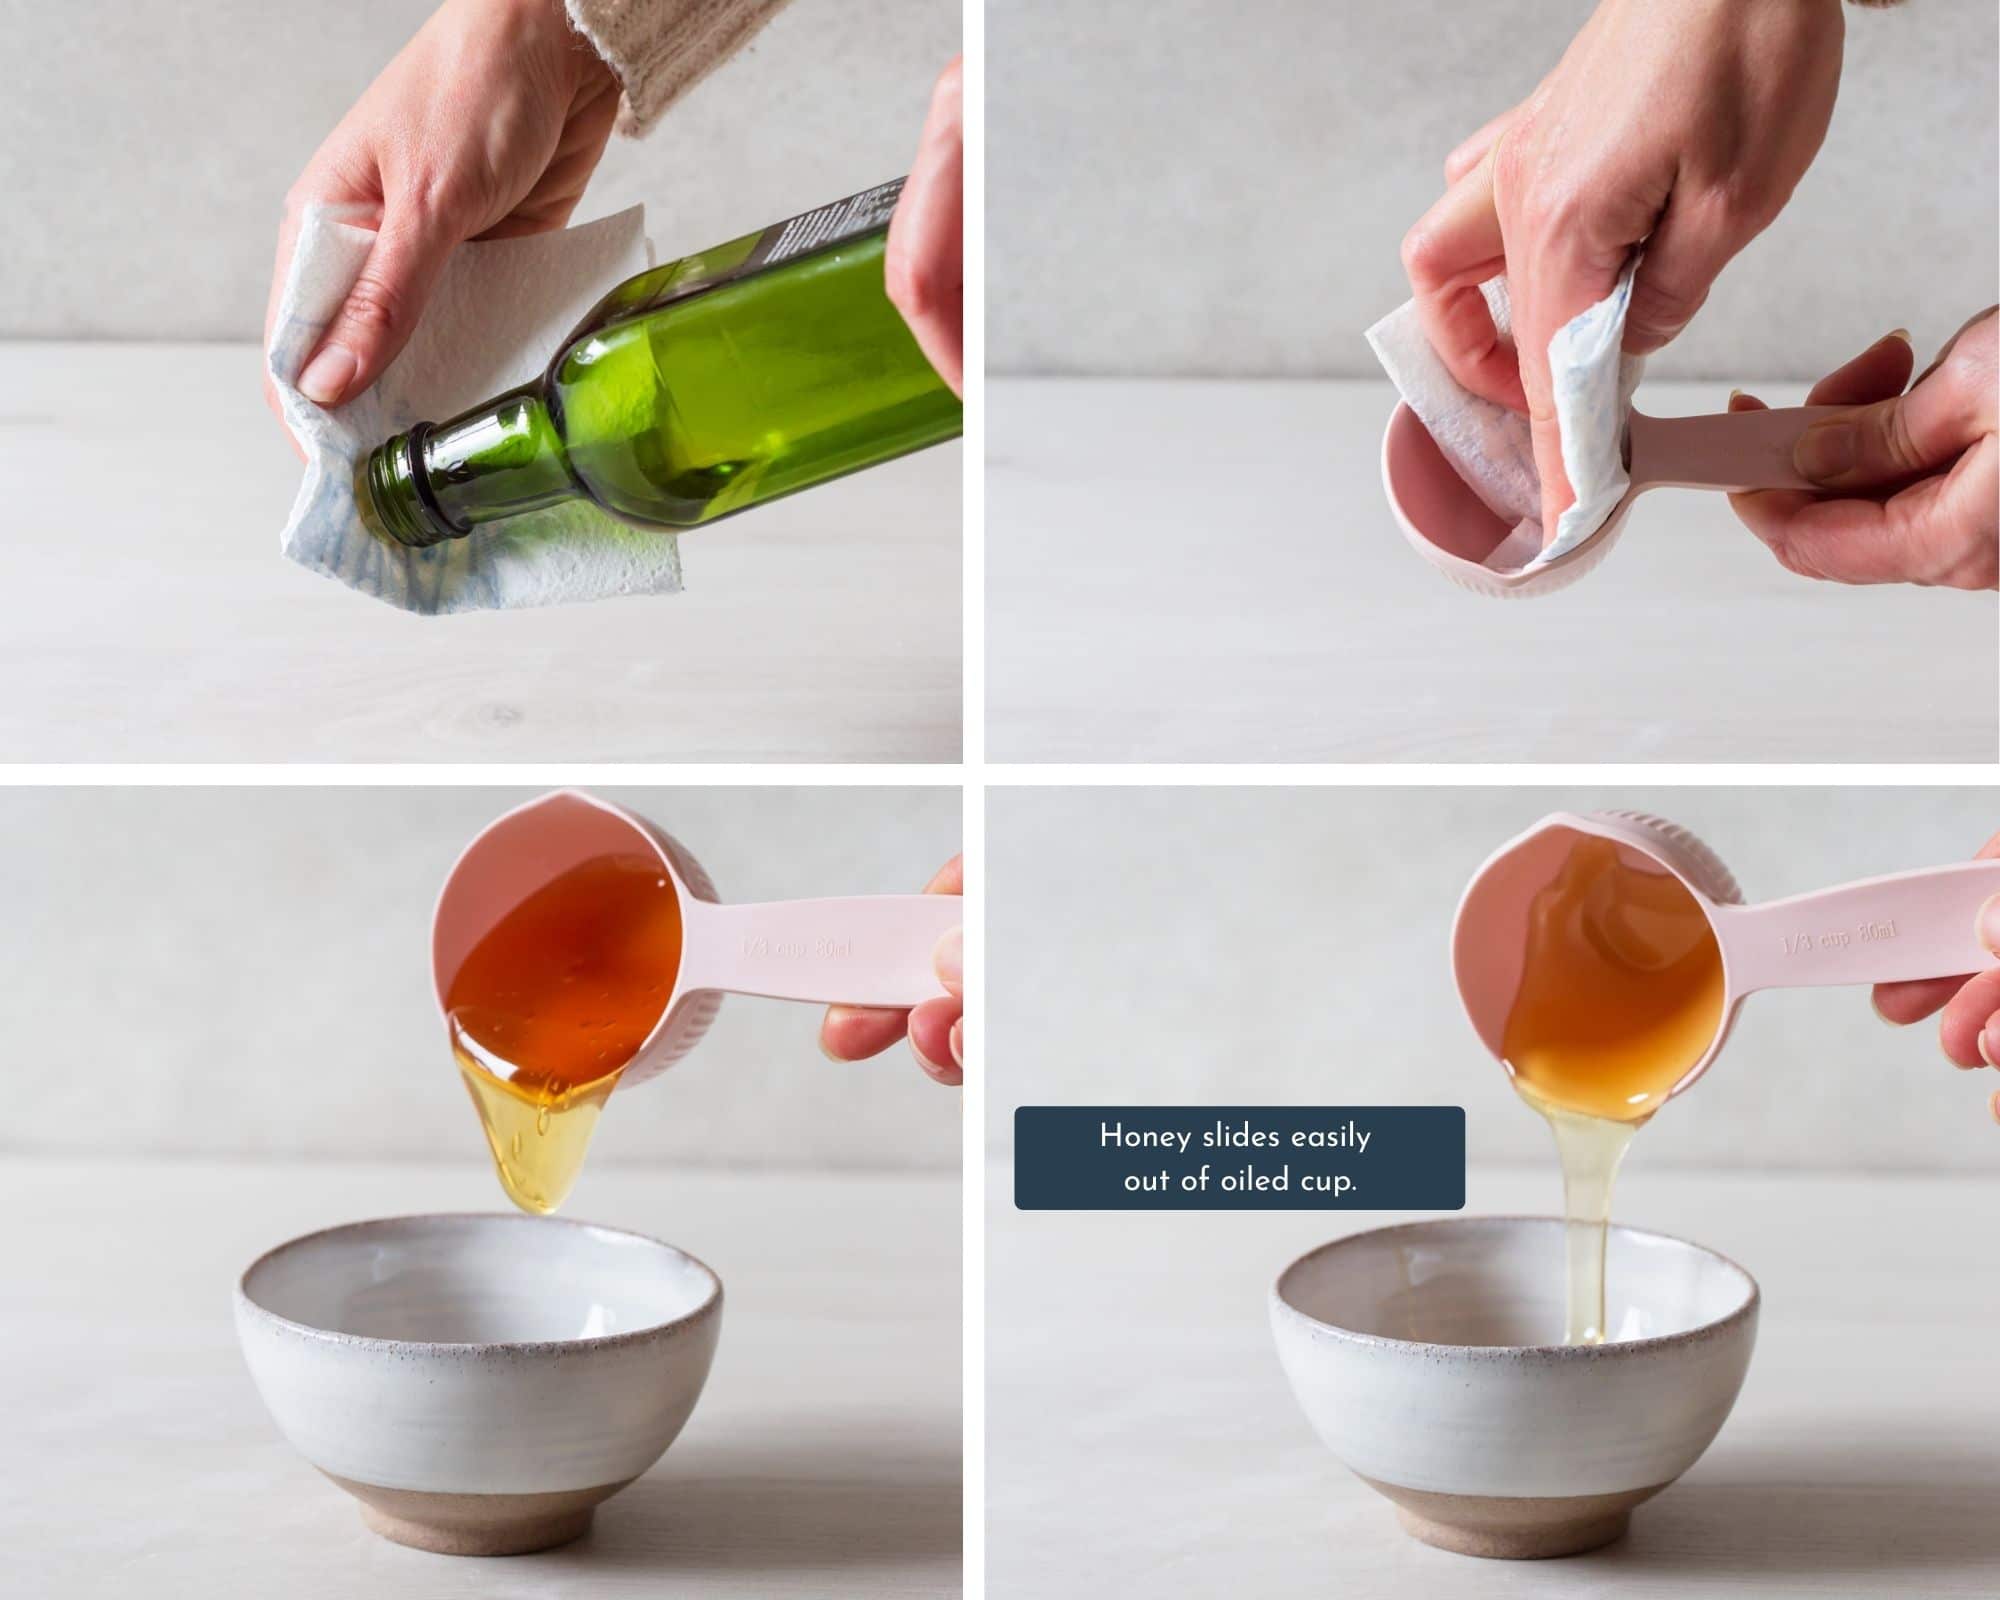
How to measure sticky ingredients such as honey, golden syrup and molasses?
The same as how we measure our wet ingredients but because these are sticky in texture, let’s make our lives easier with this pro tip:
Grease or spray a light layer of extra virgin olive oil inside a dry measuring cup. Then pour in your sticky ingredient such as honey or molasses. Pour it out of the cup and into your recipe. It will slide straight out instead of sticking to the inside of the cup. You’re welcome.
Butter
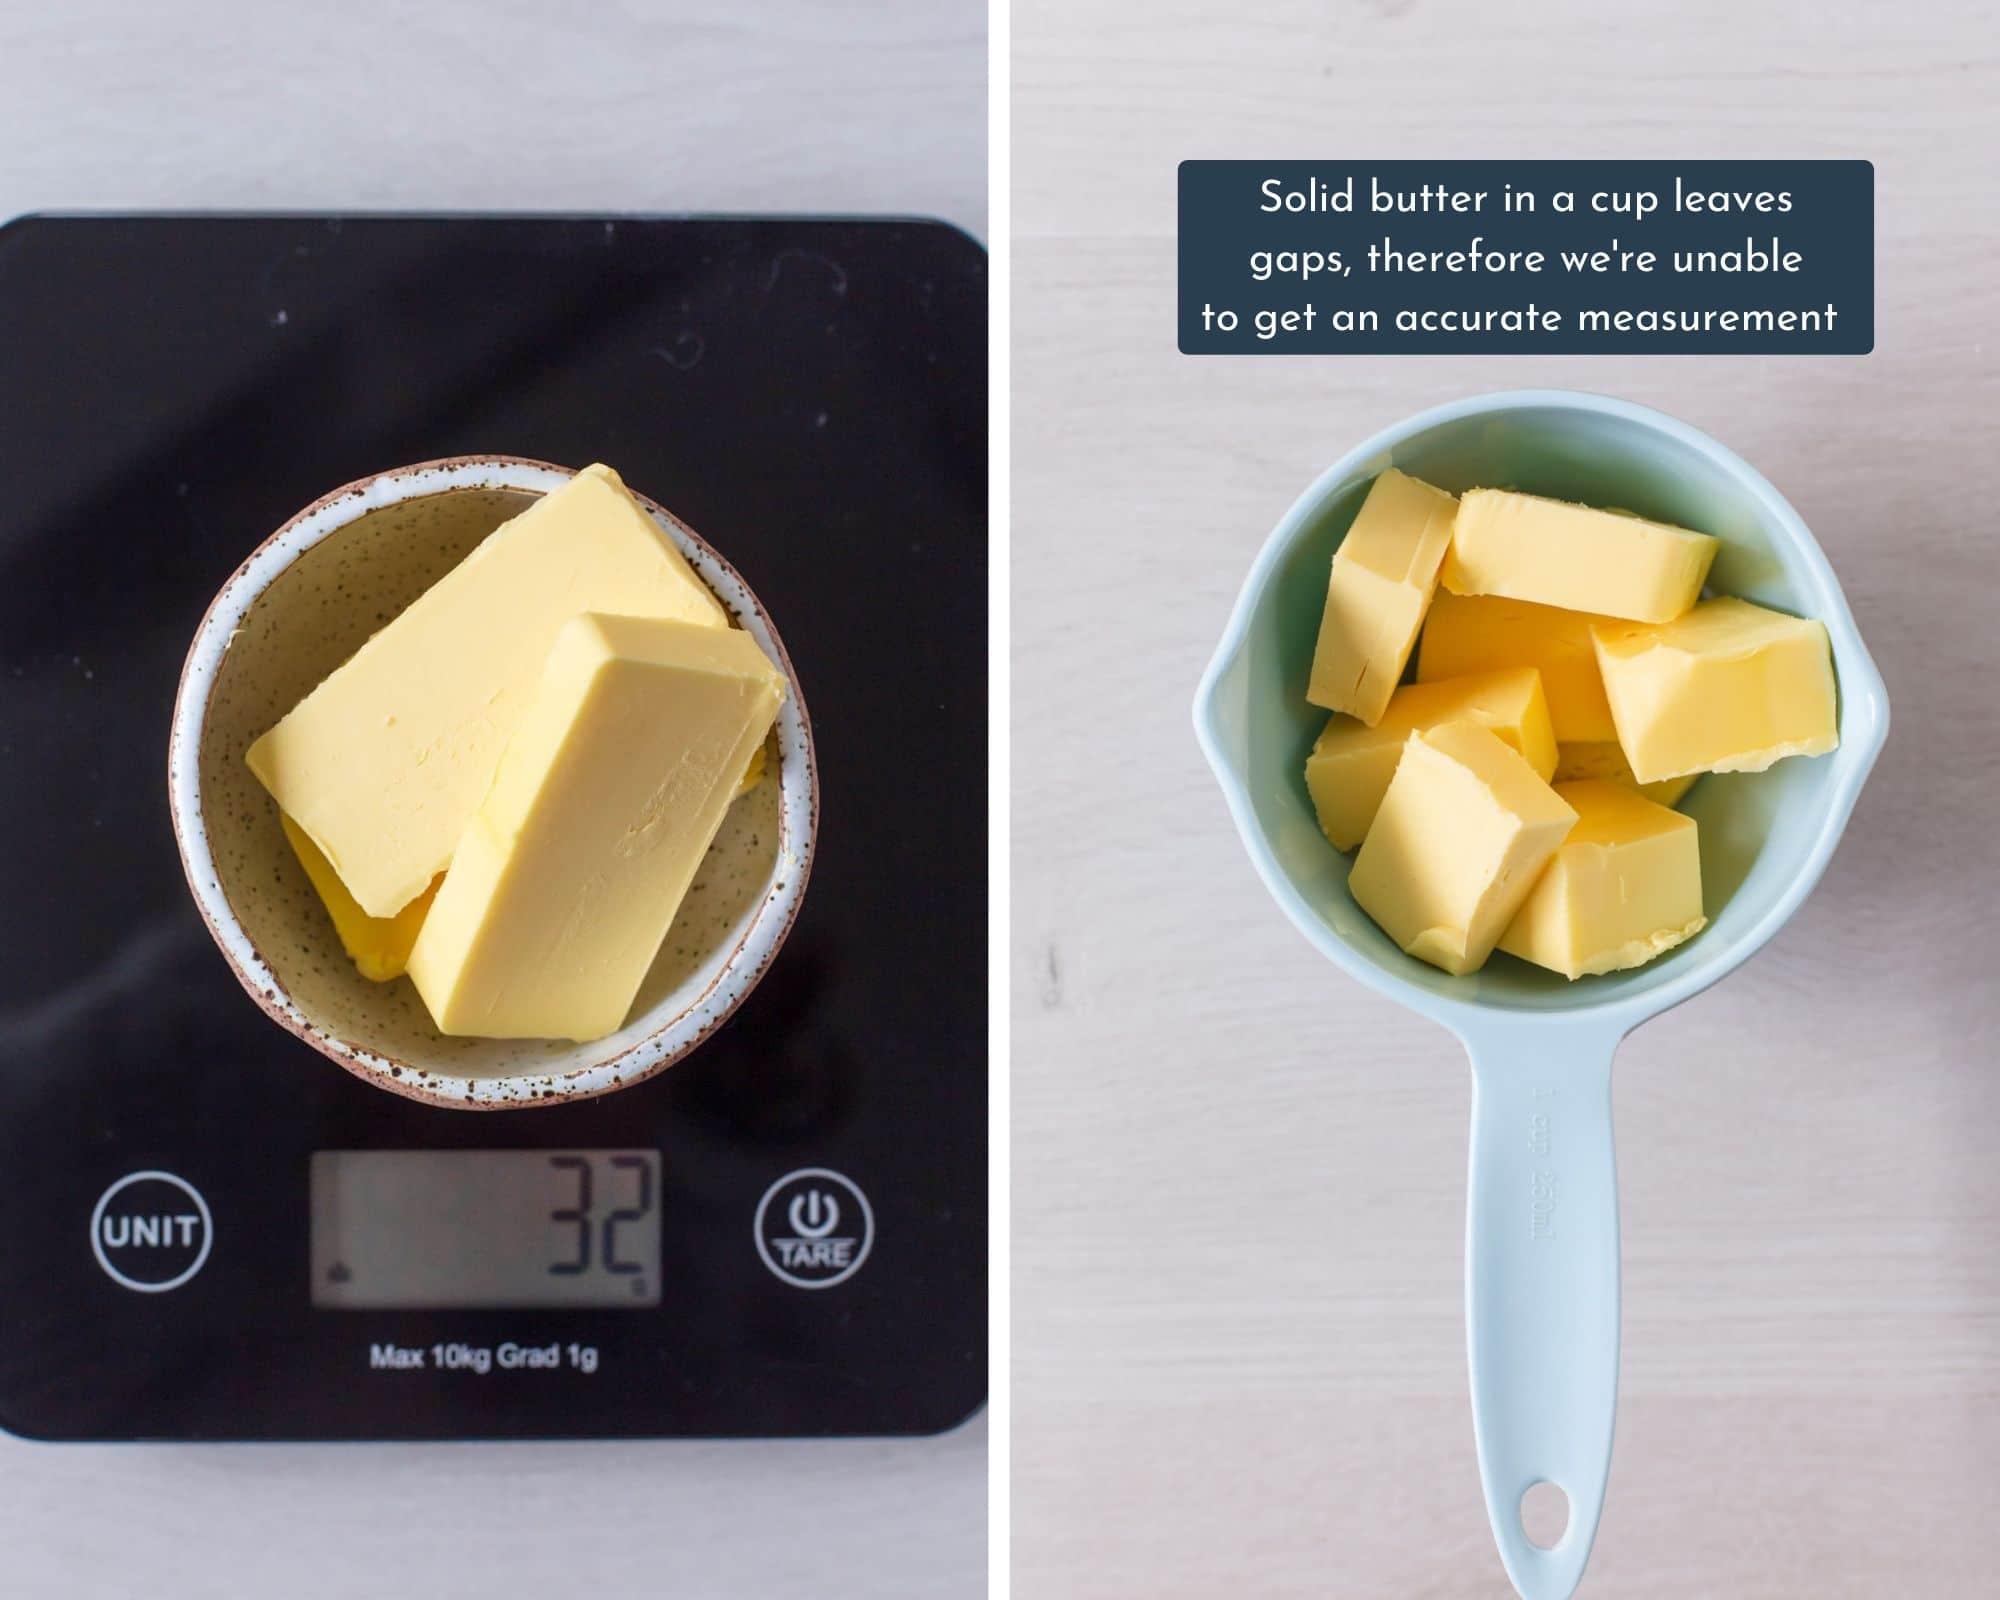
Butter needs to be looked at as a separate ingredient from our liquids and wet ingredients. Butter cannot be accurately measured in cups because in it’s solid state, there will be gaps between the chopped up butter inside the cup, see below image.
What is the best way to measure solid butter? Using a kitchen scale to measure butter in weight. Recipes should provide you with both cups/tablespoons and their equivalent measurements in grams or ounces for butter.
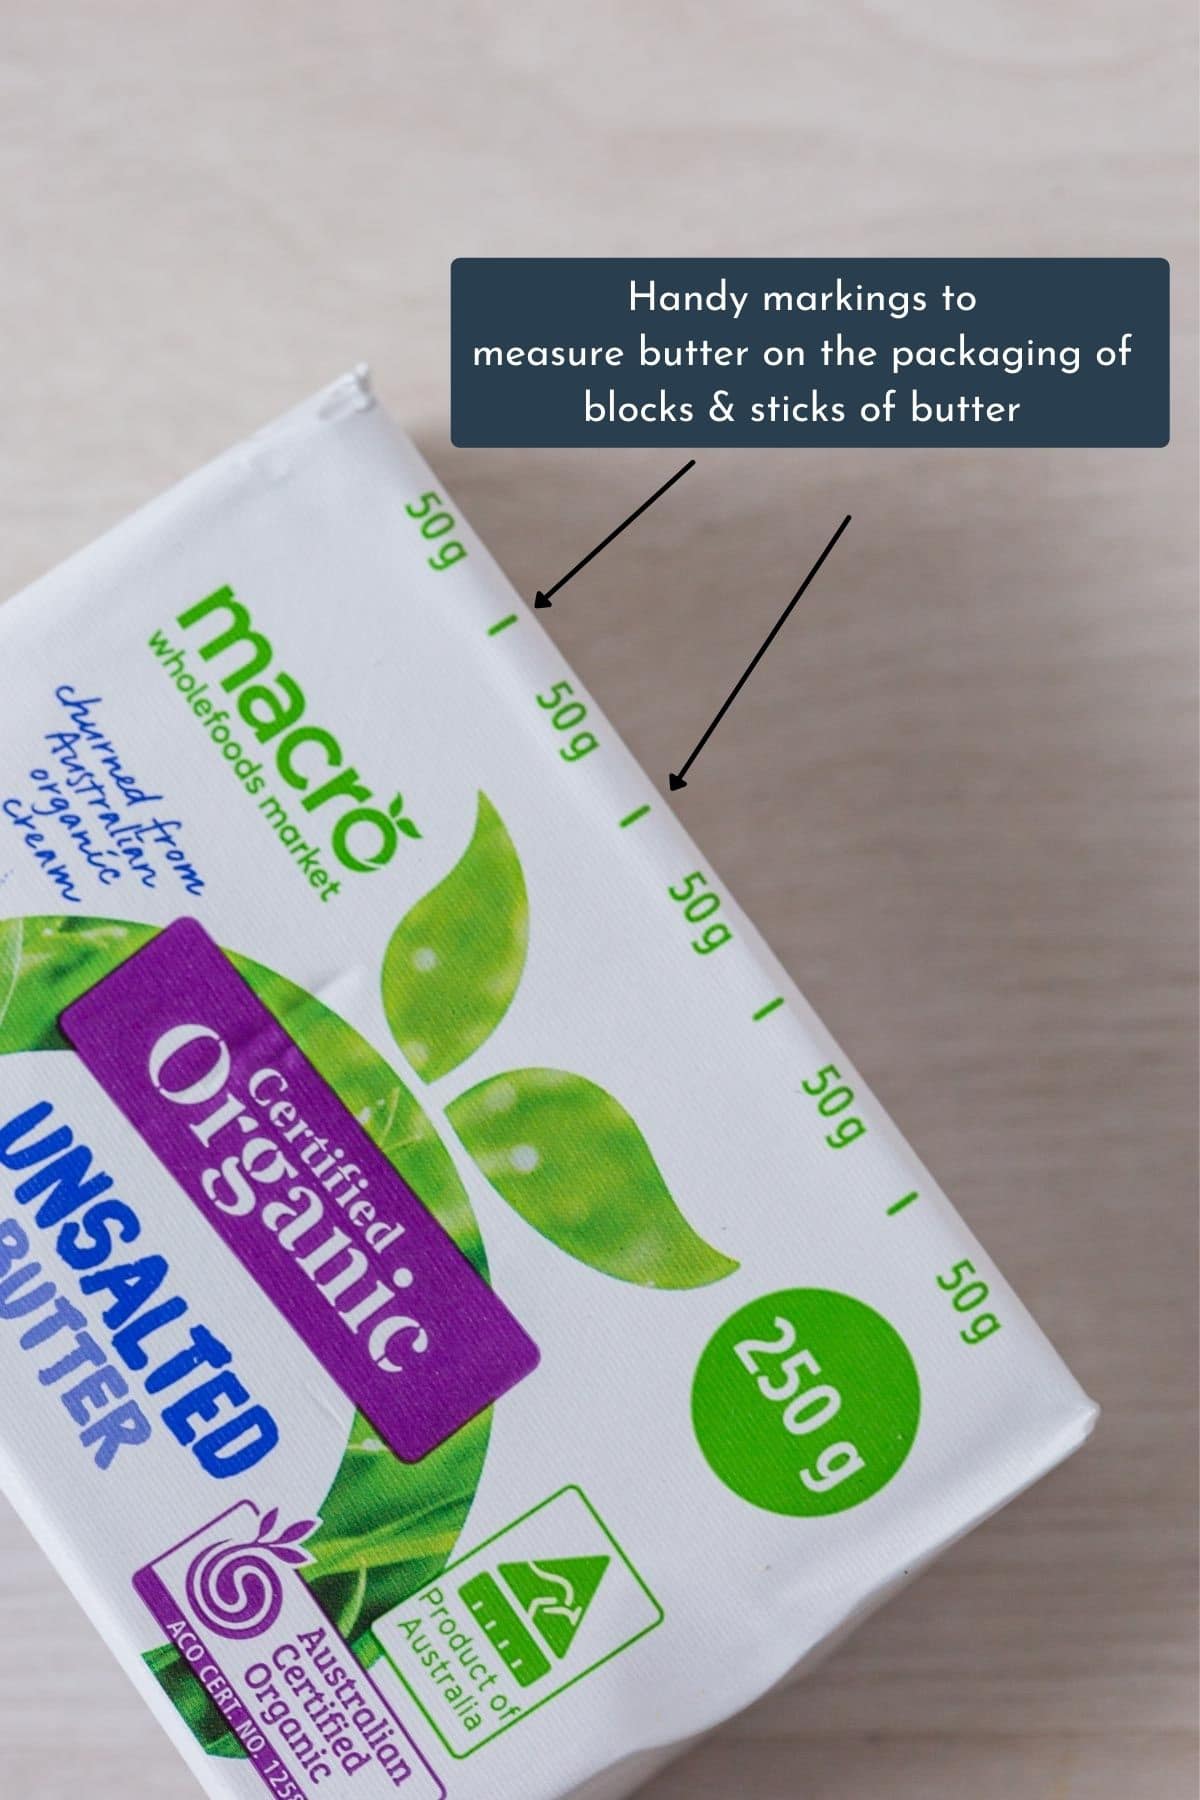
Can I use the marked measurements on butter packaging?
Blocks and sticks of butter normally have markings of measurements on the packet that are a great guide to use if you don’t have a kitchen scale. Just take a knife and slice the butter at the marking you need. Make sure the packet is on straight to get an accurate measurement. However, it’s still advisable and more accurate to use a kitchen scale to measure your butter.
In Australia, our blocks of butter have 50 gram markings. We don’t get sticks of butter here such as the ones found in the US. Most recipes should provide you with equivalents for grams, ounces or tablespoons for butter. Simply use a conversion chart to convert tablespoons to cups etc.
What is the best way to measure melted butter? Use the above methods to measure your butter in it’s solid state then melt it.
Eggs
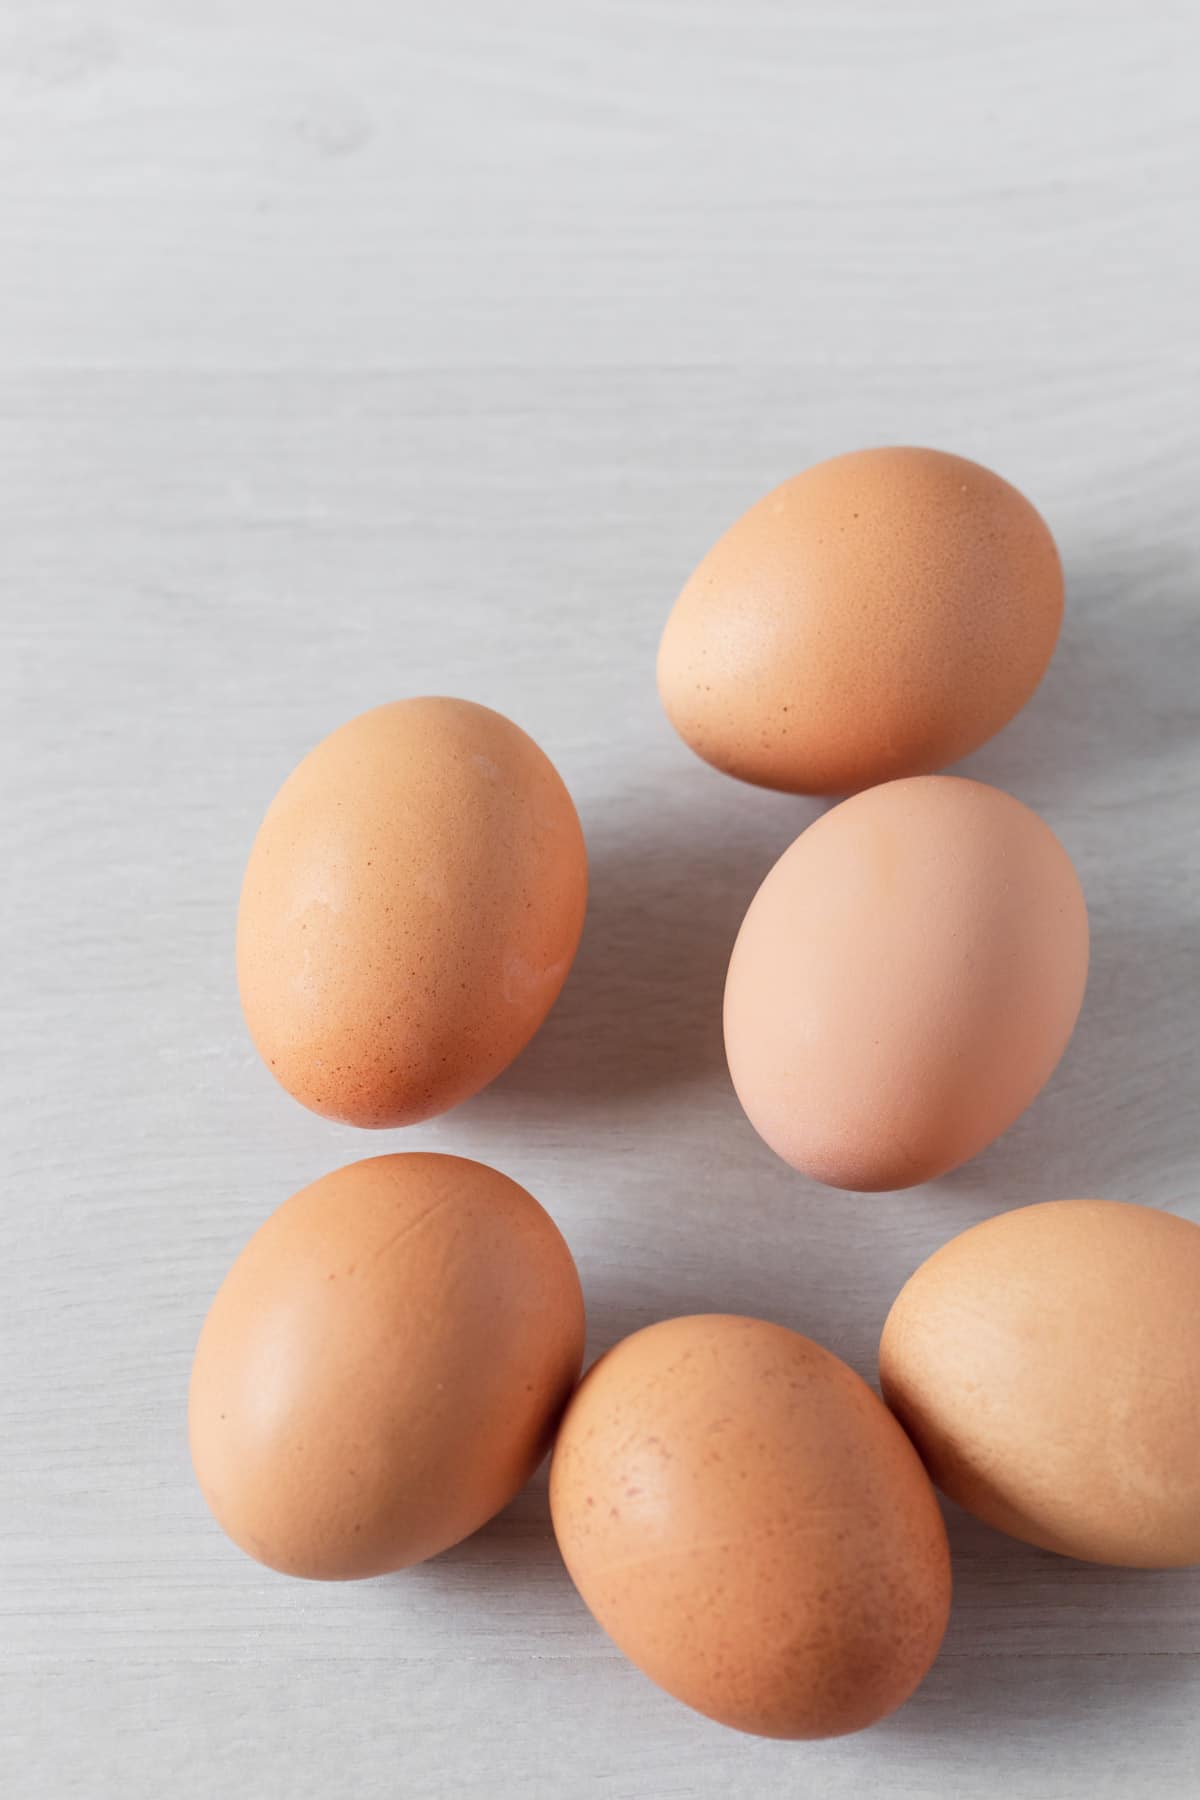
Recipes usually call for large eggs but provide no exact measurements in grams or ounces. This can be a problem because when a carton of eggs marked as large or extra large, the size of the eggs inside can differ from carton to carton.
If the recipe doesn’t provide grams or ounces and if doesn’t mention what size eggs to use, always use large eggs (cartons marked with ‘large’ not ‘small’). This is the best practice and the rule of thumb for eggs in baking.
For my recipes here on the blog, I provide weight in grams for eggs in addition to stating large egg. The weight in grams for large eggs in their shells is between 55 grams and 60 grams (1.9 ounces and 2.1 ounces).
Mix In’s (Chocolate Chips, Dried Fruit, Nuts & Seeds)
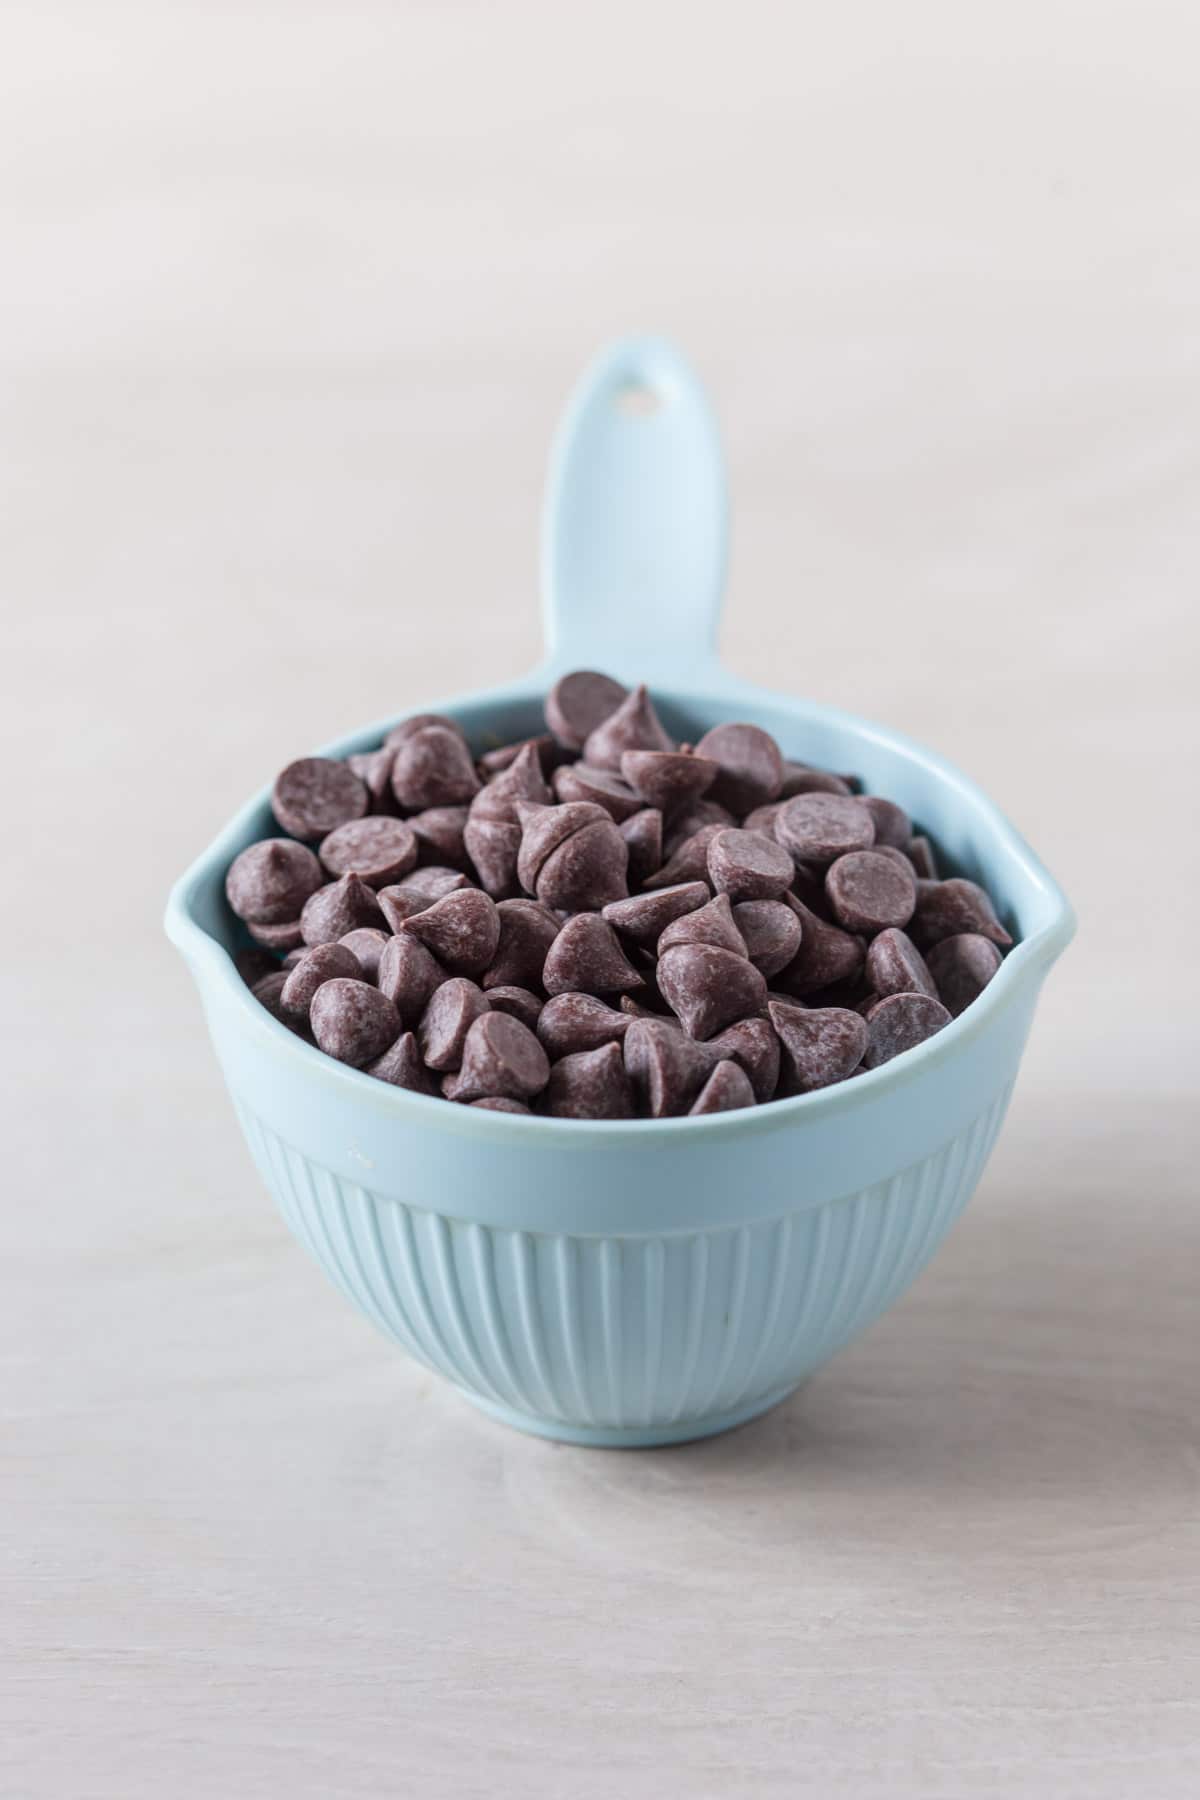
How to measure chocolate chips? What about other popular mix in’s such as an array of dried fruit, nuts and seeds?
Use dry measuring cups to measure these ingredients. You can also use kitchen scales for a more precise number, if the recipe offers those equivalents.
I hope this guide on how to measure your basic baking ingredients accurately serves you well. Be sure to bookmark this page so you can refer back to it whenever you need it. If you have any further questions, please pop a comment below and I’ll be happy to help.
Happy baking friends!