Traditional Hot Cross Buns (Better Than Store-Bought!)
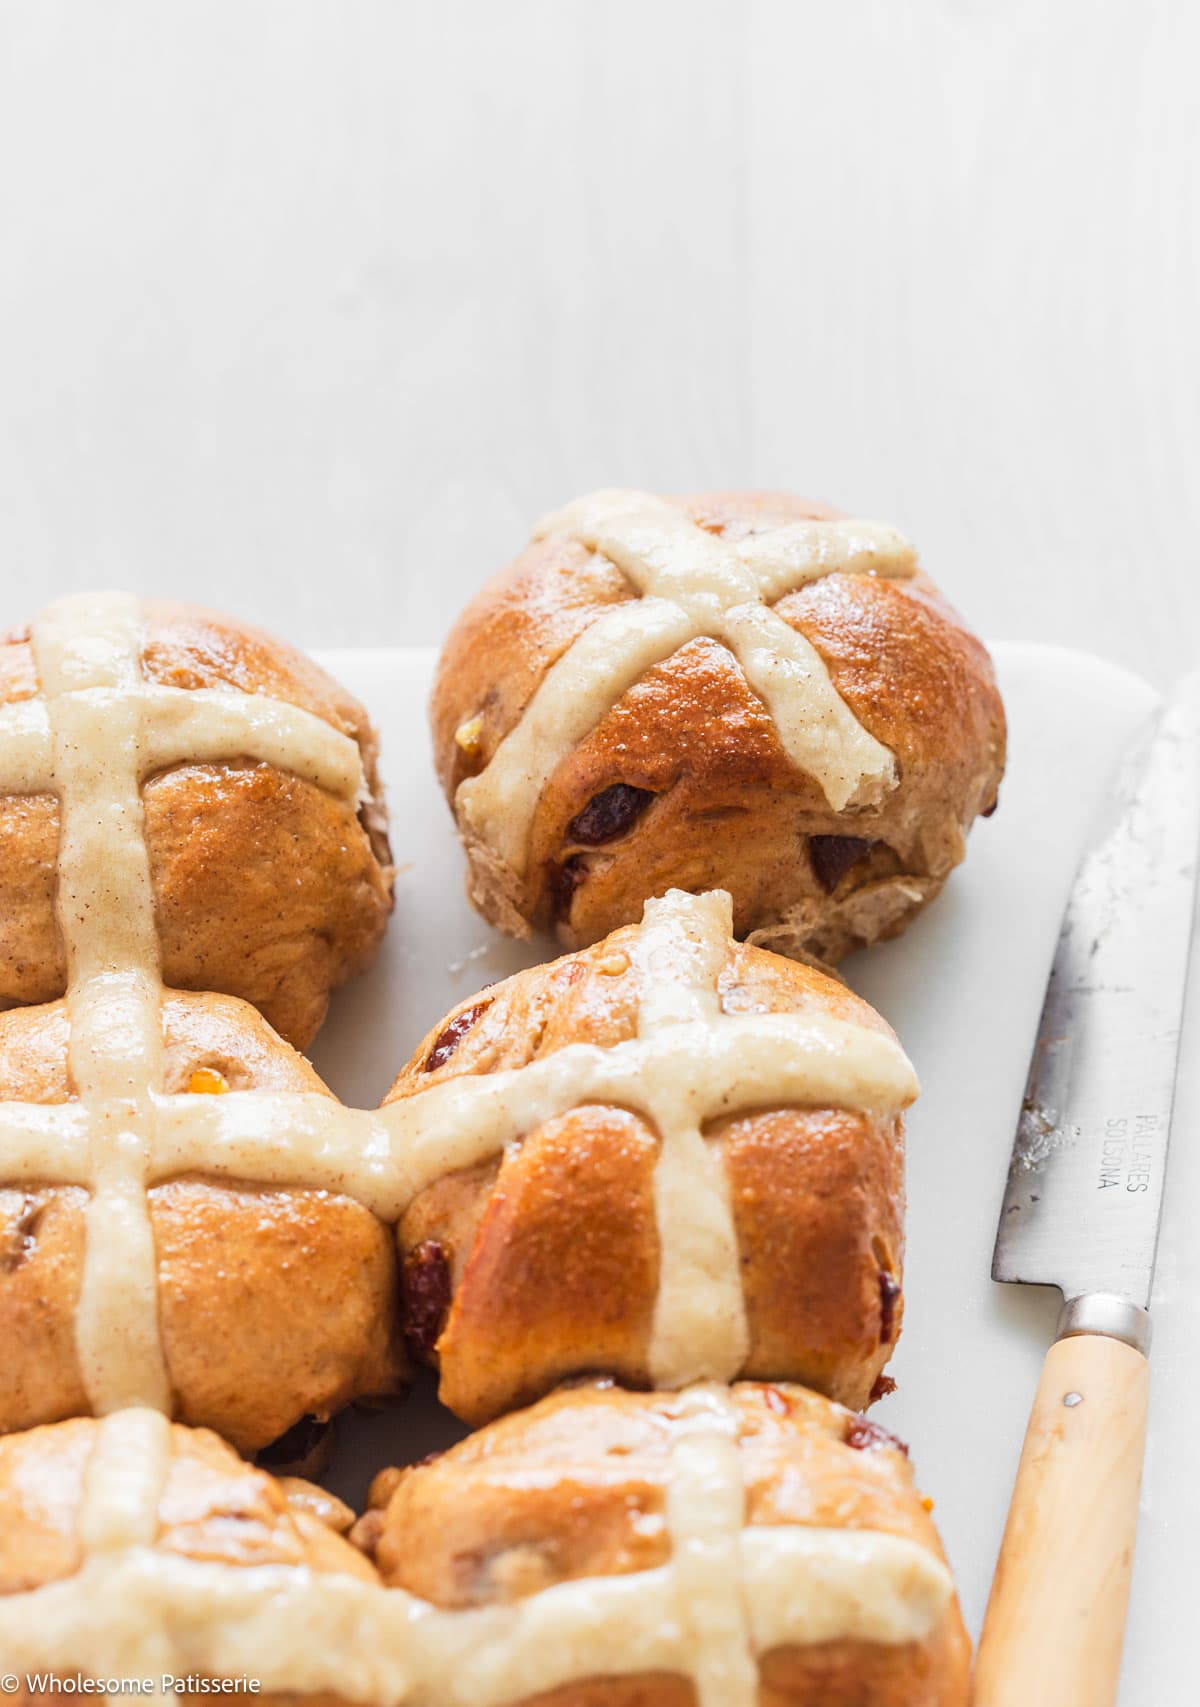
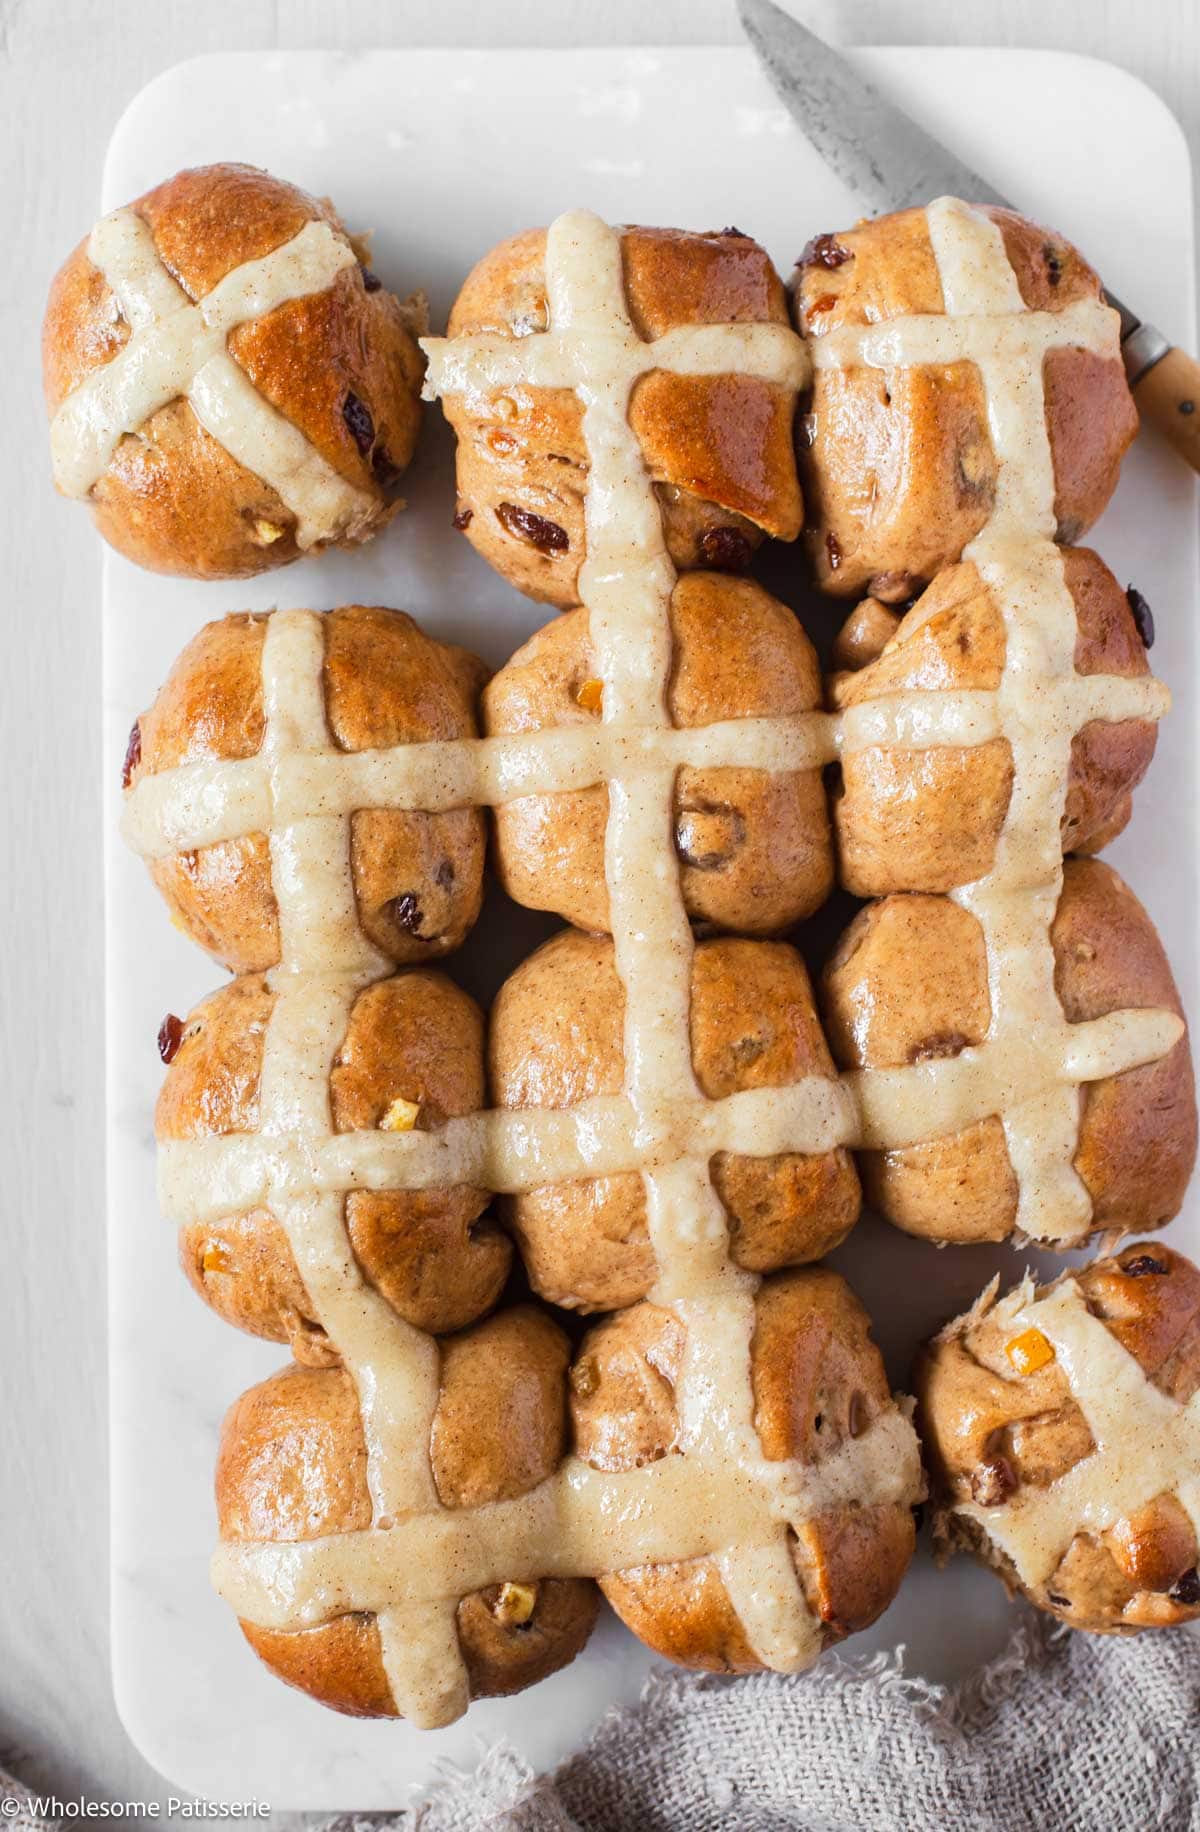
Soft, spiced, and dotted with fruit, these homemade Traditional Hot Cross Buns are the classic Easter treat you’ll bake year after year. A timeless Easter tradition, these sweet yeast buns are packed with sultanas, mixed peel, warm spices and finished with a glossy glaze and signature flour cross.
Whether you’re baking a batch for Easter brunch, gifting to loved ones, or simply craving a comforting, fruit-studded bun, this recipe will become a cherished favourite.
What Readers Are Saying
⭐️⭐️⭐️⭐️⭐️
“I’ve tried a few hot cross bun recipes over the years but this one is by far the best. The texture was spot on, soft and fluffy. I added a handful of raisins along with the sultanas and they turned out beautifully. My family asked if I could make another batch the next day! Thank you for the recipe!” – Kate

The Buns That Always Get Compliments.
There’s something magical about baking hot cross buns from scratch, the scent of cinnamon and allspice, the pillowy texture of freshly kneaded dough, and that moment when the glaze hits the warm buns straight from the oven.
I’ve made these traditional hot cross buns every year, and I’ll never go back to store-bought.
The flavour is richer, the texture softer, and they’re baked with love. Perfect for sharing, gifting or devouring warm with butter, delicious! Sam x
Why you’ll love this recipe
Nothing beats a homemade hot cross bun fresh from the oven. These are soft, fruity and full of Easter spice. They’re a timeless favorite worth making every year!
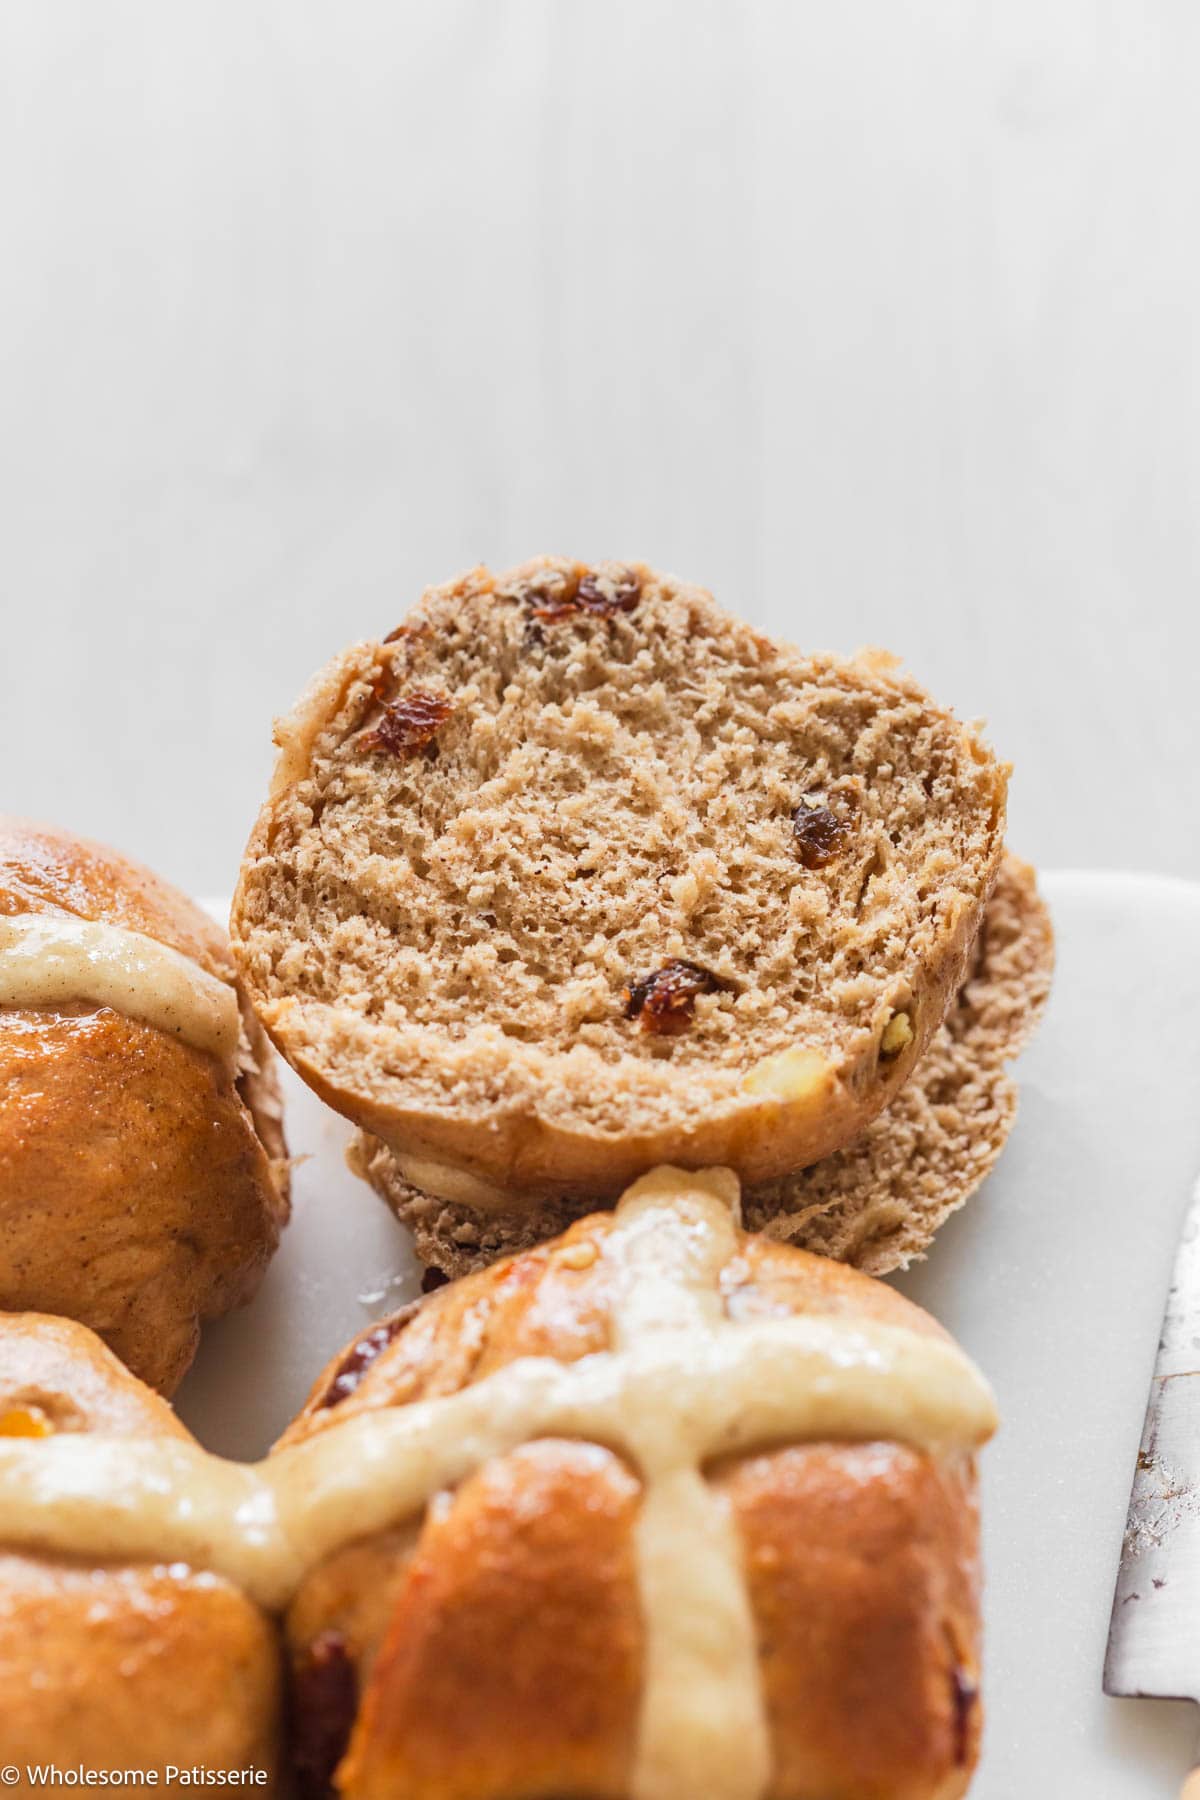
✔️ Soft, Pillowy Texture – Better than store-bought, every time.
✔️ Warm Easter Spices – Cinnamon and allspice make these buns sing.
✔️ Packed with Fruit – Dotted with sultanas and mixed peel in every bite.
✔️ Freezer Friendly – Perfect for making ahead and enjoying later.
✔️ A Classic Tradition – A beloved Easter recipe that never goes out of style.
They smell amazing, taste even better, and always impress, it’s easy to see why these buns get requested again and again!
Can I add other dried fruit to the hot cross buns?
Yes! You can absolutely customize this traditional hot cross bun recipe with your favorite dried fruits. While sultanas and mixed peel are the classic combination, you can also try adding currants, raisins, cranberries, or even chopped dried apricots. This makes your homemade Easter hot cross buns even more flavorful and unique.
Why didn’t my hot cross buns rise?
If your hot cross buns didn’t rise, the most common issue is inactive yeast, always check that it’s fresh and hasn’t expired. Yeast that’s been exposed to air, moisture, or heat can lose its strength.
Also, enriched doughs (with butter, eggs, and sugar) naturally take longer to rise, so give it time to double in size. Make sure your dough is in a warm, draft-free spot to encourage proper proofing.
Lastly, under-kneading can prevent the dough from developing enough gluten to hold structure, aim for a smooth, elastic dough after about 8 minutes of kneading.
Why are my hot cross buns dense?
Dense hot cross buns can happen if the dough is too dry or overworked. This dough should be soft and slightly sticky, so try not to add too much extra flour during kneading.
Knead until smooth and elastic, then let the dough rise fully until doubled, underproofing can also lead to heavy buns. Finally, shape the buns gently to keep them airy.
Can I make hot cross buns in advance?
Yes, hot cross bun dough can typically be made ahead and refrigerated after the first rise. The next day, bring it to room temperature, shape, and let the buns complete their second rise before baking. While I haven’t tested this specific recipe with an overnight rest, many bakers find it enhances the flavour and offers convenience for Easter morning.
Expert tips
- Proofing is key – Use fresh yeast and let your dough rise in a warm, draft-free place until doubled in size. Don’t rush this step.
- Don’t over-knead – Knead just until the dough is smooth and elastic, about 8 minutes. Over-kneading can result in dense, tough buns.
- Weigh for even buns – For consistent size and even baking, weigh your dough and divide it equally before shaping into buns.
- Neat crosses – For clean crosses, pipe the flour paste using a piping bag with a small round tip or a zip-lock bag with the corner snipped off.
- Glaze while warm – Brush the glaze on the buns as soon as they come out of the oven for a glossy finish and slight sweetness.
How to store homemade hot cross buns
Room Temperature: Store cooled hot cross buns in an airtight container at room temperature for up to 2 days. Best enjoyed fresh or gently warmed.
Refrigerator: For slightly longer storage, refrigerate in an airtight container for up to 5 days. Reheat in the microwave or a low oven to soften before serving.
Freezer: To freeze, place completely cooled buns on a baking sheet until firm, then transfer to a freezer-safe bag or container. Freeze for up to 3 months.
To Thaw: Defrost overnight at room temperature or reheat from frozen in a low oven until soft and warmed through.
Best Easter recipes
If you enjoy this recipe, please consider leaving a ⭐️ star rating and a comment review below. I love to hear what you think and it’s much appreciated. Thank you! Your email address will not be published. Sam x

Traditional Hot Cross Buns
Ingredients
Method
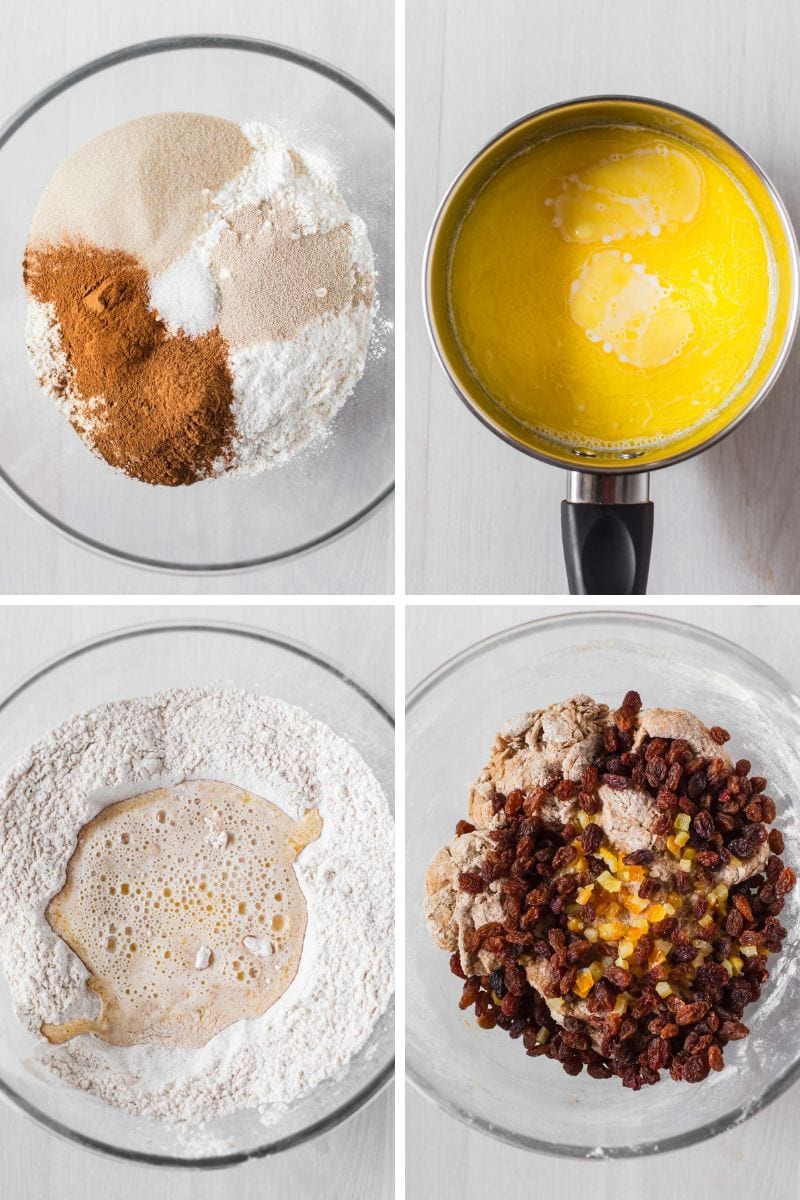
- Mix Dry Ingredients: In a large mixing bowl, combine flour, yeast, sugar, mixed spice, cinnamon, and salt.
- Warm Milk & Butter: Heat milk and butter in a small saucepan until warm to the touch, do not let any bubbles form. Test with a finger; it should be warm, not hot.
- Combine Wet & Dry: Make a well in the dry ingredients. Pour in the milk mixture and the whisked egg. Stir with a wooden spoon or rubber spatula to form a dough.
- Add Fruits: Mix in the sultanas and mixed peel with your hands.
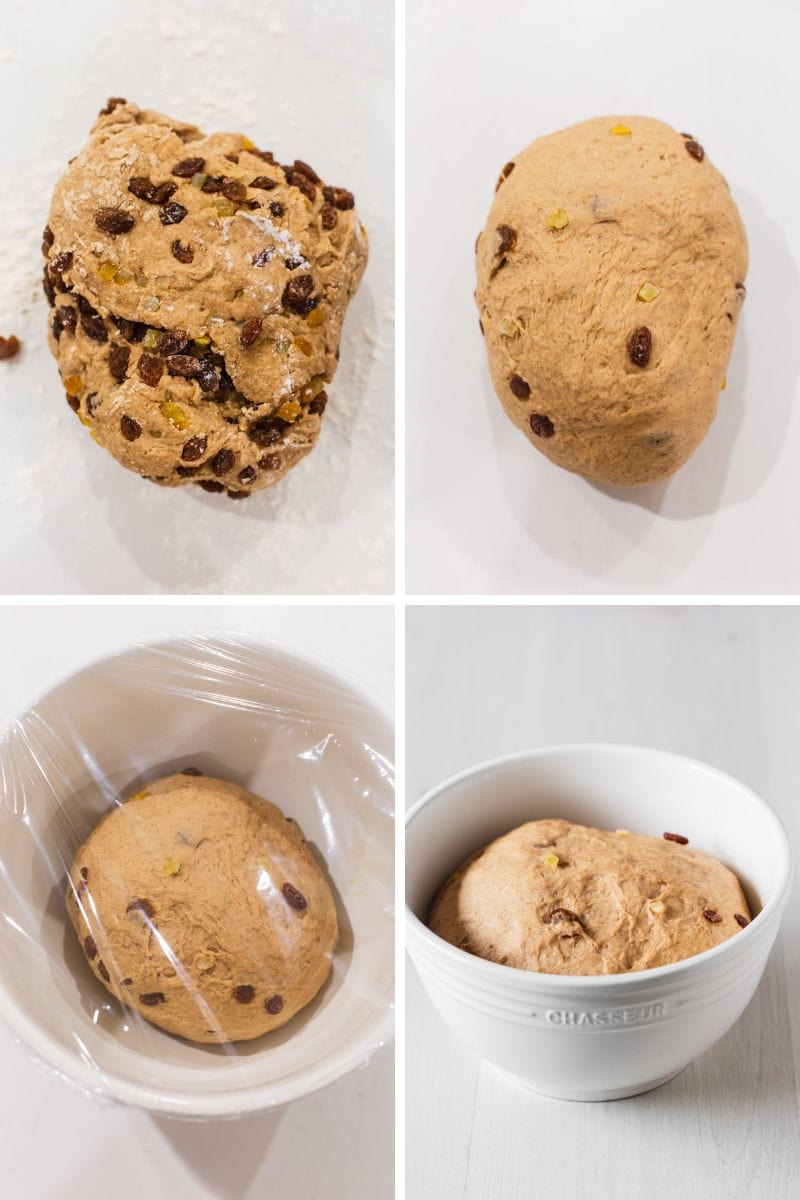
- Knead: Turn the dough out onto a lightly floured surface. Knead with your hands for 8 minutes until smooth and elastic.
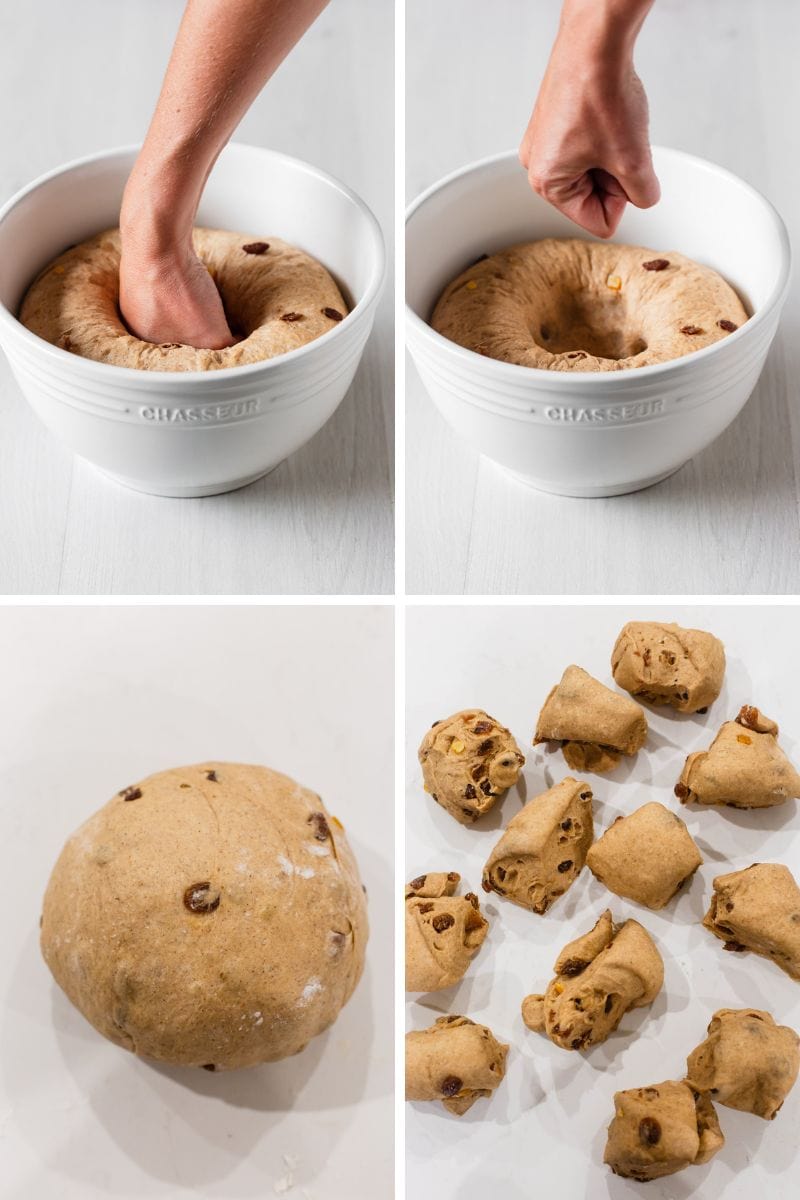
- First Rise: Grease a large bowl with cooking spray or lightly oil a paper towel and wipe the bowl's interior to prevent sticking. Place the dough in the bowl, cover, and let it rise in a warm spot for 1 hour and 15 minutes until doubled.
- Line Tray: Line a 9×13 (23cmx33cm) oven tray with parchment paper and set aside.
- Punch & Knead: Punch down the dough with your fist then transfer it to a lightly floured surface knead lightly to bring it together.
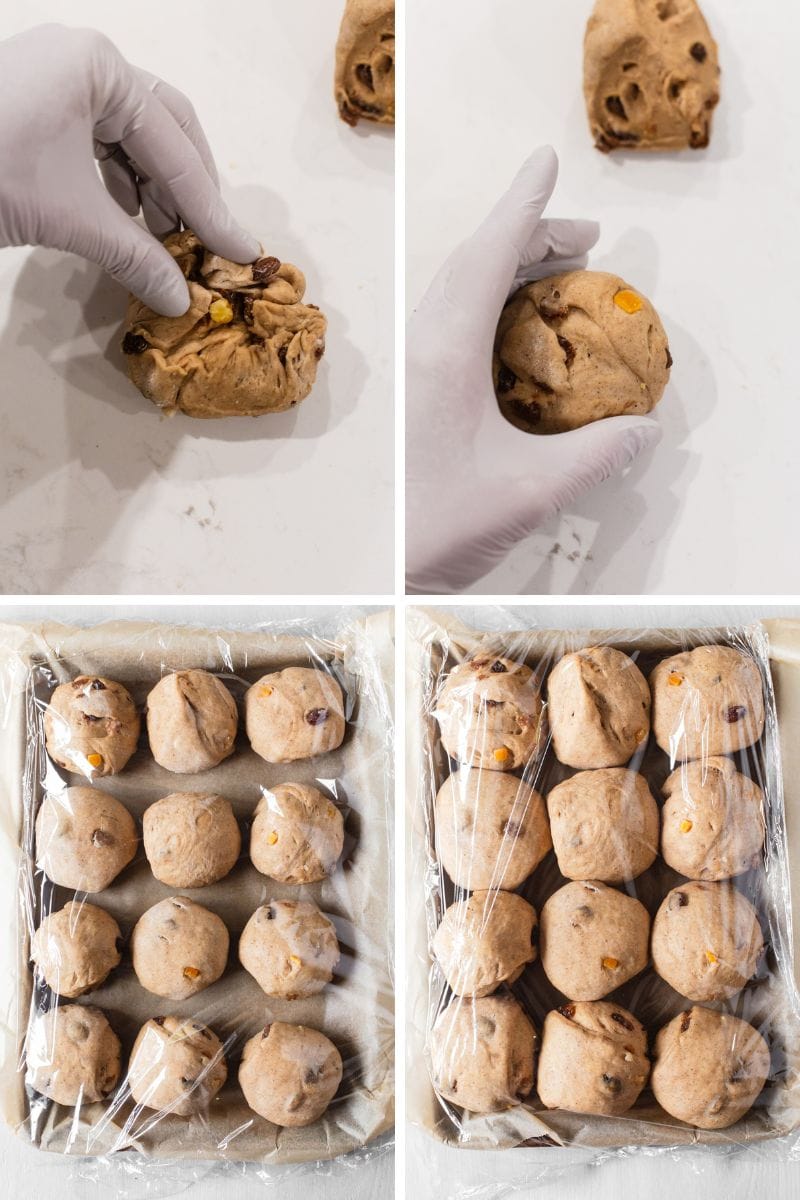
- Divide Dough & Form: Weigh entire dough and divide by 12 to get equal pieces. Roll each part into a smooth bun.
- Let Rise: Arrange buns on the lined tray in 4 rows of 3, slightly touching. Cover with plastic wrap and place in a warm spot for 45 minutes until risen and slightly increased in size.
- Preheat Oven: To 350ºF (180ºC) fan-forced.
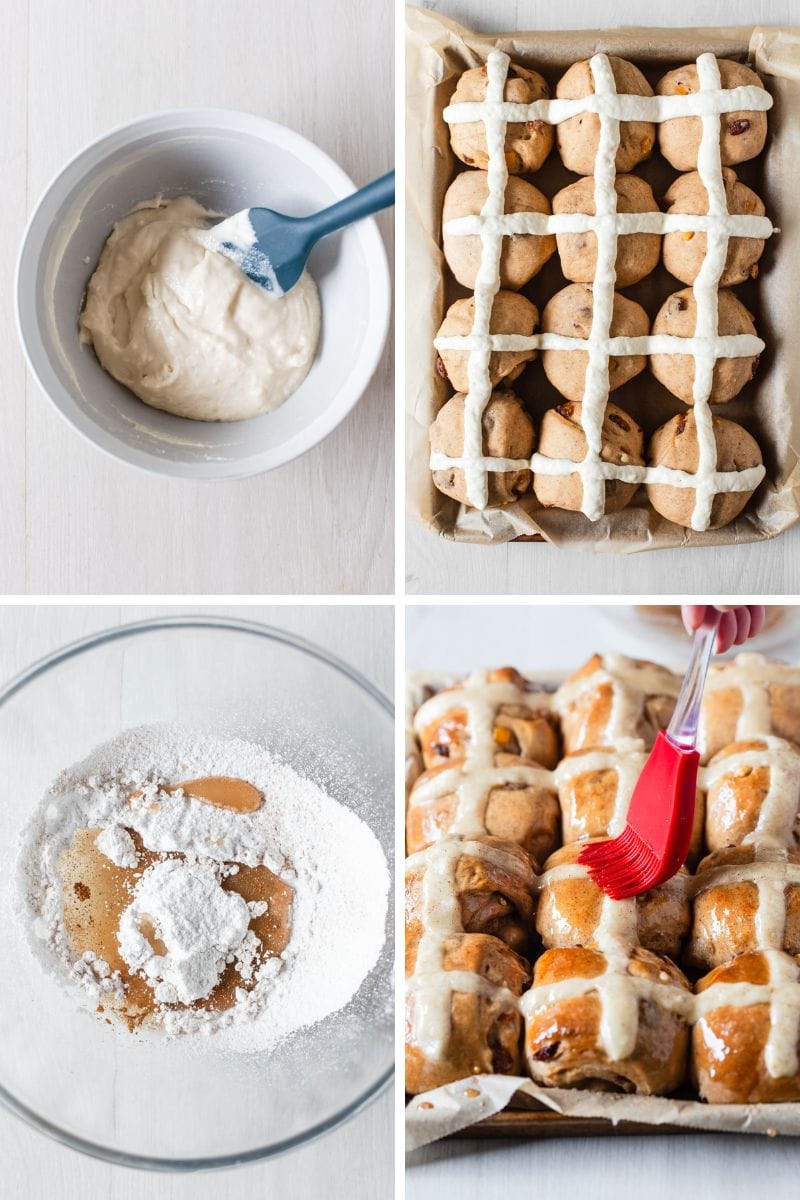
- Make Paste: In a small mixing bowl, mix the flour and water to a thick paste. Fill a piping bag.
- Pipe Crosses: Fill a piping bag fitted with a small round tip or a plastic zip-lock bag, snipping one corner to pipe. Pipe the crosses onto risen buns.
- Bake: Bake buns for 20-22 minutes until golden. The buns in the middle may be lighter in colour, this is ok, you don’t want them overcooked. While buns are baking, make the glaze to brush it over as soon as they come out of the oven.
- Mix Glaze: In a mixing bowl, sift together the icing sugar, cinnamon and all spice. Pour in the water and whisk until well combined. It will be thin in consisceintcy.
- Remove Buns & Brush: Once the buns are golden, remove from the oven. Brush the glaze over the warm buns.
- Cool & Serve: Transfer the hot cross buns to a wire rack, removing the parchment paper. Allow the buns to cool slightly, then serve warm with butter or cool completely on the wire rack. Enjoy!