Homemade Bounty Bars (Mounds Bars)
With only 5 ingredients you can make Bounty Bars at home! They have a soft and lightly sweetened coconut filling coated in melted dark chocolate.
As an easy slice recipe, these homemade bounty bars, aka mounds bars, are fancy enough to serve as dessert for guests at a dinner party or as a crowd-pleasing Super Bowl Dessert!
Like my Cherry Ripe Bites, making homemade chocolate candy bars is so simple and they make the perfect sweet treat.
🍫 Why You Will Love This Recipe
- DIY mounds candy bars aka bounty bars.
- Only 5 ingredients.
- Can be made dairy-free.
- Made without condensed milk.
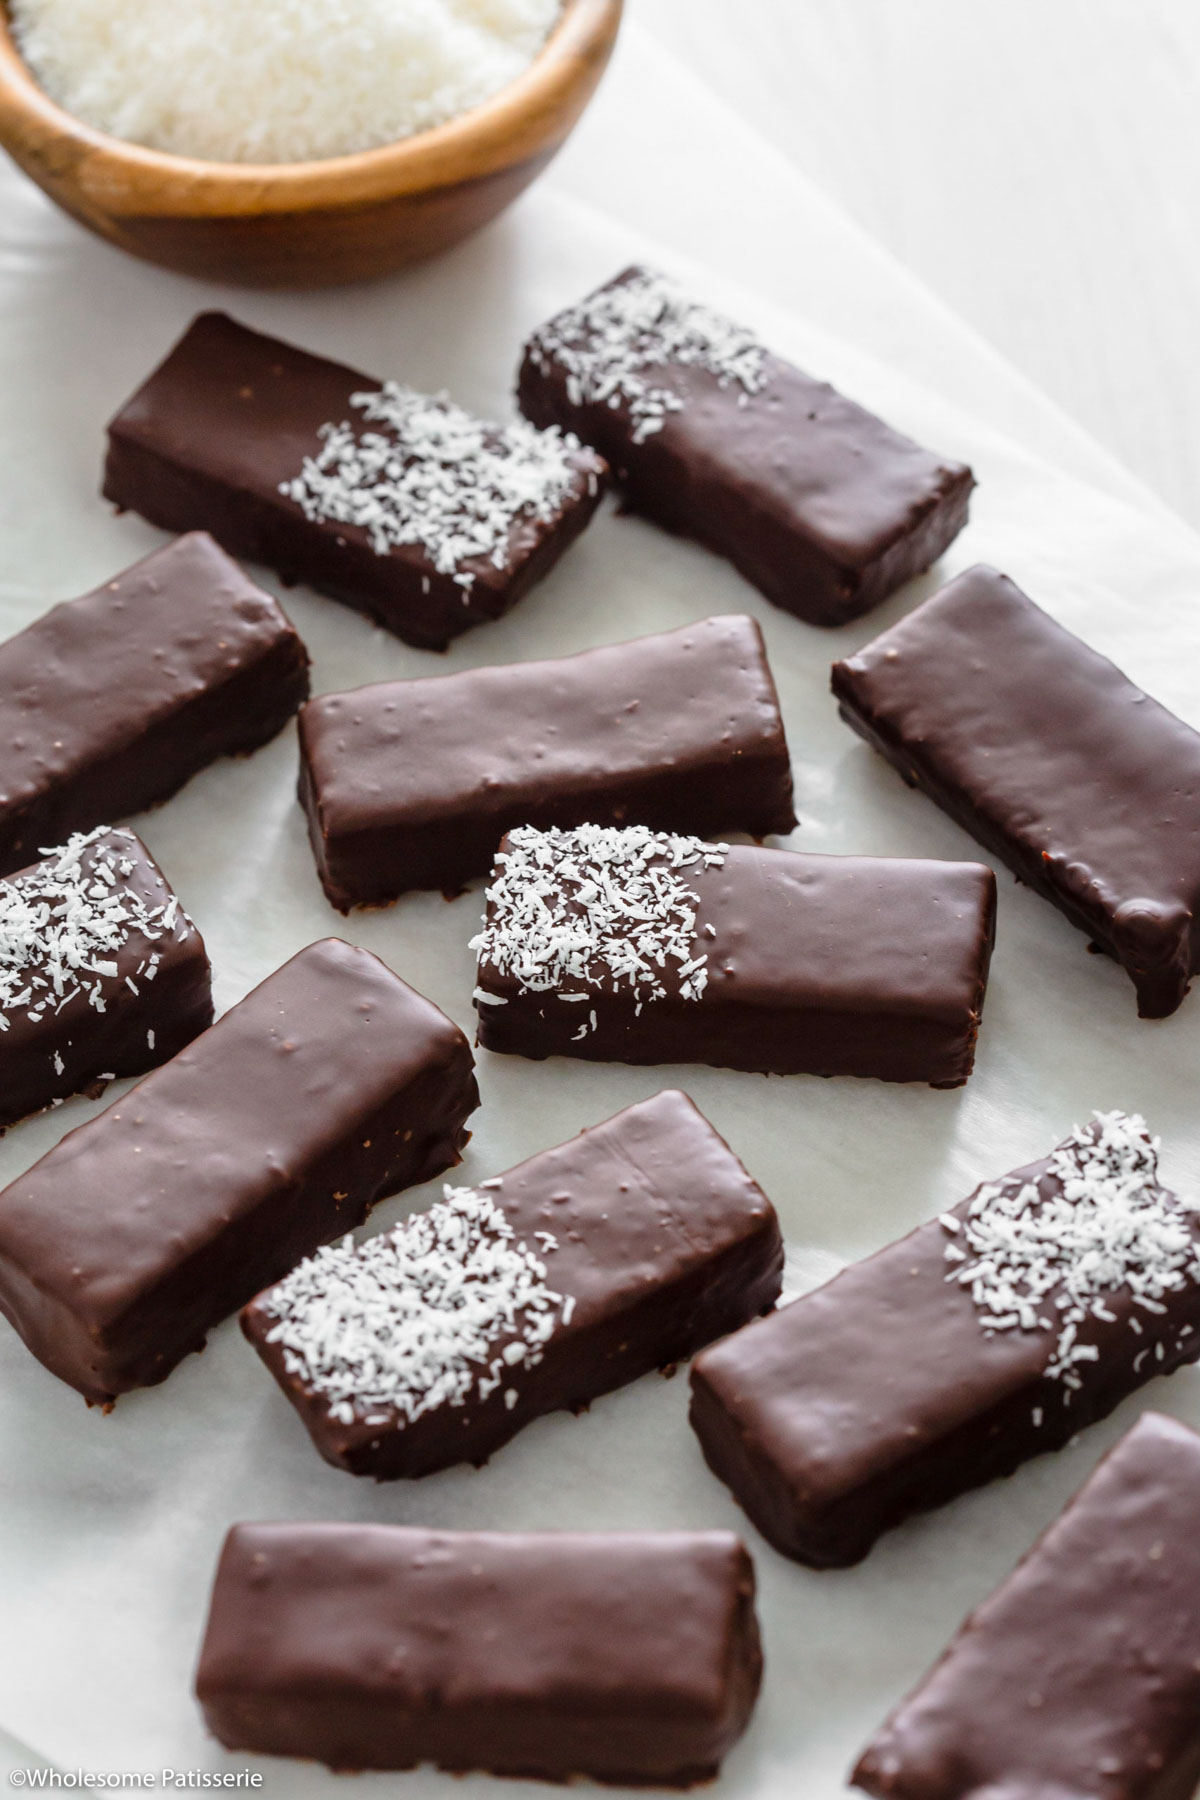
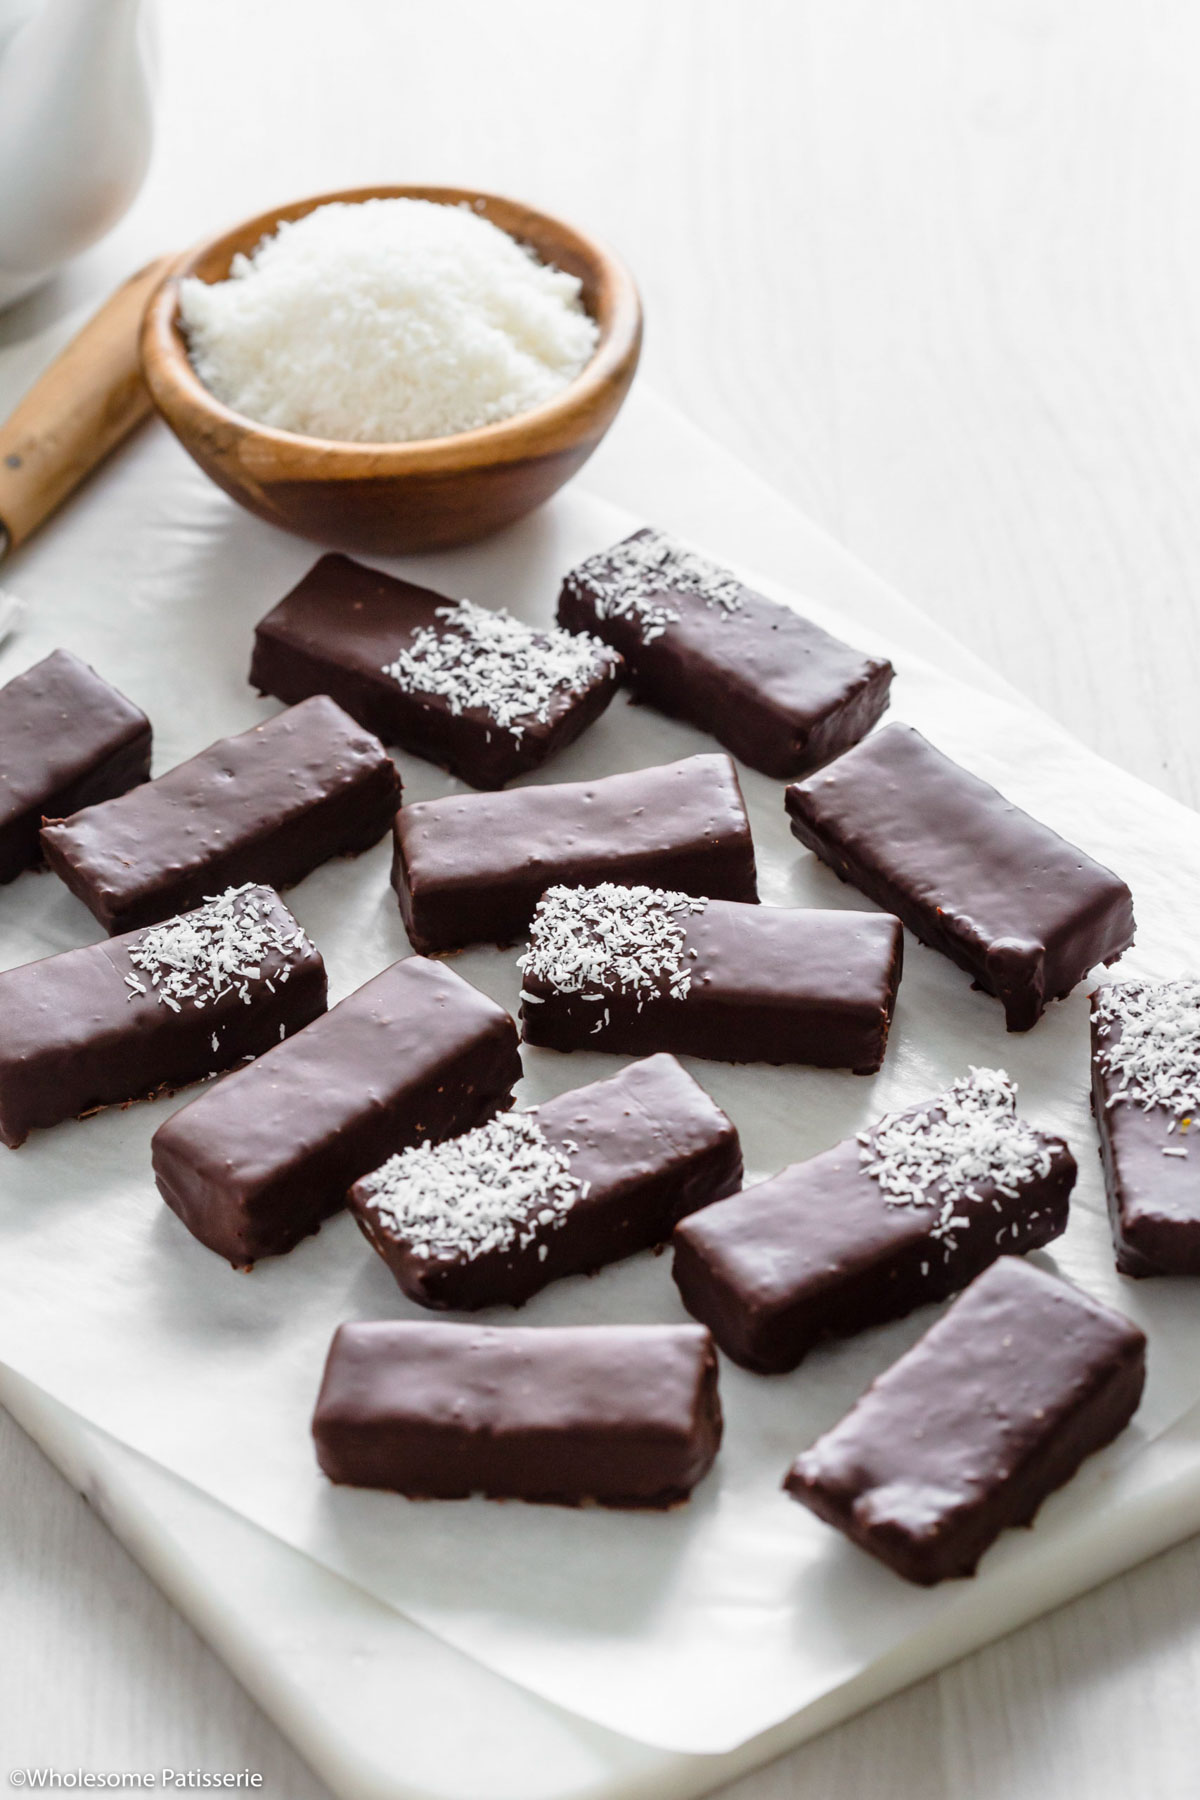
Bounty Bars and Mounds Bars are basically the same candy bar. For example, those in Australia know them as Bounty and those in the US love them as Mounds.
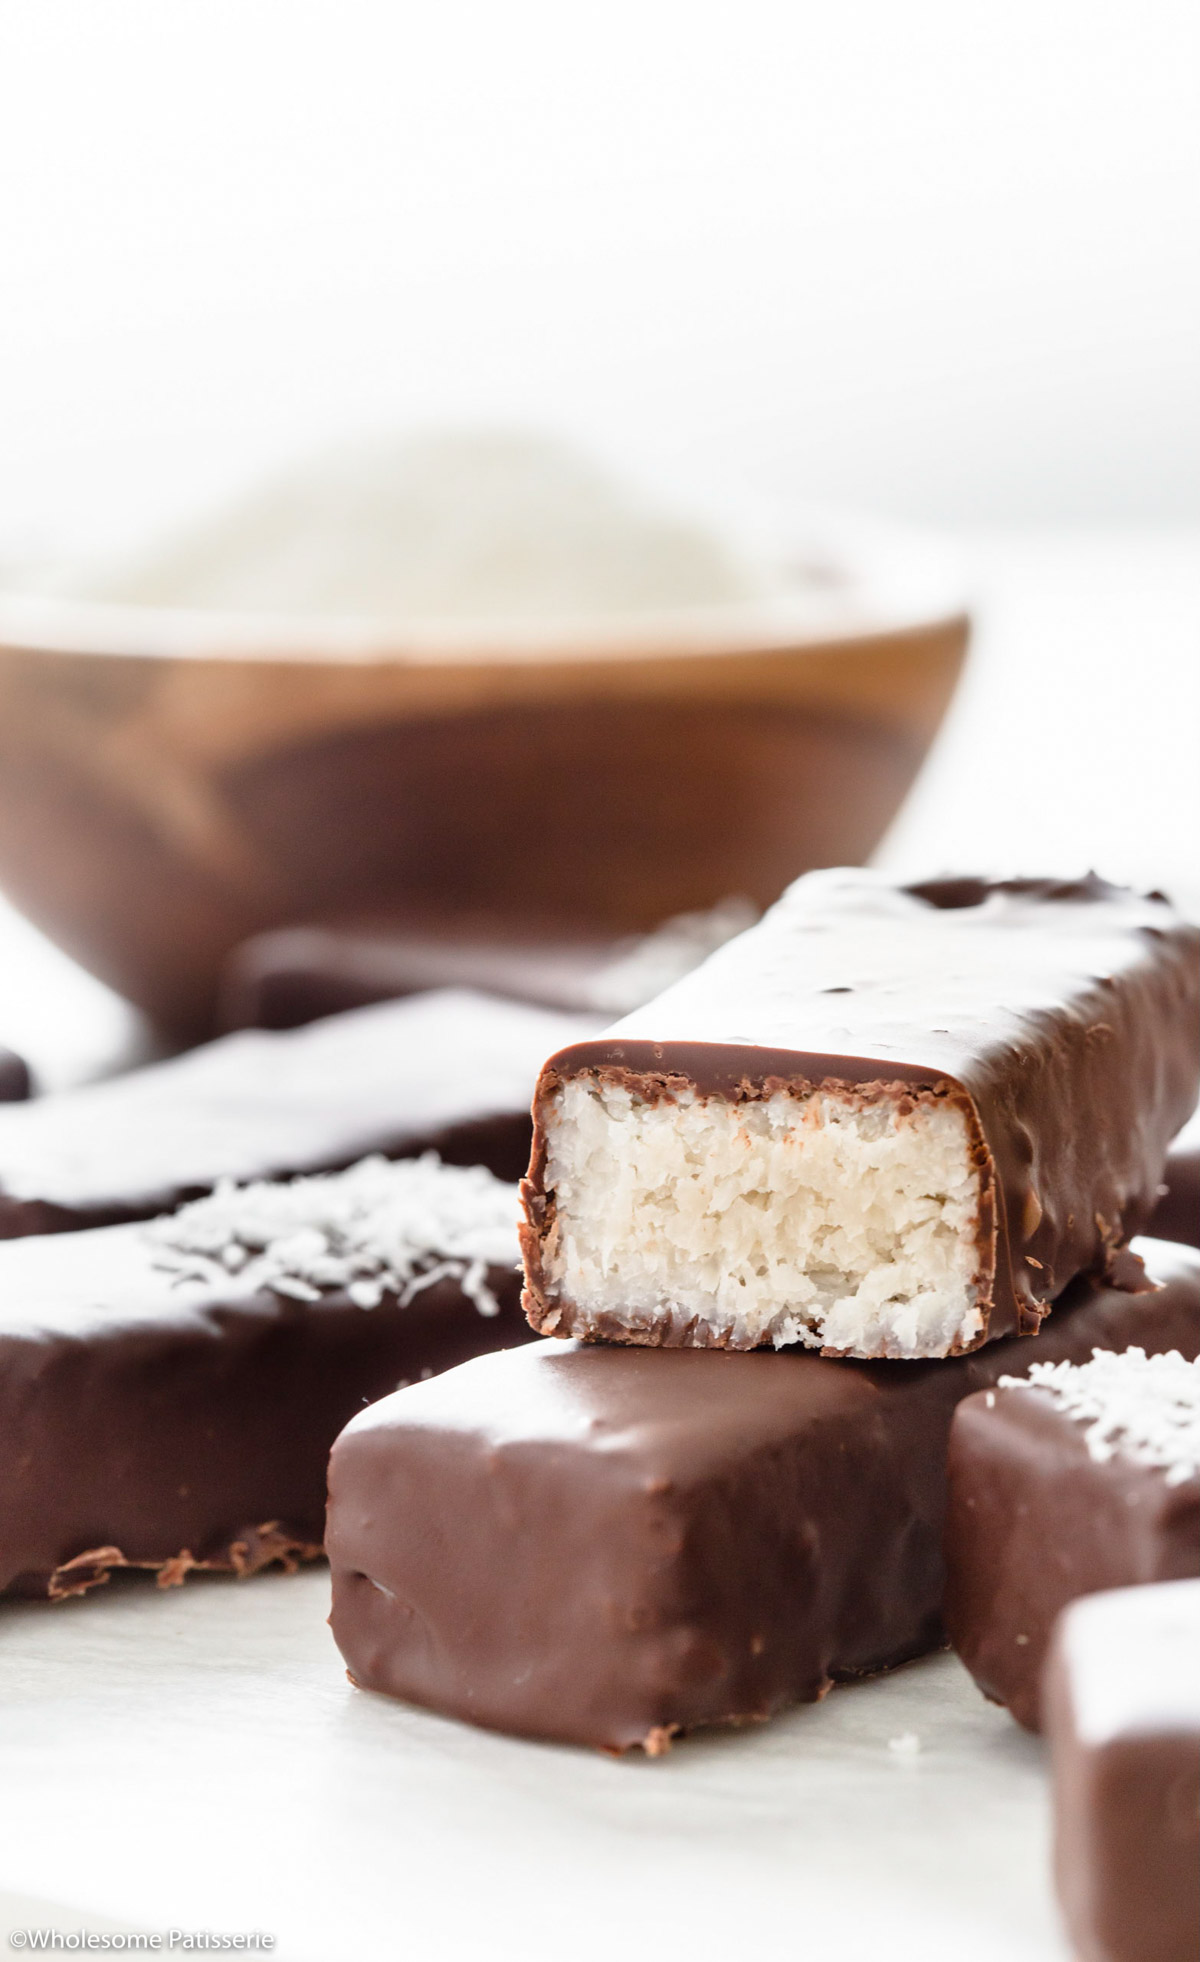
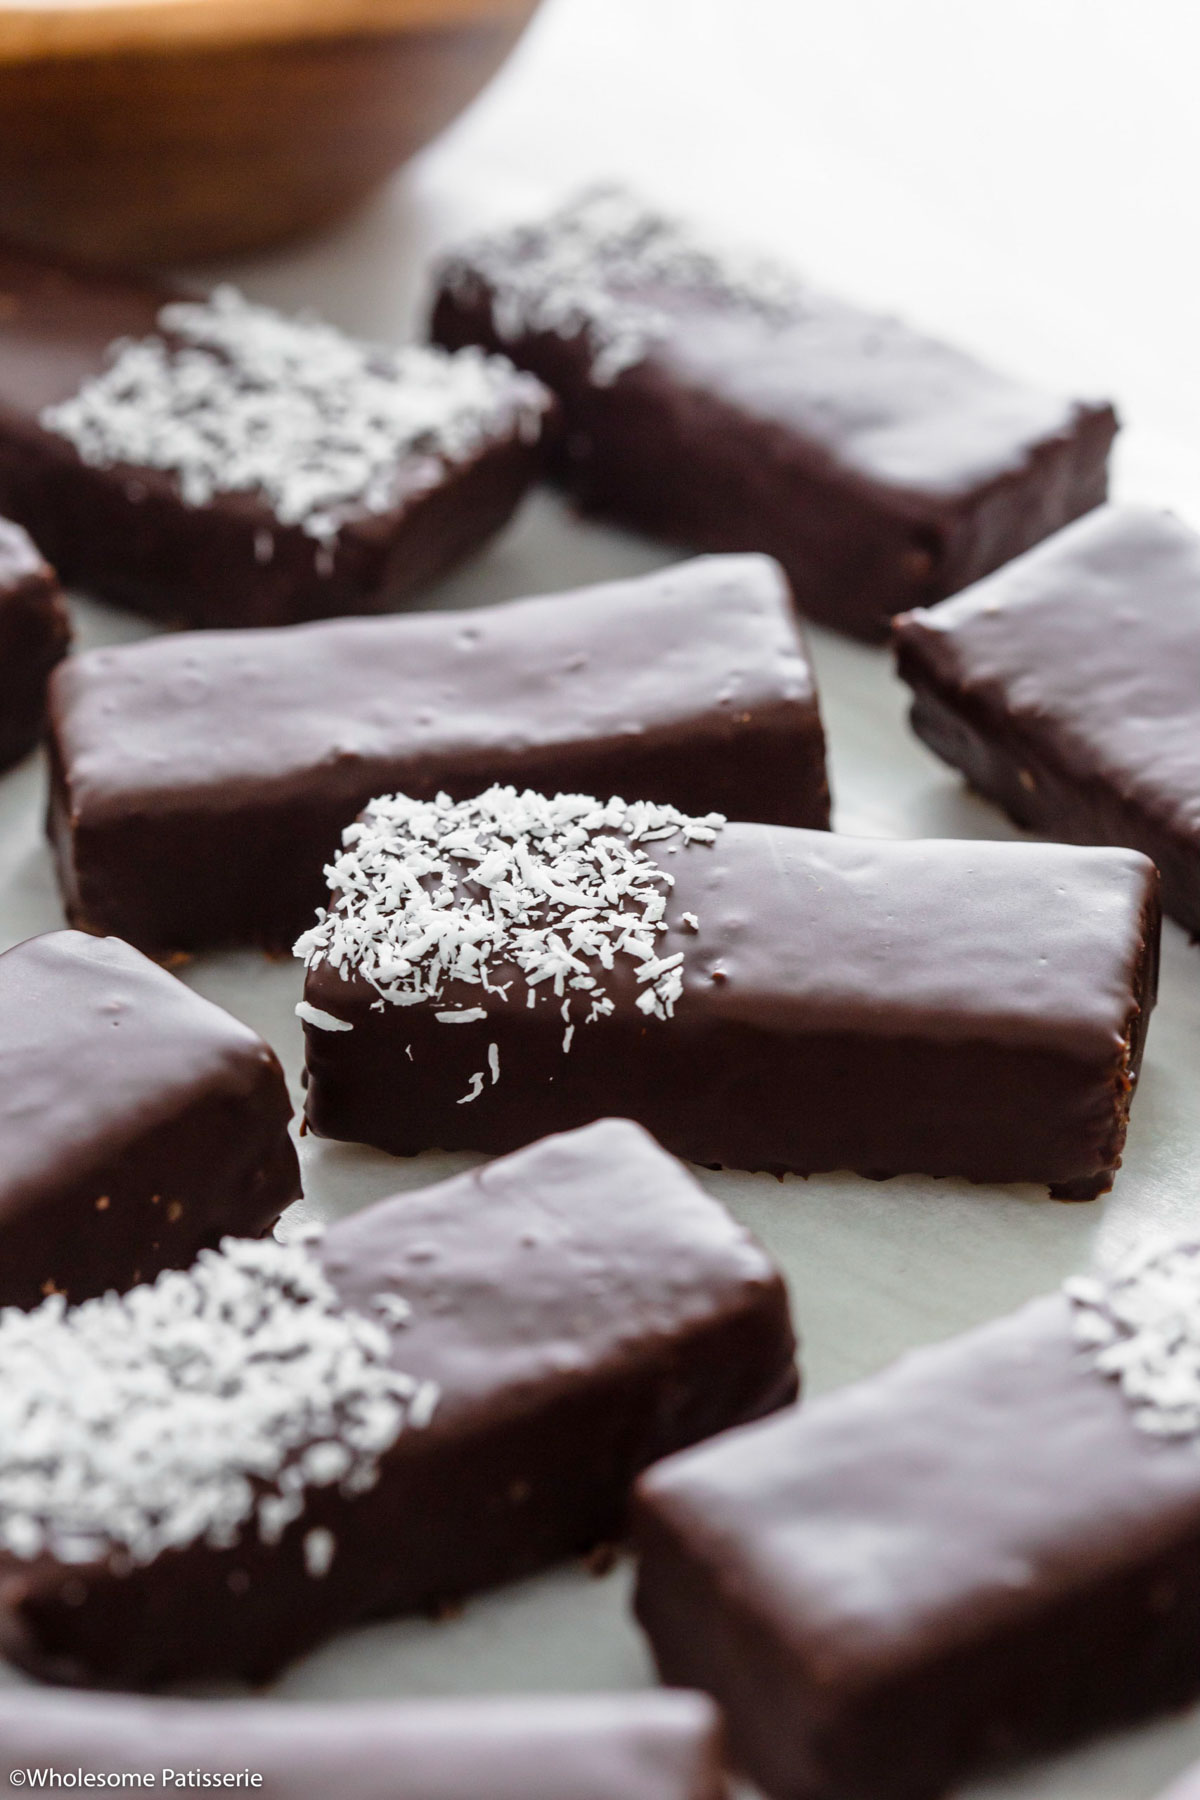
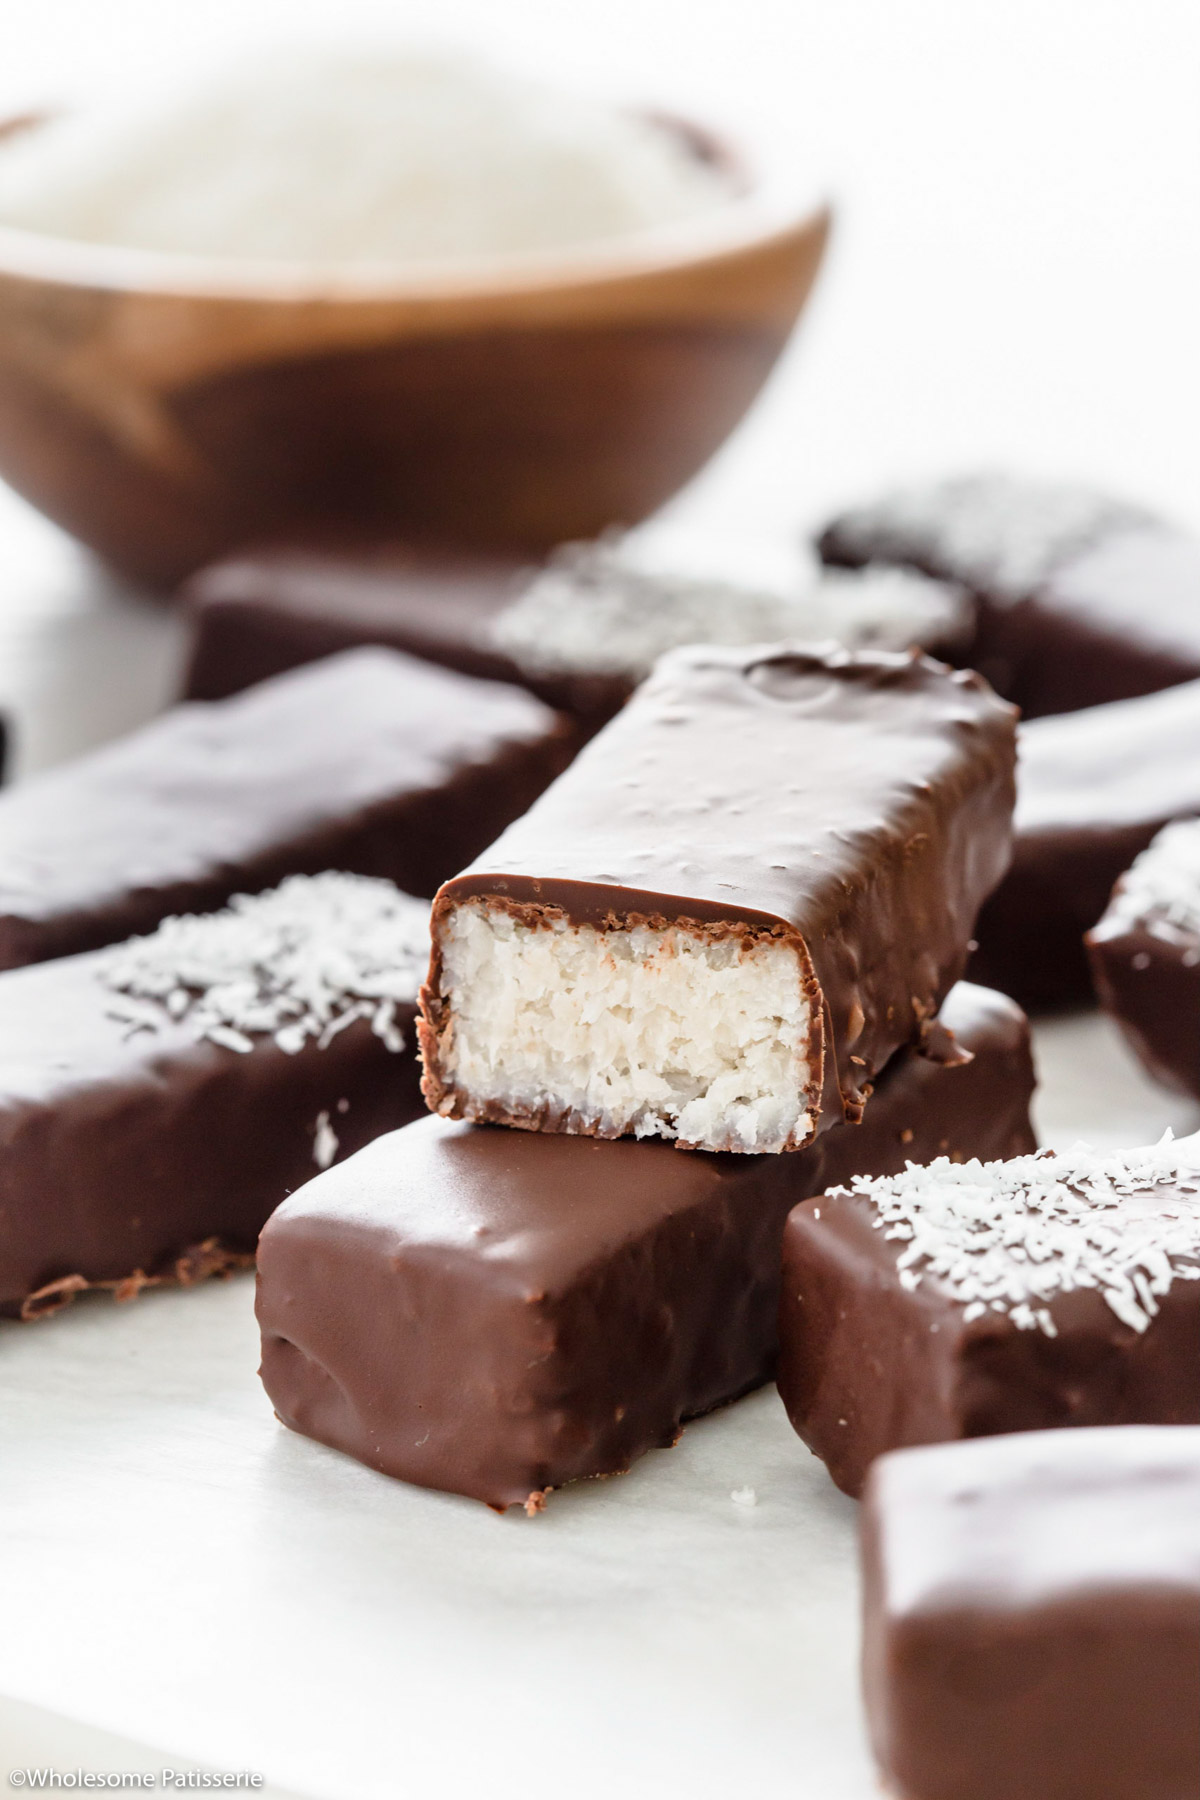
They’re long rectangular bars or ‘mounds’ that consist of a soft sweetened coconut filling which is then coated in melted dark chocolate.
Having a recipe for homemade mounds bars allows you to know the exact ingredients in your candy bar. Chocolate and coconut mostly, just like these chocolate coconut bars!
As you know, the kids LOVE mounds bars, as well as these Kid Friendly Rum Balls. Having both of these on rotation in the house will make everyone happy!
Keeping delicious homemade snacks on hand is perfect for your dessert sweet tooth and to share with loved ones when they pop over.
🥥 Ingredient Notes & Substitutions
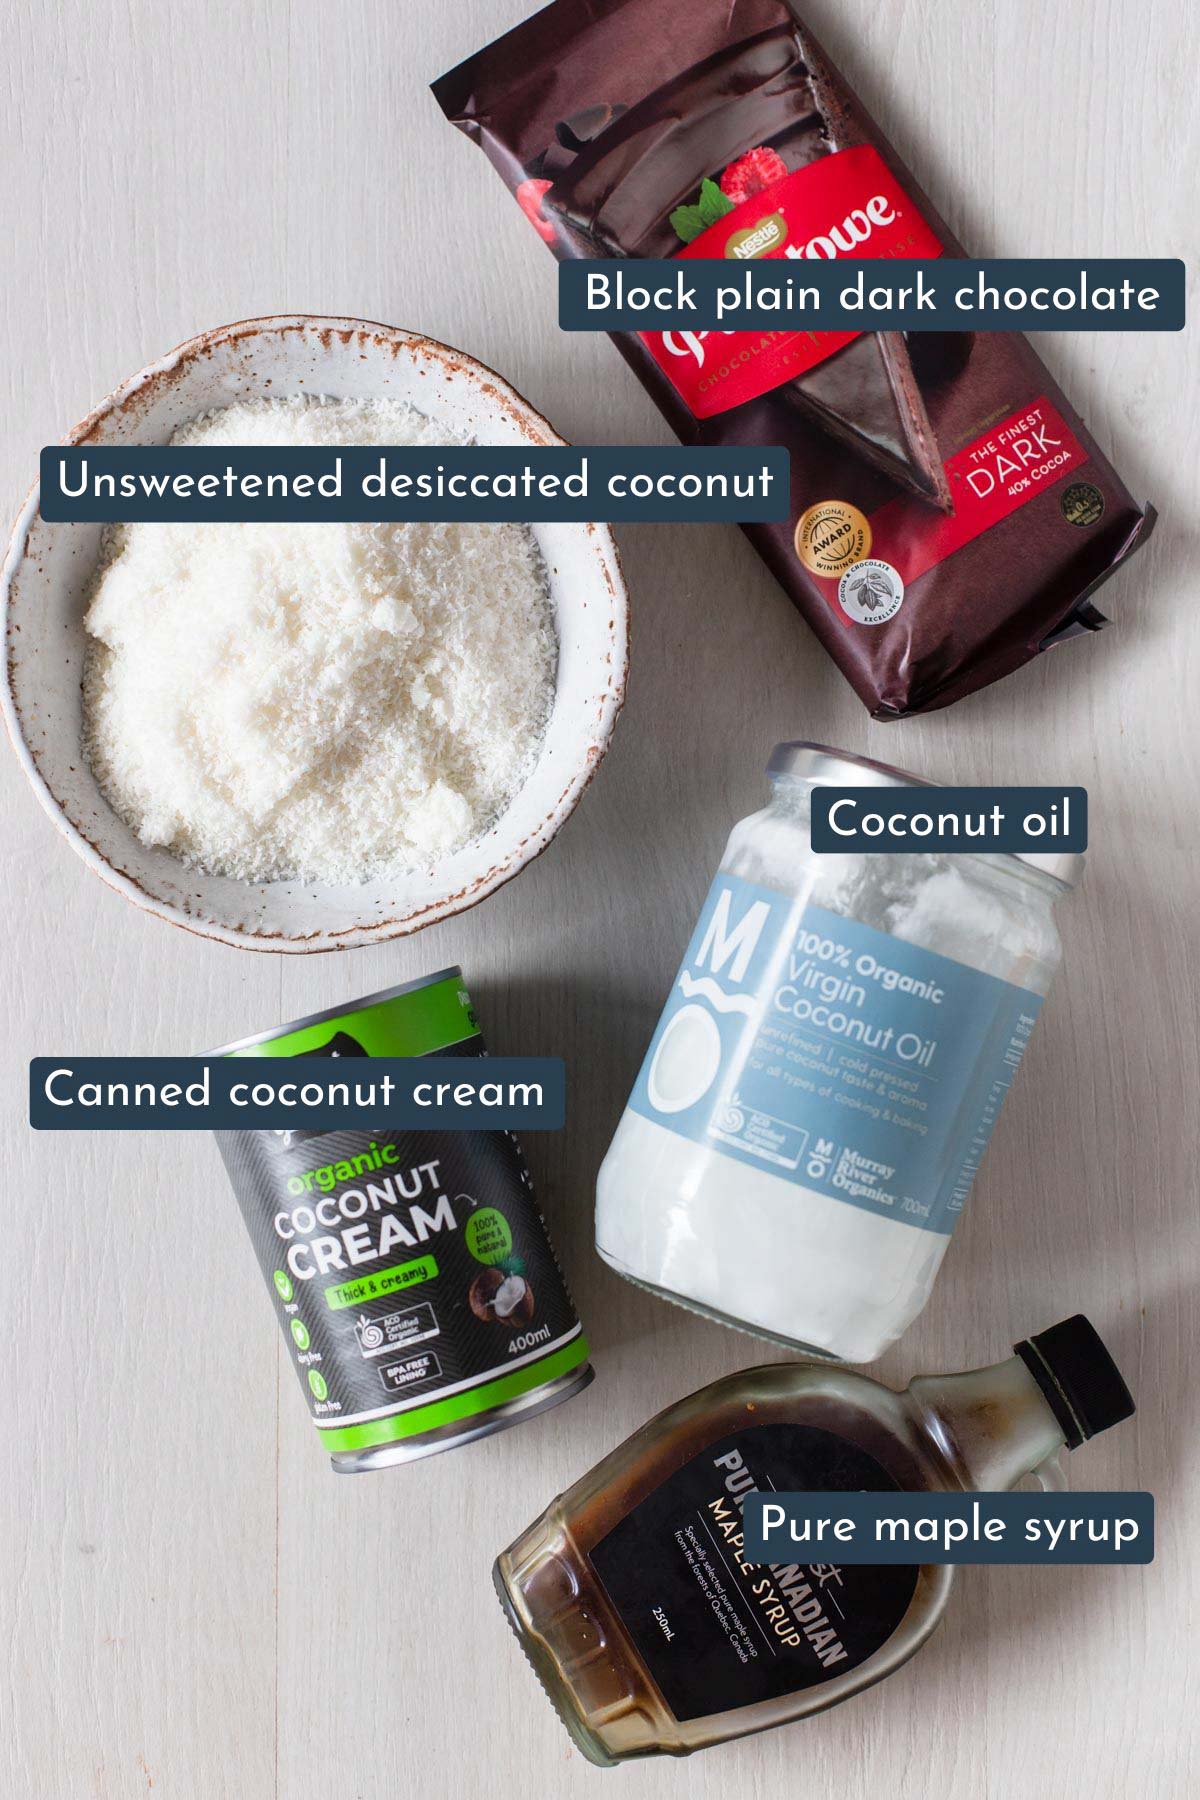
- Desiccated coconut – use unsweetened desiccated coconut. Try substituting with unsweetened shredded coconut if you don’t have desiccated.
- Canned coconut cream – scoop out and use only the solid cream at the top of the can and discard the liquid underneath or add to smoothies.
- Coconut oil – do not substitute as it helps the coconut filling stick together when chilled.
- Pure maple syrup – try and use pure maple syrup without added sweeteners.
- Block plain dark chocolate – any block over 40% cocoa such as 60% or 80% cocoa. Try substituting it with milk chocolate if desired, although I have not tested it.
🥣 Step By Step Instructions (with photos)
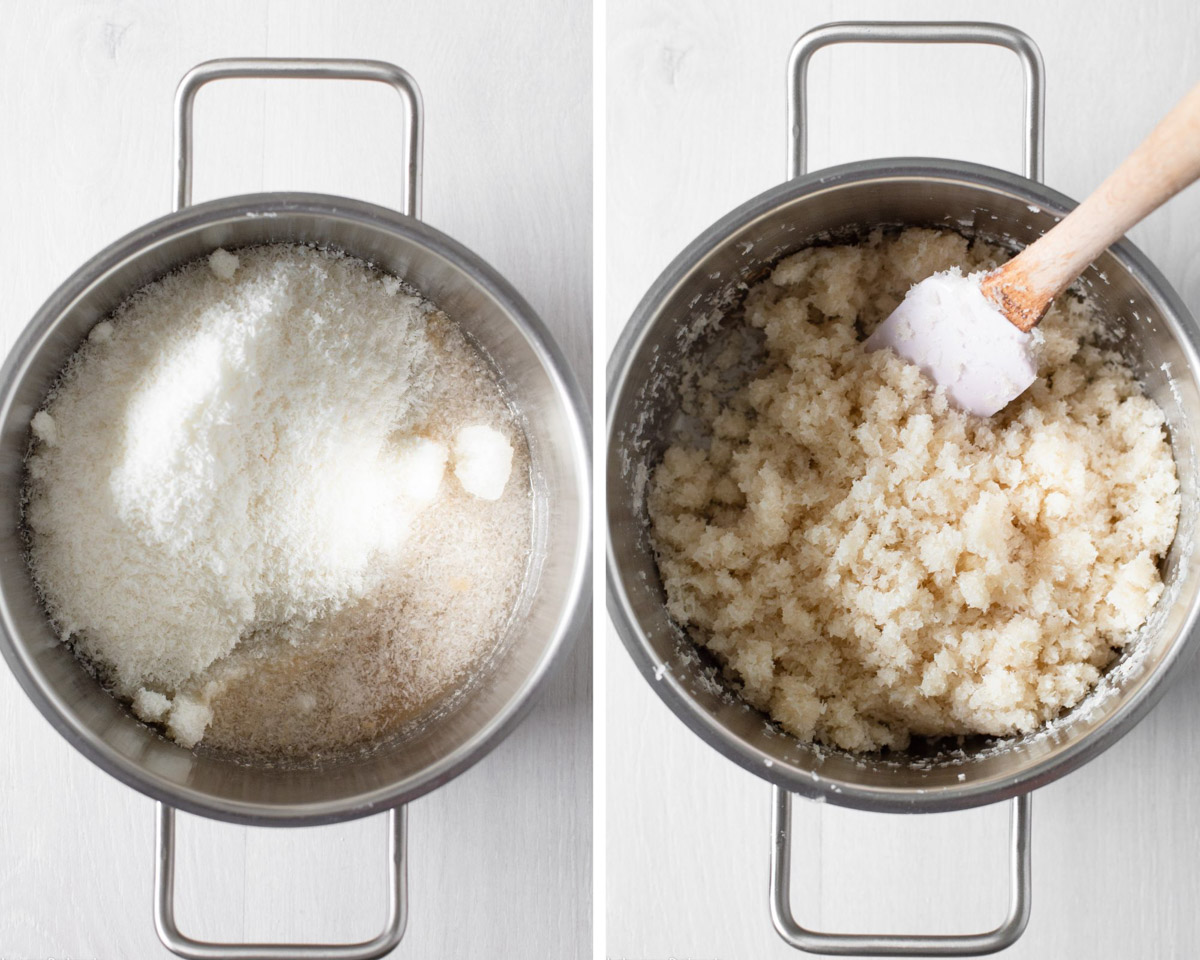
Step one: In a medium-sized pot, add desiccated coconut, coconut cream solids, coconut oil, and maple syrup.
Step two: Once the mixture is warmed through, continue to cook over medium-low heat for 1 minute and 30 seconds, mixing continually, ensuring it doesn’t stick or burn on the base. Turn off the heat.
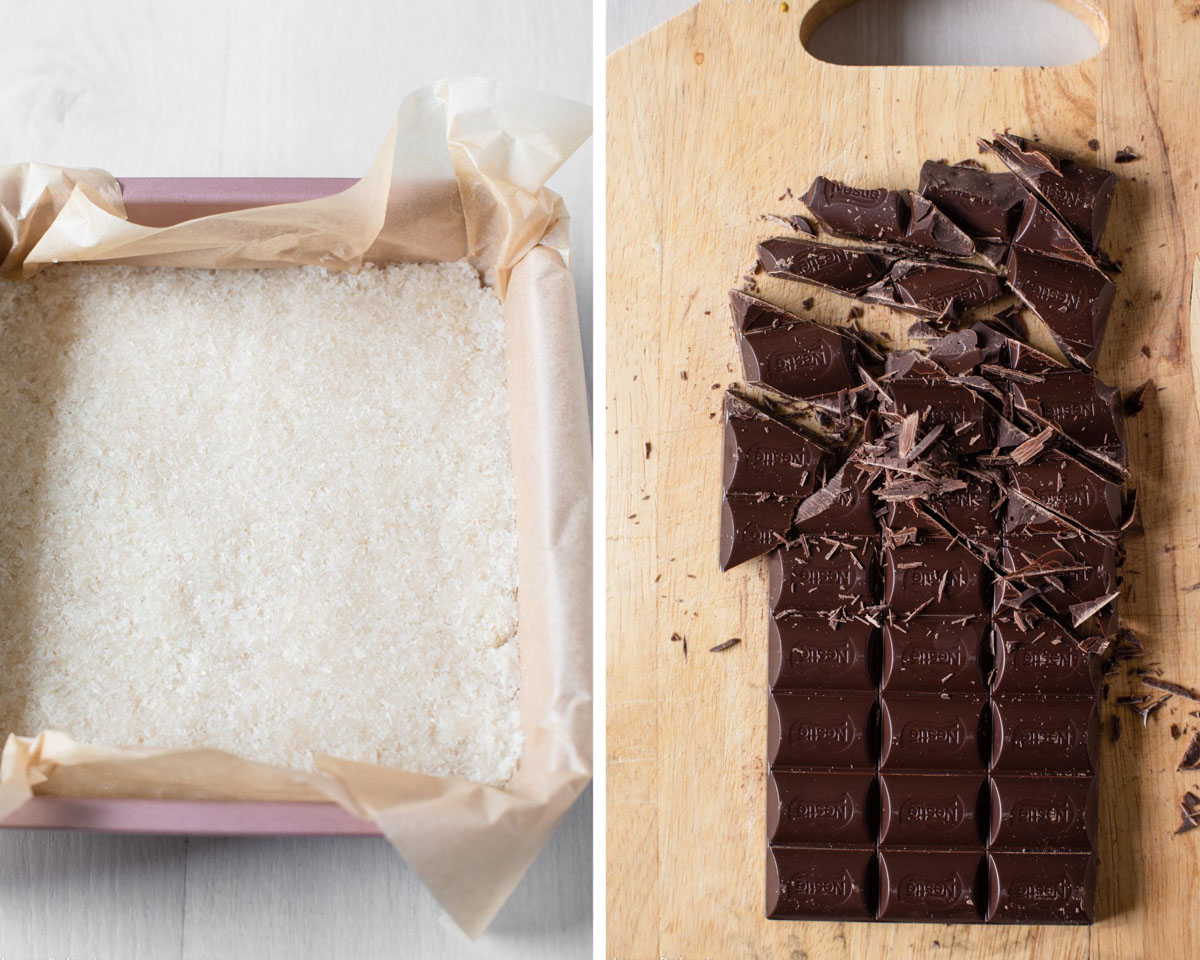
Step three: Pour the mixture into the lined tin and press it in firmly using a rubber spatula, wooden spoon, or your hands. Make sure the top is evened out. Freeze for 1 hour or until solid.
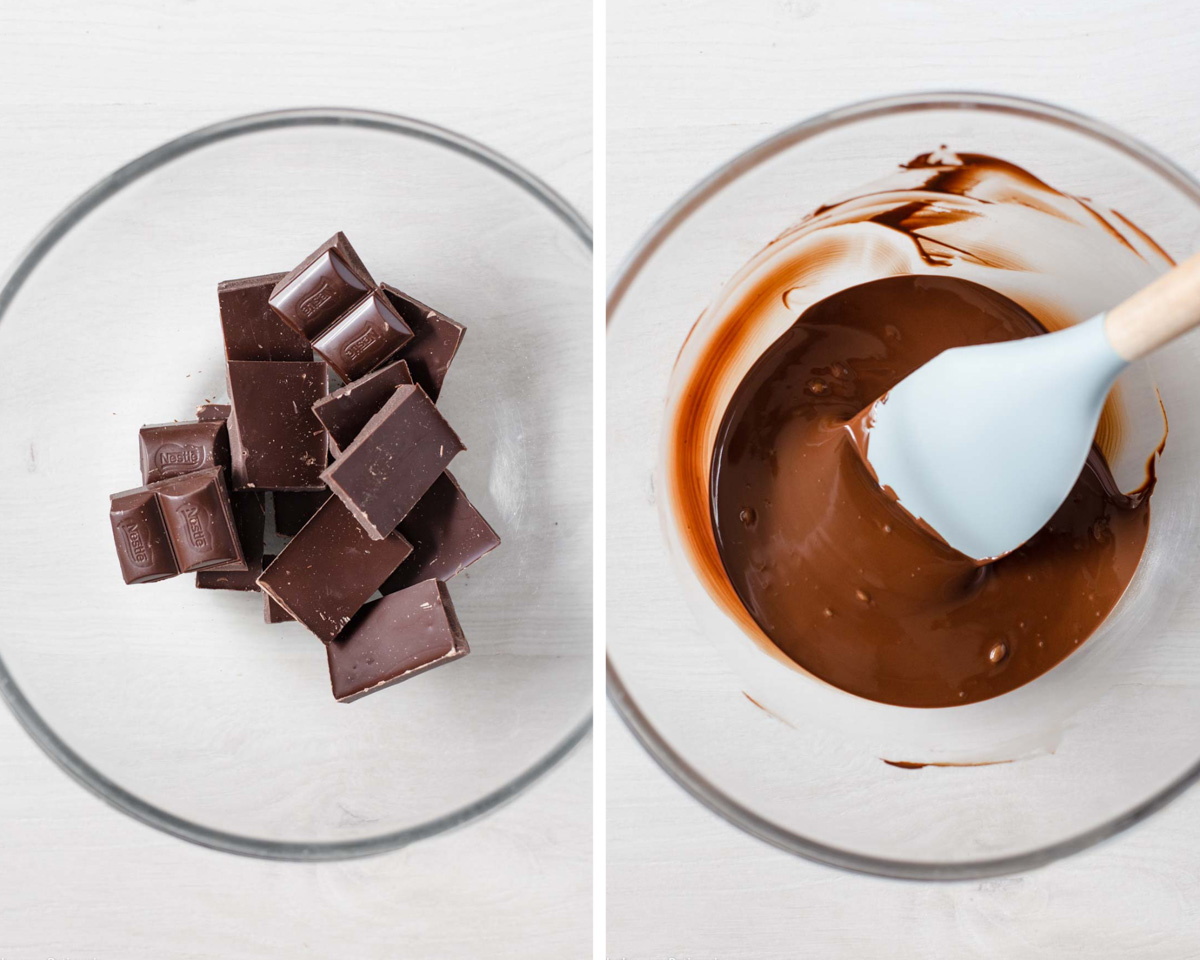
Step four: Melt chocolate in a double boiler over low-medium heat until melted and smooth. Set aside while you cut up the coconut filling.
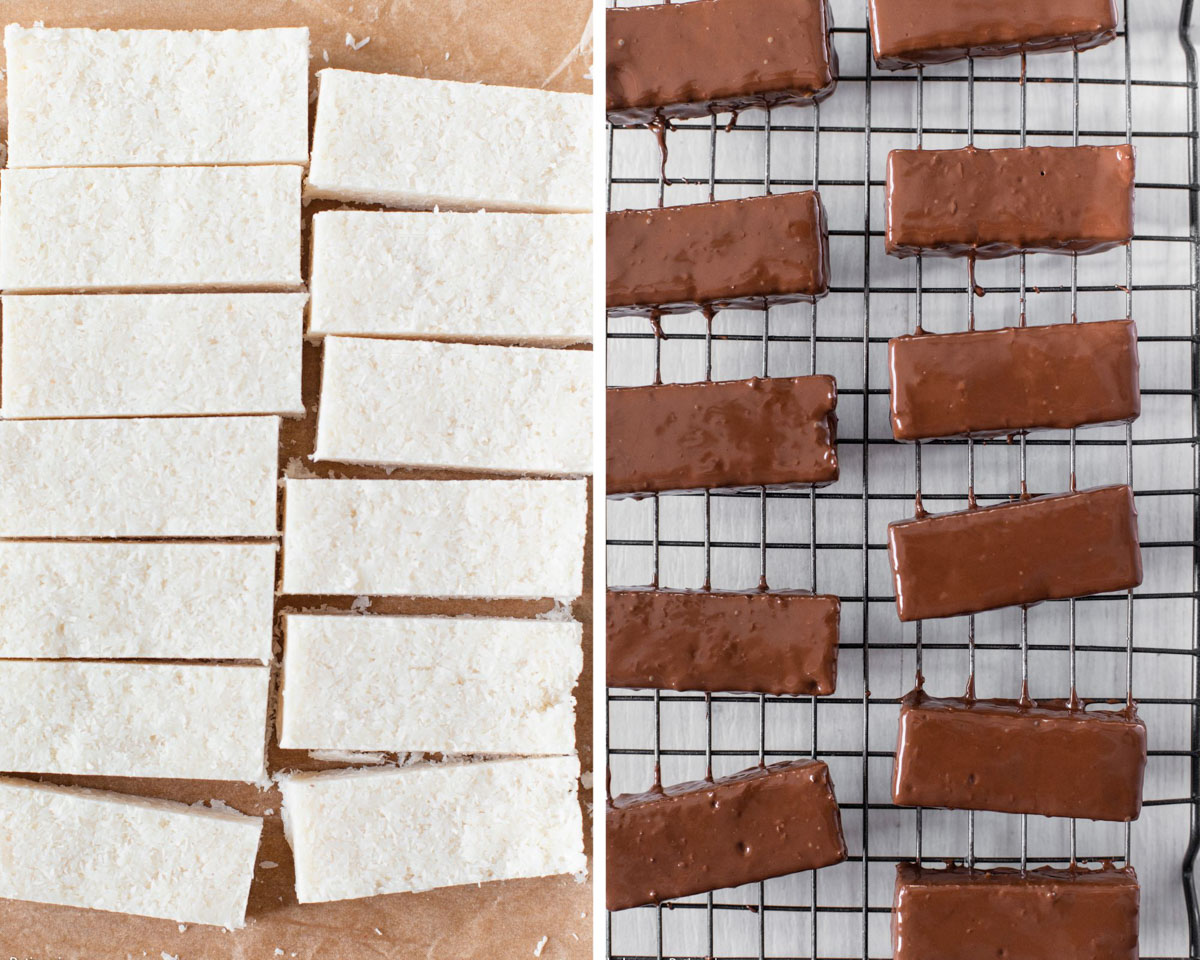
Step five: Remove coconut filling from the freezer and place it on a large chopping block. Using a large sharp knife, cut into thirds and then slice 6-7 long bars out of each third. Expert tip: run the knife under warm water for a few seconds, wipe it dry, and slice.
Step six: Working one bar at a time, dip in melted chocolate and turn over with a fork to coat. Using the fork, lift it and allow the excess chocolate to drip back into the bowl. Place on the lined tray or a wire rack. Repeat process.
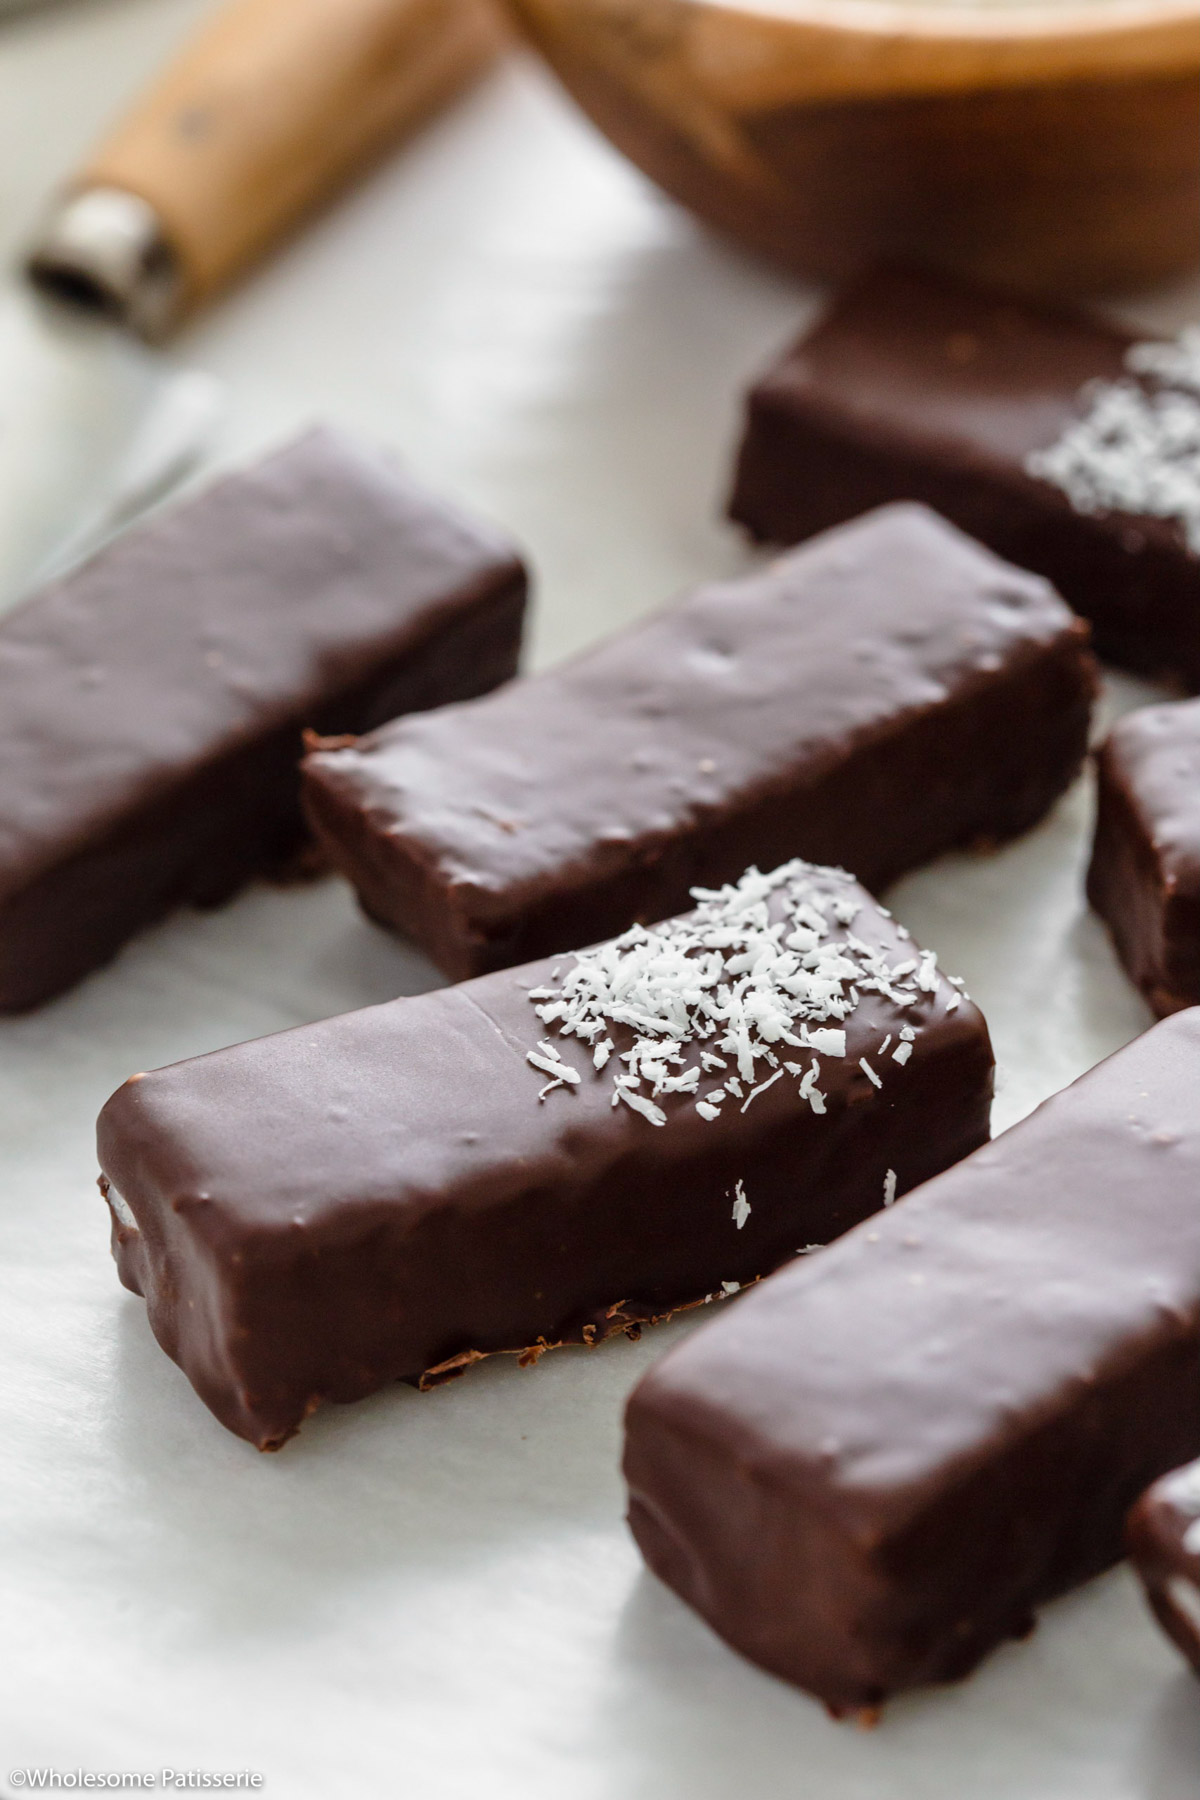
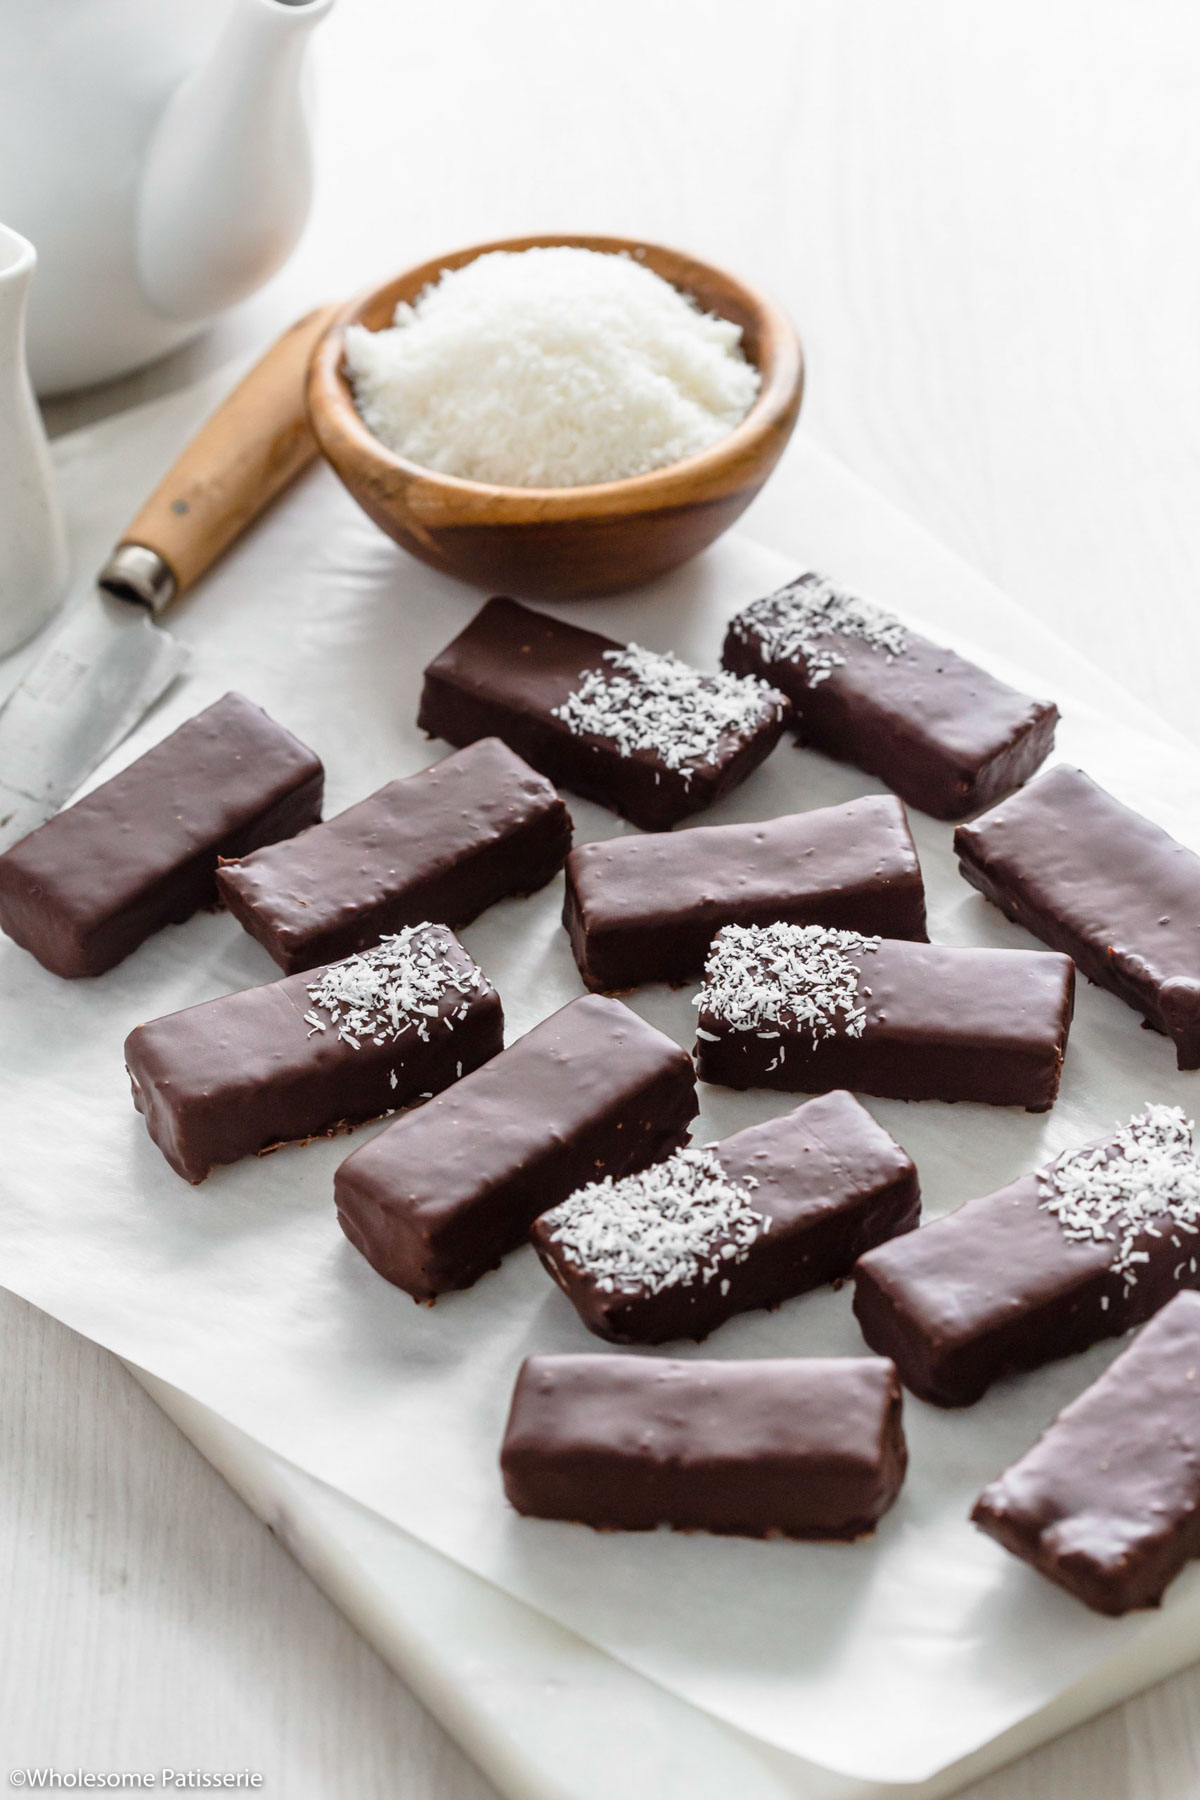
Step seven: Sprinkle half of each bar with some extra desiccated coconut if desired. Refrigerate the bars on the tray/rack until the chocolate is set. Enjoy from the fridge or sit at room temperature for 5 minutes to soften slightly.
💭 Tips For Recipe Success
- When cooking the coconut in the pot, mix it continually to avoid it sticking and burning to the base of the pot.
- Firmly press the coconut filling into the tin, this ensures the bars don’t fall apart when sliced.
- Make it easier to slice into the coconut filling by running the knife under warm water for a few seconds, wiping it dry then slicing.
- If your coconut bars have softened too much before coating them in the chocolate, return them to the freezer until solid.
- If you place the dipped bounty bars on a wire rack, keep in mind they’re a little more difficult to remove once cooled. I prefer this method over the lined tray as the chocolate pools too much underneath. However, the choice is yours!
⏲️ Storage Instructions
Store in a sealed container, refrigerated, for up to 1 week – 10 days.
Freeze in a freezer-friendly sealed container, in a single layer not touching each other, for up to 2 months.
Thaw from frozen in the refrigerator overnight or at room temperature for 15-30 minutes or until desired consistency.
💬 Recipe FAQ’s
Yes! Although I haven’t tested this recipe using unsweetened shredded coconut, I recommend you giving it a go if you want to. Just make sure your coconut filling sticks together, that is the main priority.
Yes! Keep in mind melted milk chocolate is thicker in consistency than melted dark chocolate. Either way, the milk chocolate will coat your bounty bars beautifully.
Yes! Easily substitute the canned coconut cream with regular dairy heavy cream or thickened cream. They will no longer be dairy-free though.
Absolutely! Before you pop the coconut filling into the fridge, simply press whole almonds into the coconut, embedding them roughly where you will be cutting the long bars. Then slice your bars and coat them in either melted milk or dark chocolate.
Best Coconut Recipes
If you enjoy this recipe, please consider leaving a ⭐️ star rating and a comment review below. I love to hear what you think and it’s much appreciated. Thank you! Your email address will not be published. Sam x

Homemade Bounty Bars
Ingredients
Method
- Line an 8-inch (22cm) square baking tin with parchment paper and set aside.
- In a medium-sized pot, add desiccated coconut, coconut cream solids, coconut oil, and maple syrup.
- Place over medium heat and mix to combine.
- Once the mixture is warmed through, continue to cook over medium-low heat for 1 minute and 30 seconds, mixing continually, ensuring it doesn’t stick or burn on the base. Turn off heat.
- Pour the mixture into the lined tin. Press it in firmly using a rubber spatula, wooden spoon, or your hands. Make sure the top is evened out as much as possible.
- Freeze for 1 hour or until solid.
- Prepare a double boiler by placing a heat-proof mixing bowl over a small/medium-sized pot of simmering water.
- Place broken-up chocolate into the bowl and gently melt over low heat until completely melted and smooth. Turn off the heat and set aside while you cut up the coconut filling.
- Remove from the freezer, lift it out of the tin and place it on a large chopping block.
- Using a large sharp knife, cut into thirds and then slice 6-7 long bars out of each third. Refer to the images in the post for a visual.
- If the bars have softened too much after cutting and they begin to crumble slightly, place them back into the freezer for 15 minutes until solid again.
- Line a baking sheet with parchment paper or have ready a wire cooling rack, and set aside.
- Working one bar at a time, dip in melted chocolate and turn over with a fork to coat. Using the fork, lift it and allow the excess chocolate to drip back into the bowl. Place on the lined tray or a wire rack. Repeat process.
- Sprinkle half of each bar with some extra desiccated coconut if desired.
- Refrigerate bars on tray/rack until chocolate is set, approx. 30 minutes- 1 hour.
- Enjoy from fridge or sit at room temperature for 5 minutes to soften slightly.
- Store in a sealed container, refrigerated, for up to 1 week – 10 days.
Nutrition
Notes
- Firmly press the coconut filling into the tin, this ensures the bars don’t fall apart when sliced.
- Make it easier to slice into the coconut filling by running the knife under warm water for a few seconds, wiping it dry then slicing.
- If your coconut bars have softened too much before coating them in the chocolate, return them to the freezer until solid.
- If you place the dipped bounty bars on a wire rack, keep in mind they’re a little more difficult to remove once cooled. I prefer this method over the lined tray as the chocolate pools too much underneath. However, the choice is yours!
- Store in a sealed container, refrigerated, for up to 1 week – 10 days.
- Freeze in a freezer-friendly sealed container, in a single layer not touching each other, for up to 2 months.
- Thaw from frozen in the refrigerator overnight or at room temperature for 15-30 minutes or until desired consistency.
Can’t wait to try these!!
Hi Fatma! I hope you enjoy this recipe, they’re SO yum and morish!