Flourless Chocolate Cake
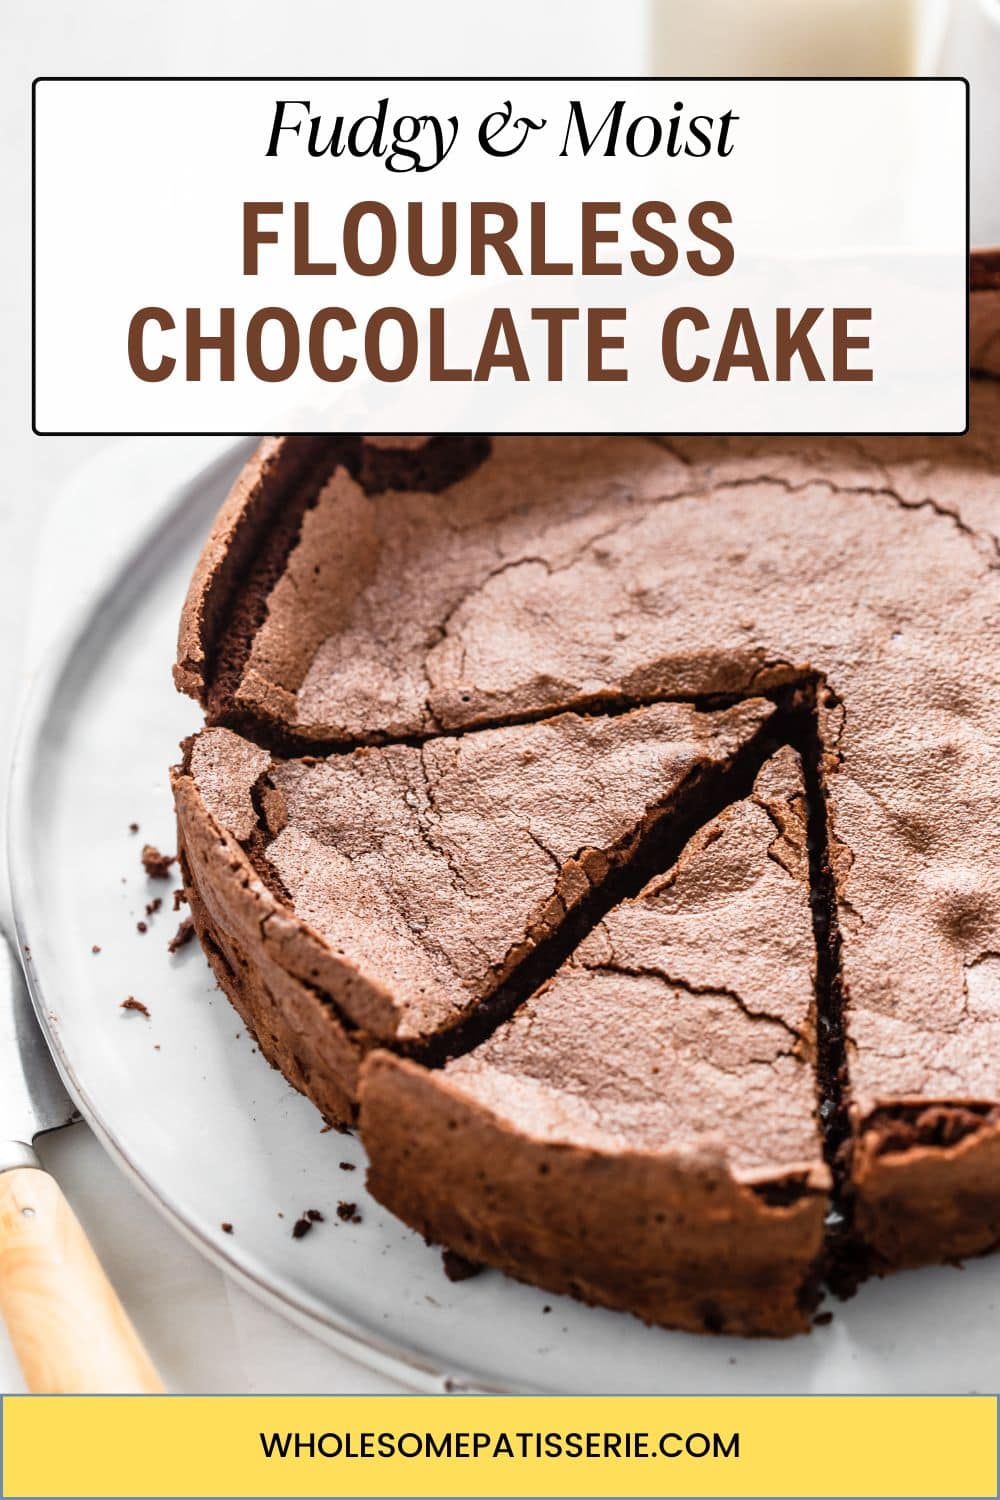
This gluten-free Flourless Chocolate Cake Recipe, featuring a crispy meringue crust and a fudgy center, is crafted with just seven ingredients, making it an ideal choice for celebrations or a luxurious dessert option.
Rich in dark chocolate and incredibly moist, it’s a decadent treat that effortlessly caters to those avoiding gluten. Recipes like this show that rich, moist cakes don’t always need milk, the right balance of ingredients does the work instead.

Flourless Chocolate Cake Recipe
This flourless chocolate cake is a luxurious dessert that combines the richness of dark chocolate with the lightness of a meringue crust.
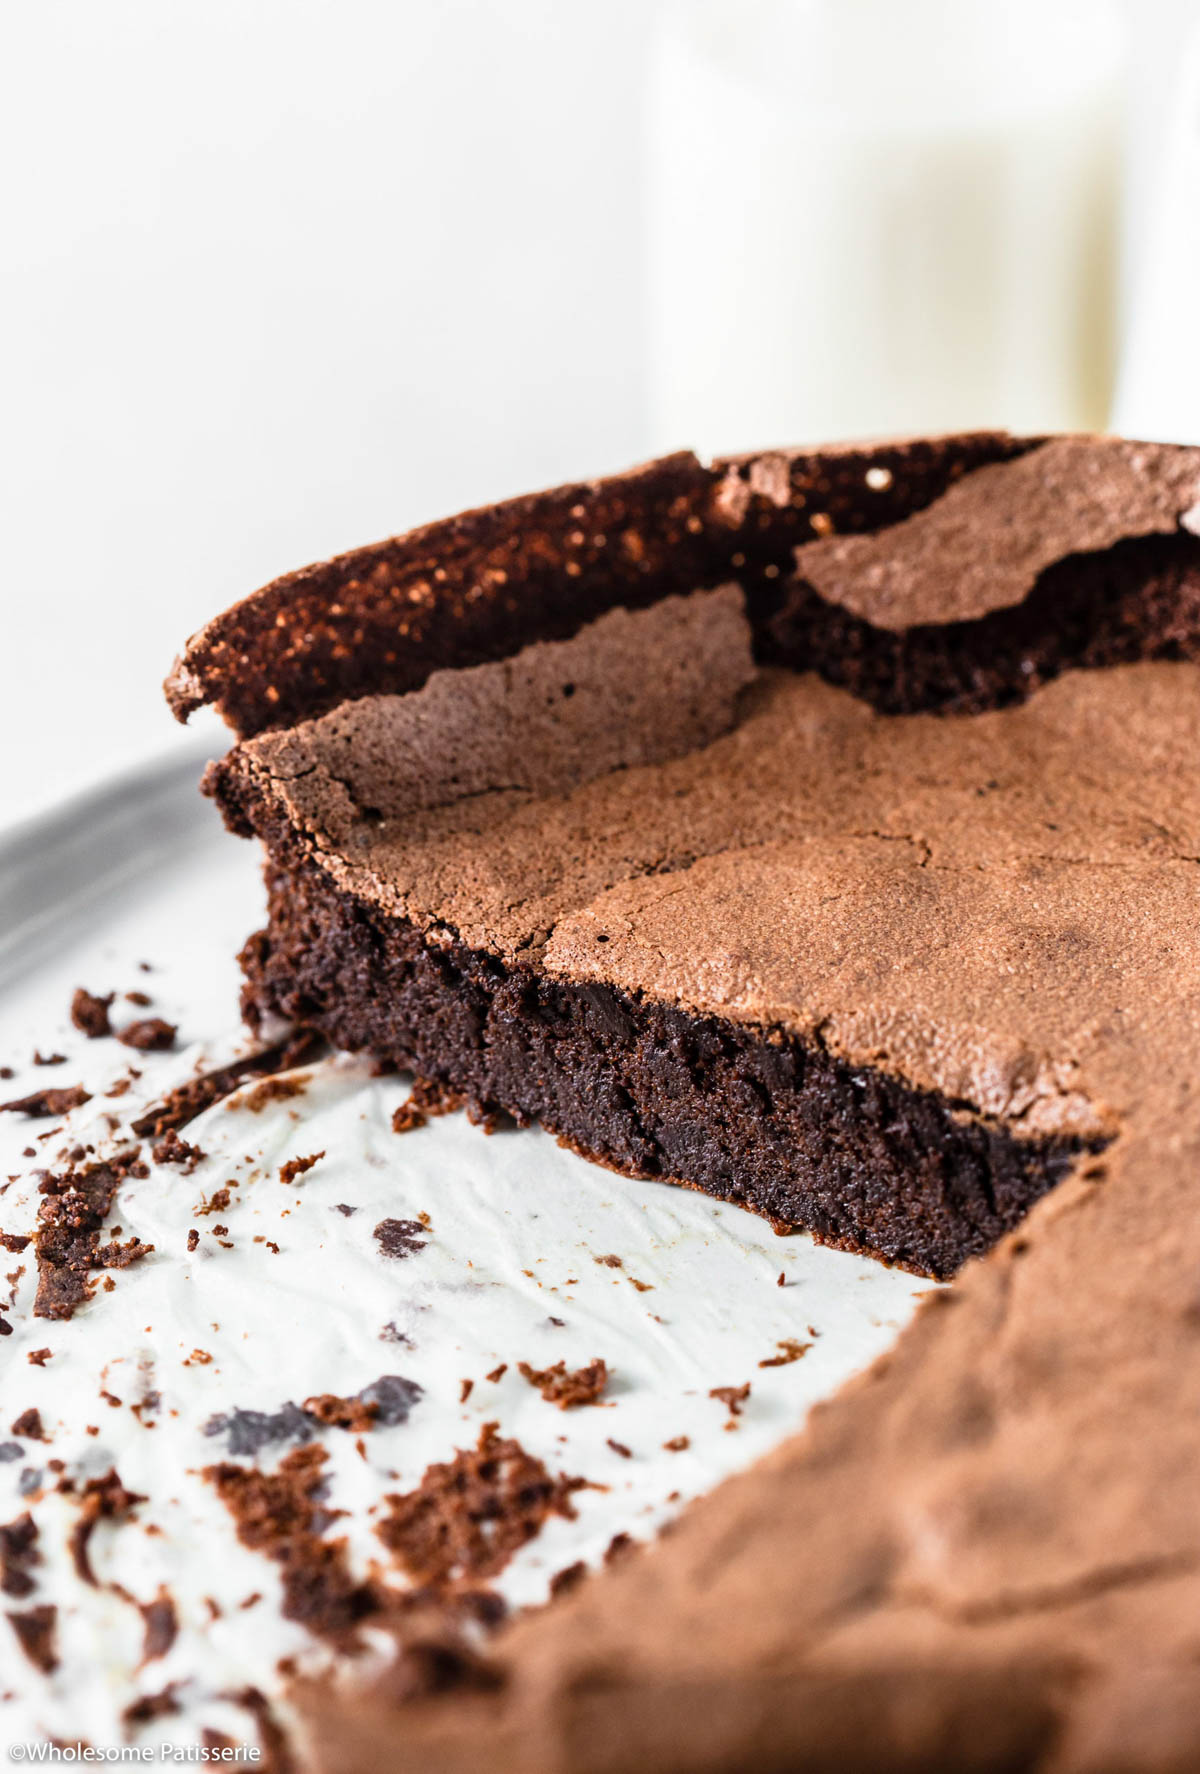
With only seven staple kitchen ingredients, this cake is not only gluten-free but also mirrors the decadence of a torte. It features a soft and fudgy center beneath a crispy, crunchy crust, crafted from whipped egg whites for added structure and stability.
Perfectly blending the elements of both cake and dessert, it can be prepared ahead of time, making it an ideal choice for gatherings.
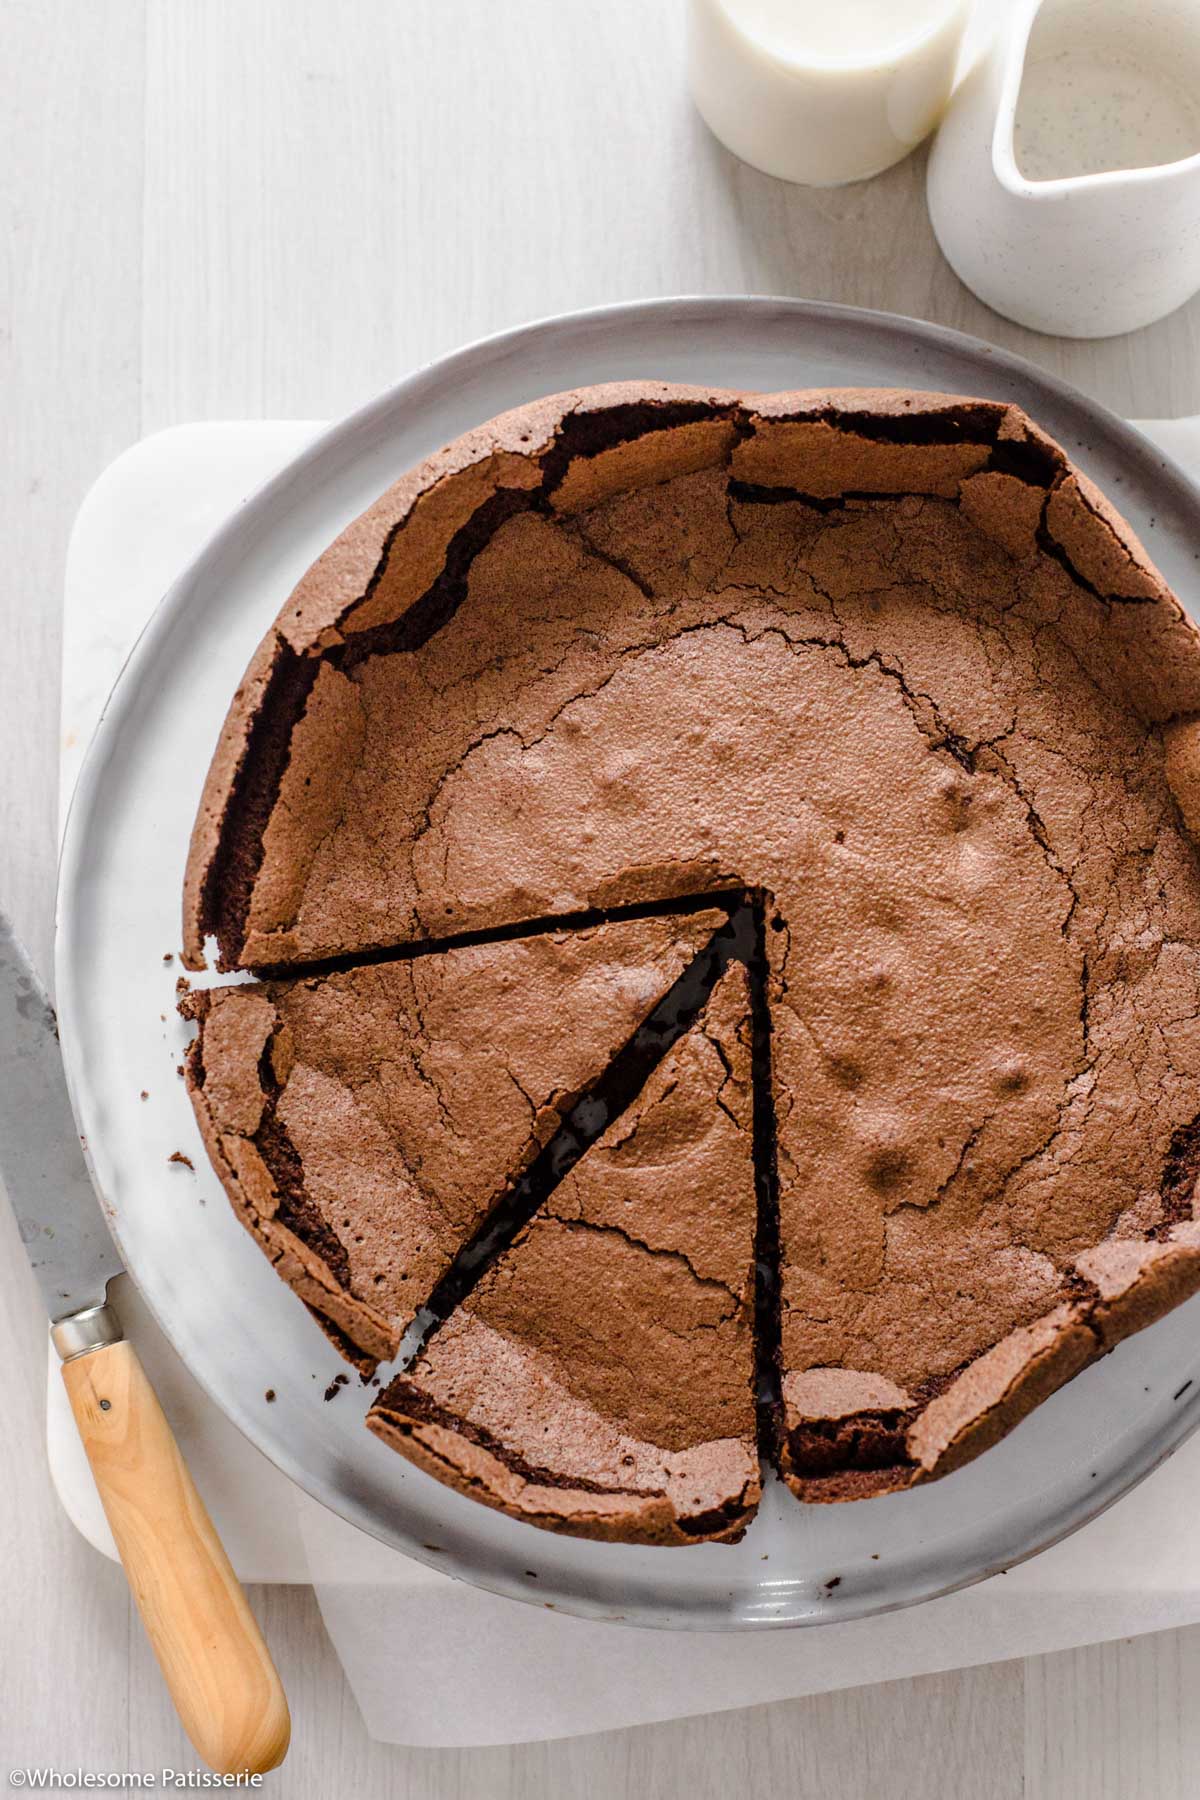
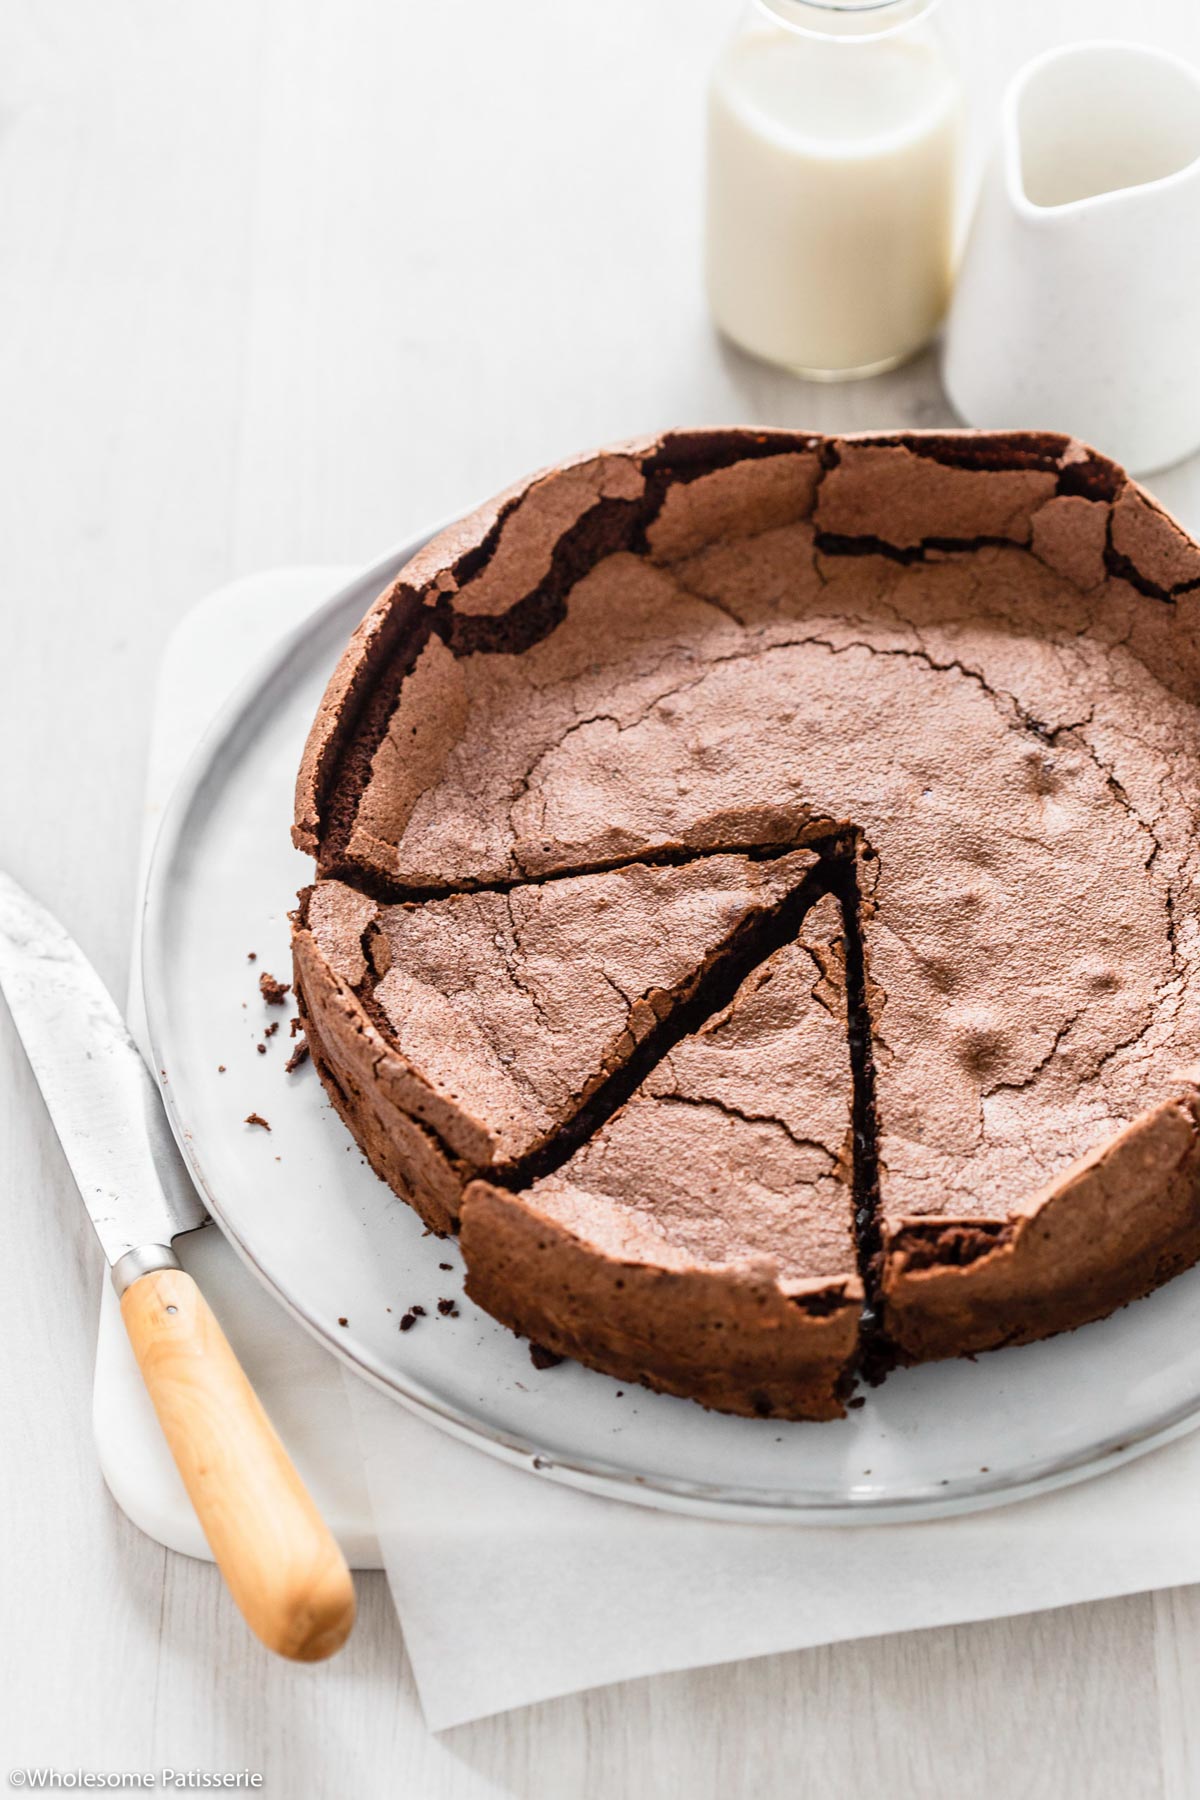
Is it normal for this flourless chocolate cake to have cracks on the surface?
Yes, it’s typical for the surface of a flourless chocolate cake to crack due to its crispy meringue crust. The cracks may become more pronounced with handling and slicing but do not affect the deliciousness of the cake.
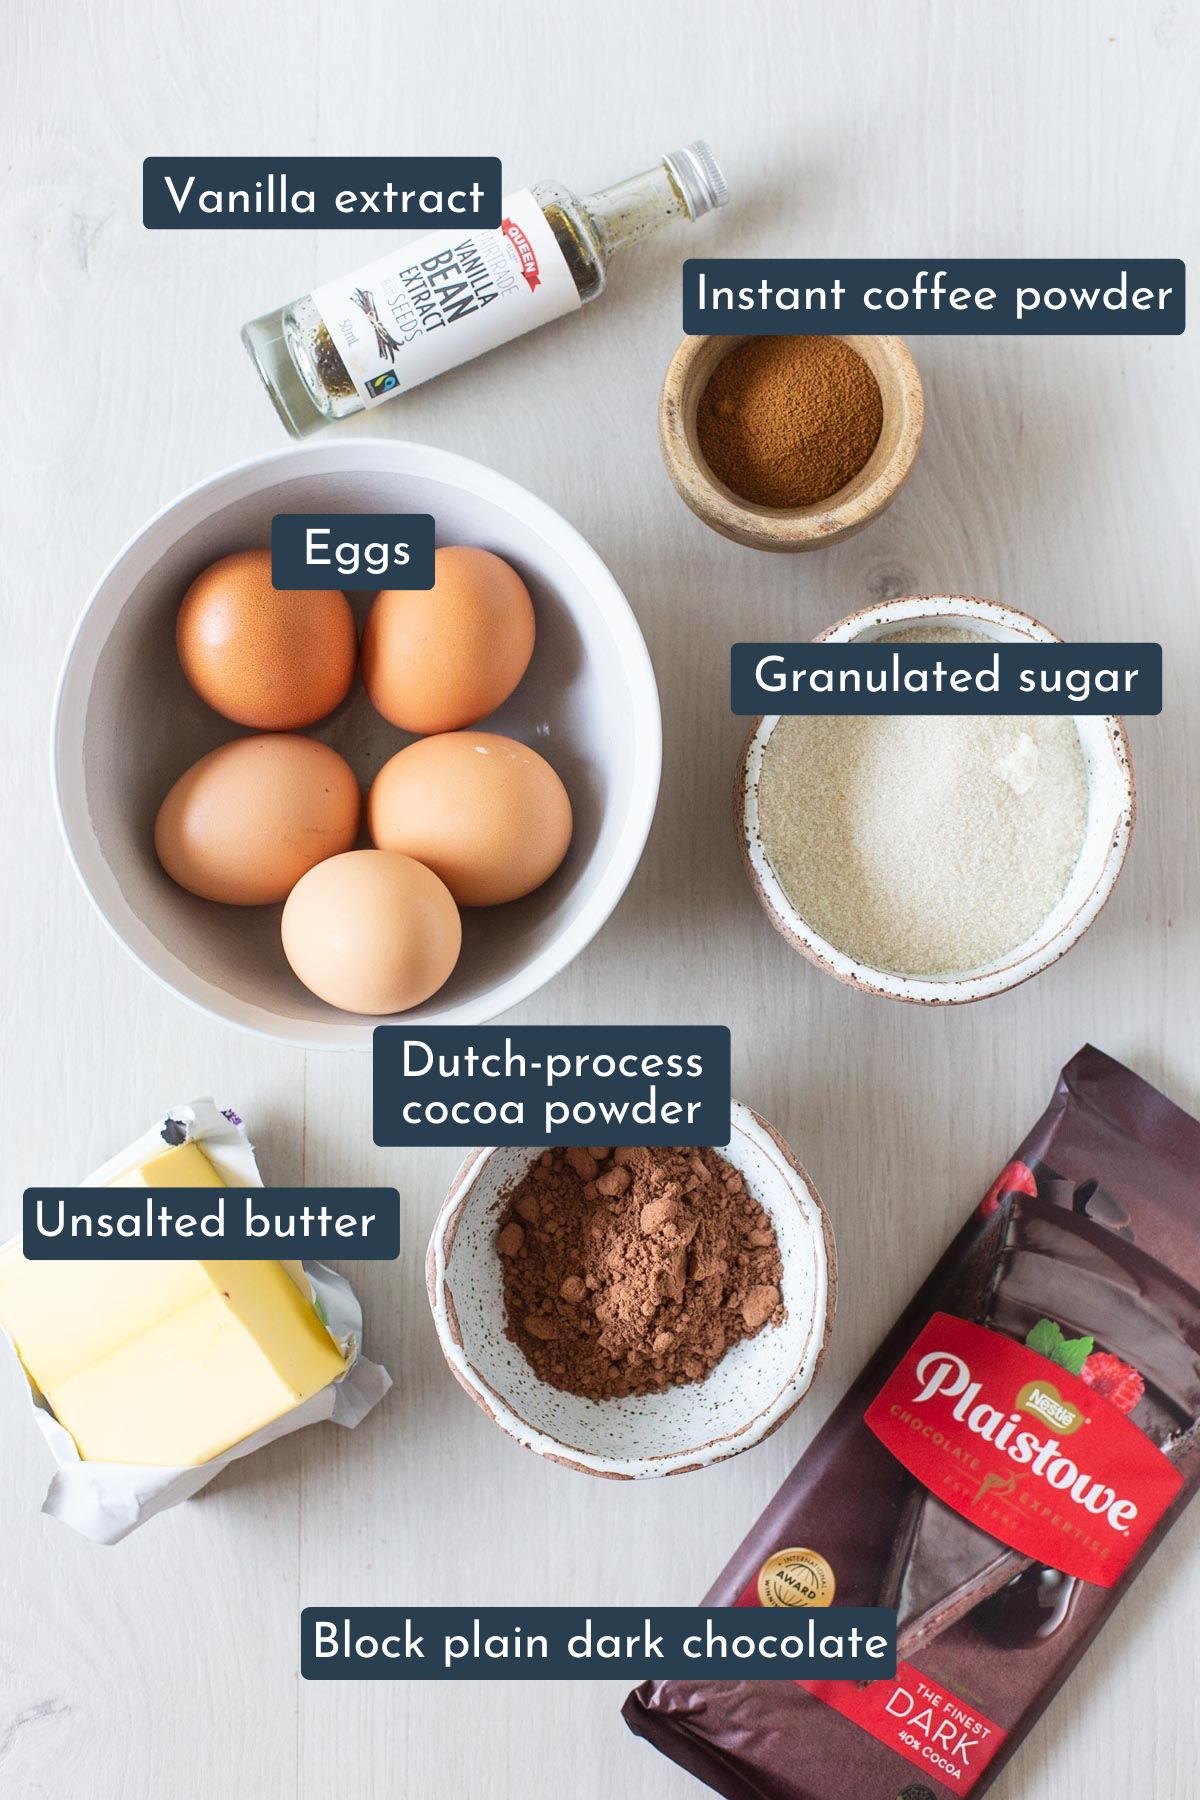
Essential Ingredients
The essential ingredients listed below are affiliate links on Amazon so you can easily find and see the exact products I recommend for creating this flourless chocolate cake!
Must Have Tools
For making this recipe, it’s essential to have these Amazon affiliate tools at your disposal.
Is flourless chocolate cake gluten free?
Yes, flourless chocolate cake is naturally gluten-free as it is made without any flour. This makes it a great dessert option for those with gluten sensitivities or celiac disease. Just ensure that all other ingredients used, such as baking powder or chocolate, are also gluten-free.
What is the best chocolate to use for this flourless cake?
For the best results, use a high-quality dark chocolate with at least 40% cocoa content. This will ensure a rich and decadent flavor.
Can I make this flourless cake without eggs?
No, you cannot make this flourless chocolate cake without eggs. The eggs are essential for providing structure and moisture, and there are no substitutes that will offer the same results in this particular recipe.
Can I make this ahead of time?
Absolutely! This flourless chocolate cake can be stored in an airtight container in the refrigerator for up to three days. Enjoy it chilled or at room temperature.
How to store flourless chocolate cake
Store: Store the cooled cake in an airtight airtight container, at room temperature for 1-2 days then keep it in the refrigerator for a further 2-3 days.
Freeze: Wrap the whole cake or slices of cake in plastic wrap then in foil, or a double layer of plastic wrap. Place into a freezer-friendly airtight container or large zip-lock bags and freeze for up to 3 months. Thaw in the refrigerator overnight.
Best Chocolate Cake Recipe
Try these other cakes without milk including chocolate, date and apple!
If you enjoy this recipe, please consider leaving a ⭐️ star rating and a comment review below. I love to hear what you think and it’s much appreciated. Thank you! Your email address will not be published. Sam x

Gluten-Free Flourless Chocolate Cake
Ingredients
Method
- Preheat Oven & Prep Pan: Preheat oven to 320ºF (160ºC). Grease with butter and line with parchment paper a 9-inch (22cm) round springform cake pan. Set aside.
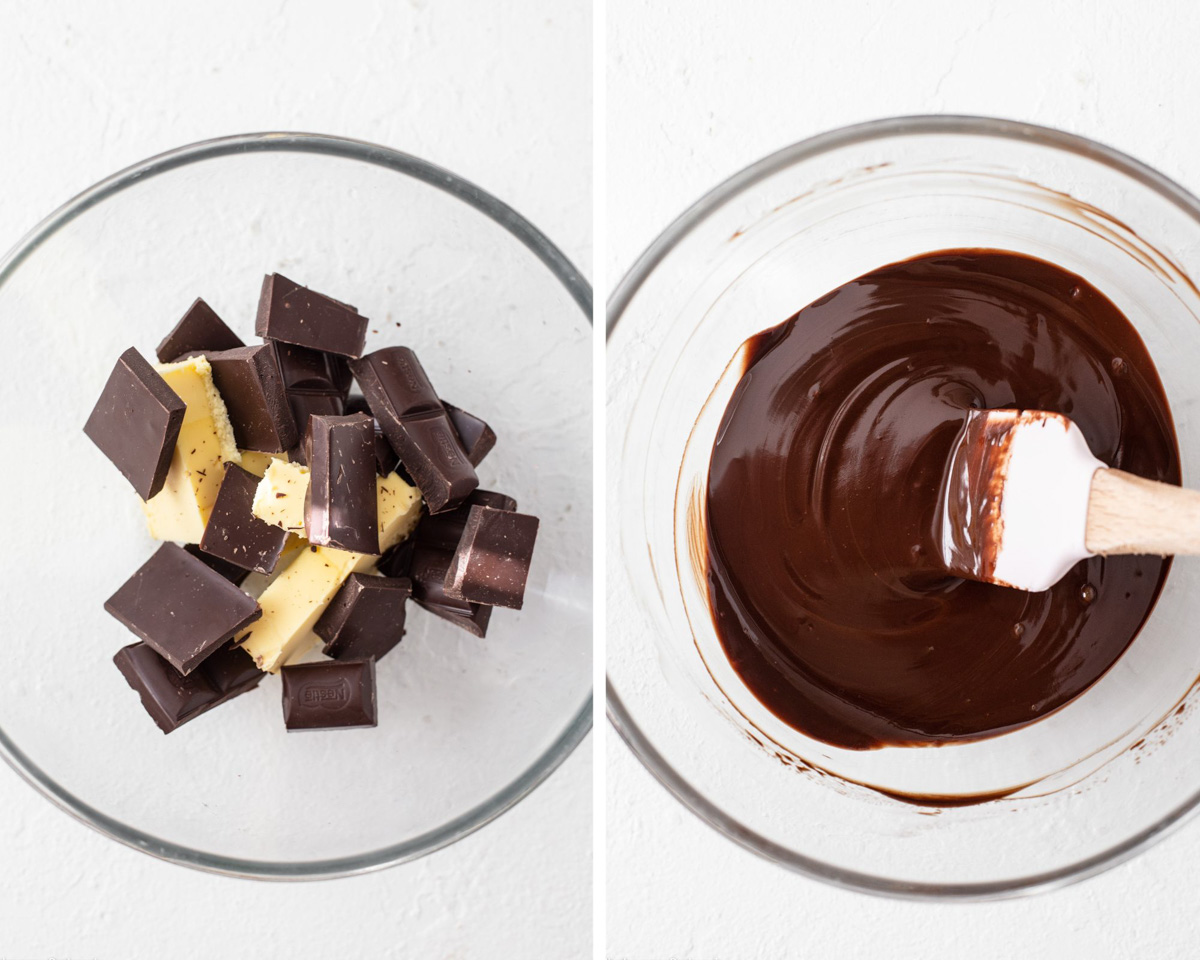
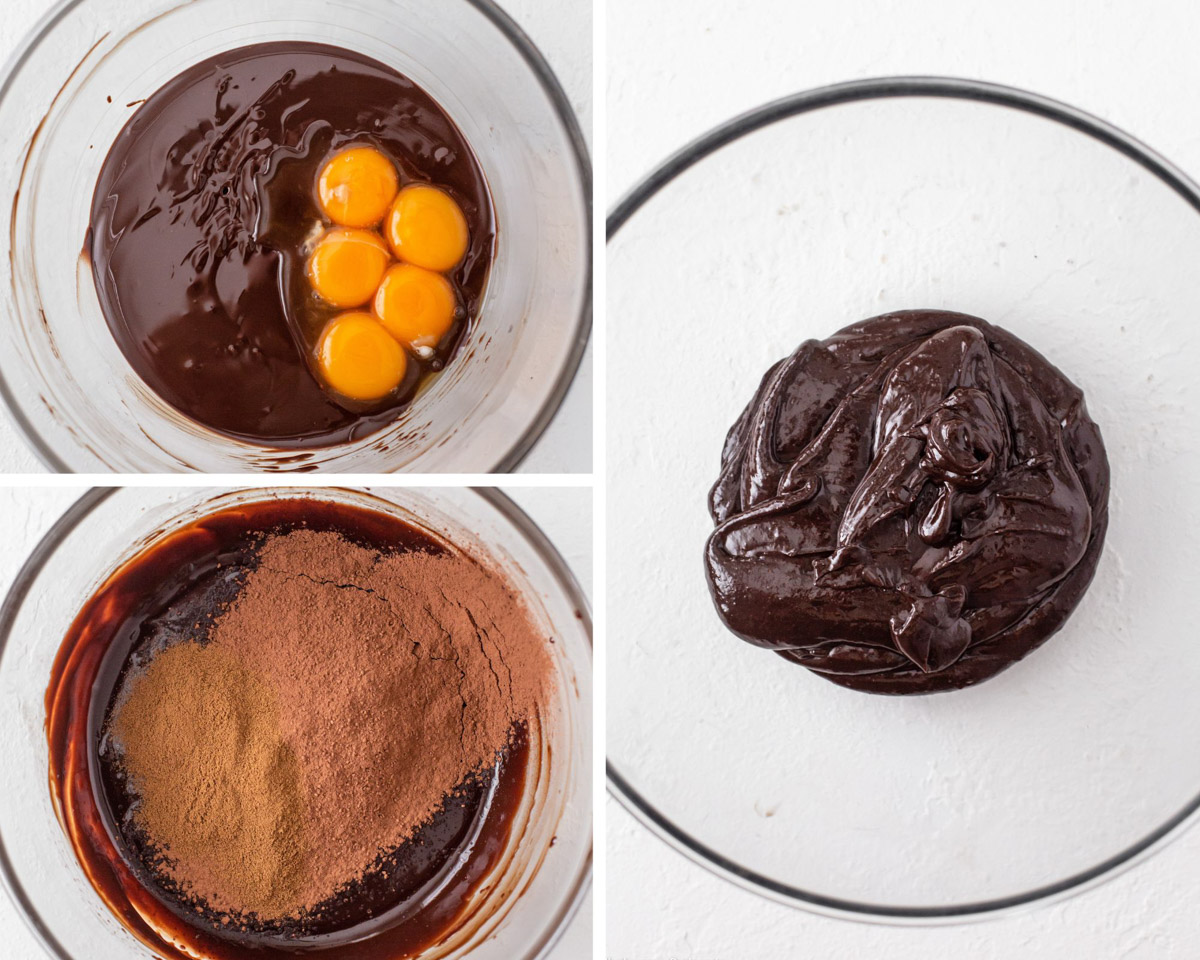
- Melt Chocolate and Butter: Prepare a double boiler with a large heat-proof mixing bowl over a pot of simmering water. Add broken-up chocolate and butter to the bowl and gently melt together over low heat until completely melted and smooth.
- Cool Chocolate Mixture: Remove from heat and allow to cool slightly while you prepare the eggs.
- Separate Eggs: Separate the eggs, placing the whites into a large mixing bowl or the bowl of a stand mixer, and the yolks into a separate small bowl. Set the bowl with the egg whites aside.
- Mix Chocolate with Yolks: When the chocolate mixture has cooled slightly and is just warm to the touch, add egg yolks and vanilla, and whisk until well combined.
- Add Cocoa and Coffee: Sift over cocoa powder then add coffee powder. Whisk until well combined and smooth. Set aside.
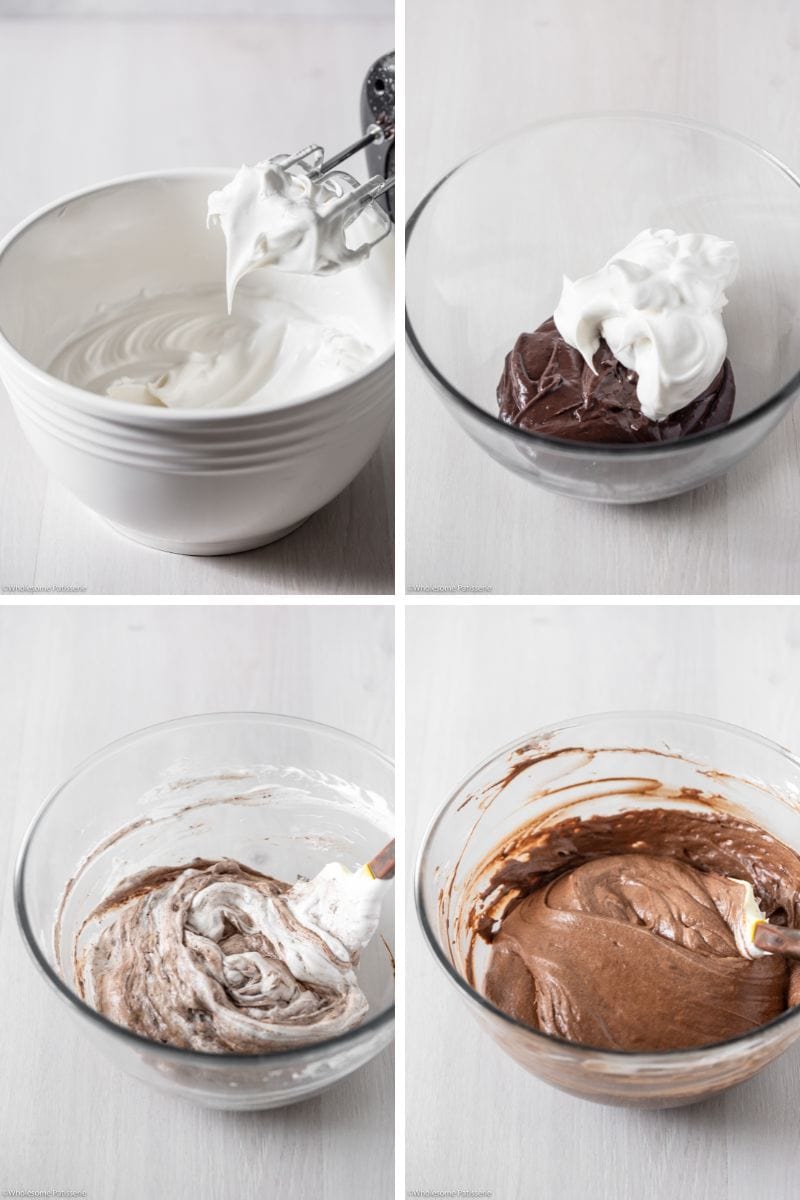
- Whip Egg Whites: Using an electric hand beater or stand mixer with the whisk attachment, beat the egg whites for 20 seconds until foamy. Gradually add the sugar, one tablespoon at a time, while beating on medium-high speed, and continue until stiff peaks form, about 3 minutes in total.
- Fold Egg Whites into Chocolate: Stir the chocolate mixture again to loosen it up if it has thickened. Fold 1/3 of the whipped egg whites into the chocolate mixture gently to avoid deflating the egg whites. Continue adding and folding the remaining egg whites in two more batches until fully incorporated with no white streaks remaining.
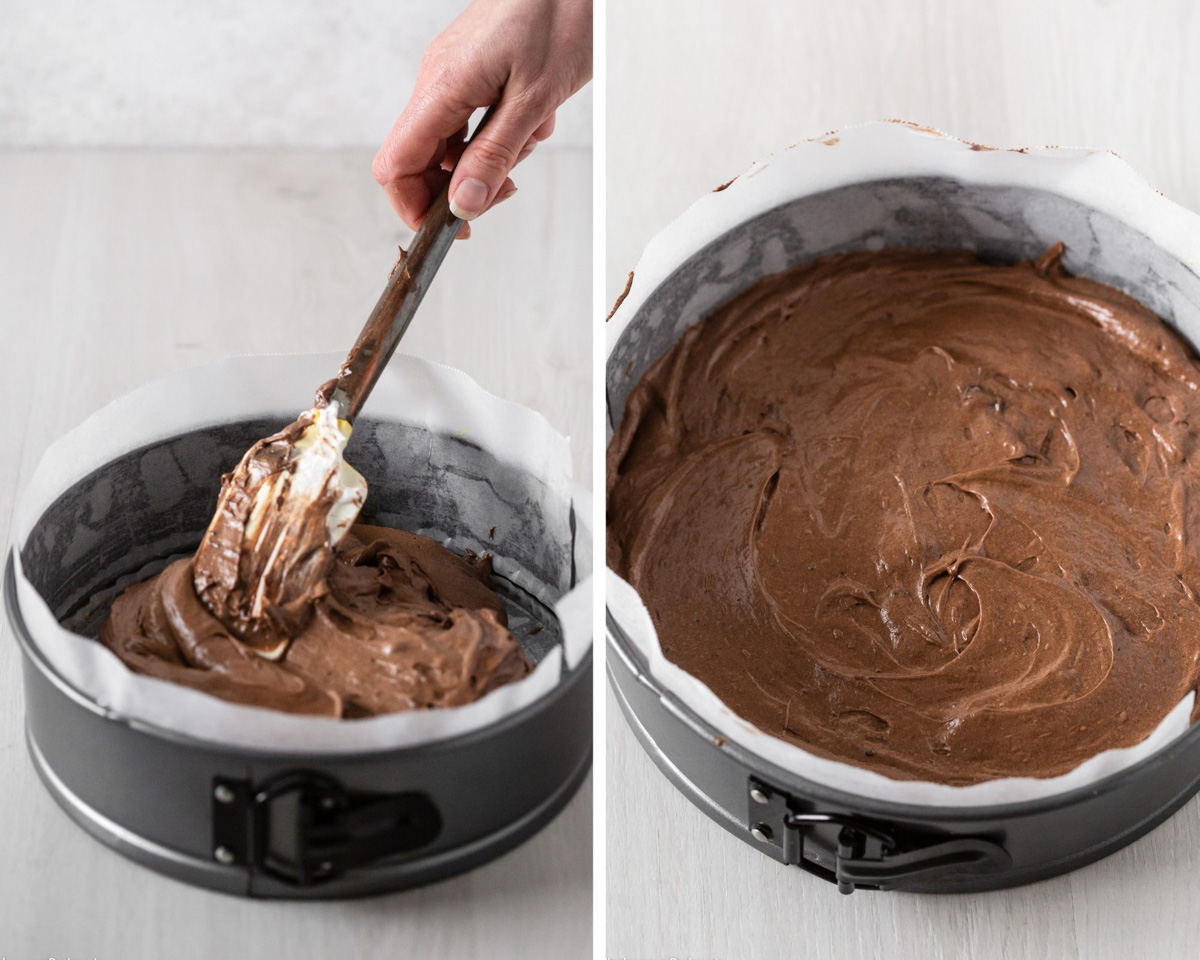
- Transfer Batter to Pan: Pour the batter into the lined springform pan, smoothing out the top with a spatula.
- Bake: Bake for 30-35 minutes or until a toothpick inserted into the center comes out with just a few moist crumbs, the middle no longer jiggles, and cracks have formed on the surface.
- Cool: Remove from oven and allow to cool in the pan for 15 minutes. Gently release the latch on the springform tin and transfer the cake, still on the base of the pan, to a wire rack to cool completely.
- Serve & Store: Serve warm or cool with scoops of ice cream or dolloped cream if desired. Store in a sealed airtight container, at room temperature for 1-2 days, then refrigerate for 2-3 days.
Nutrition
Tried this recipe?
Let us know how it was!