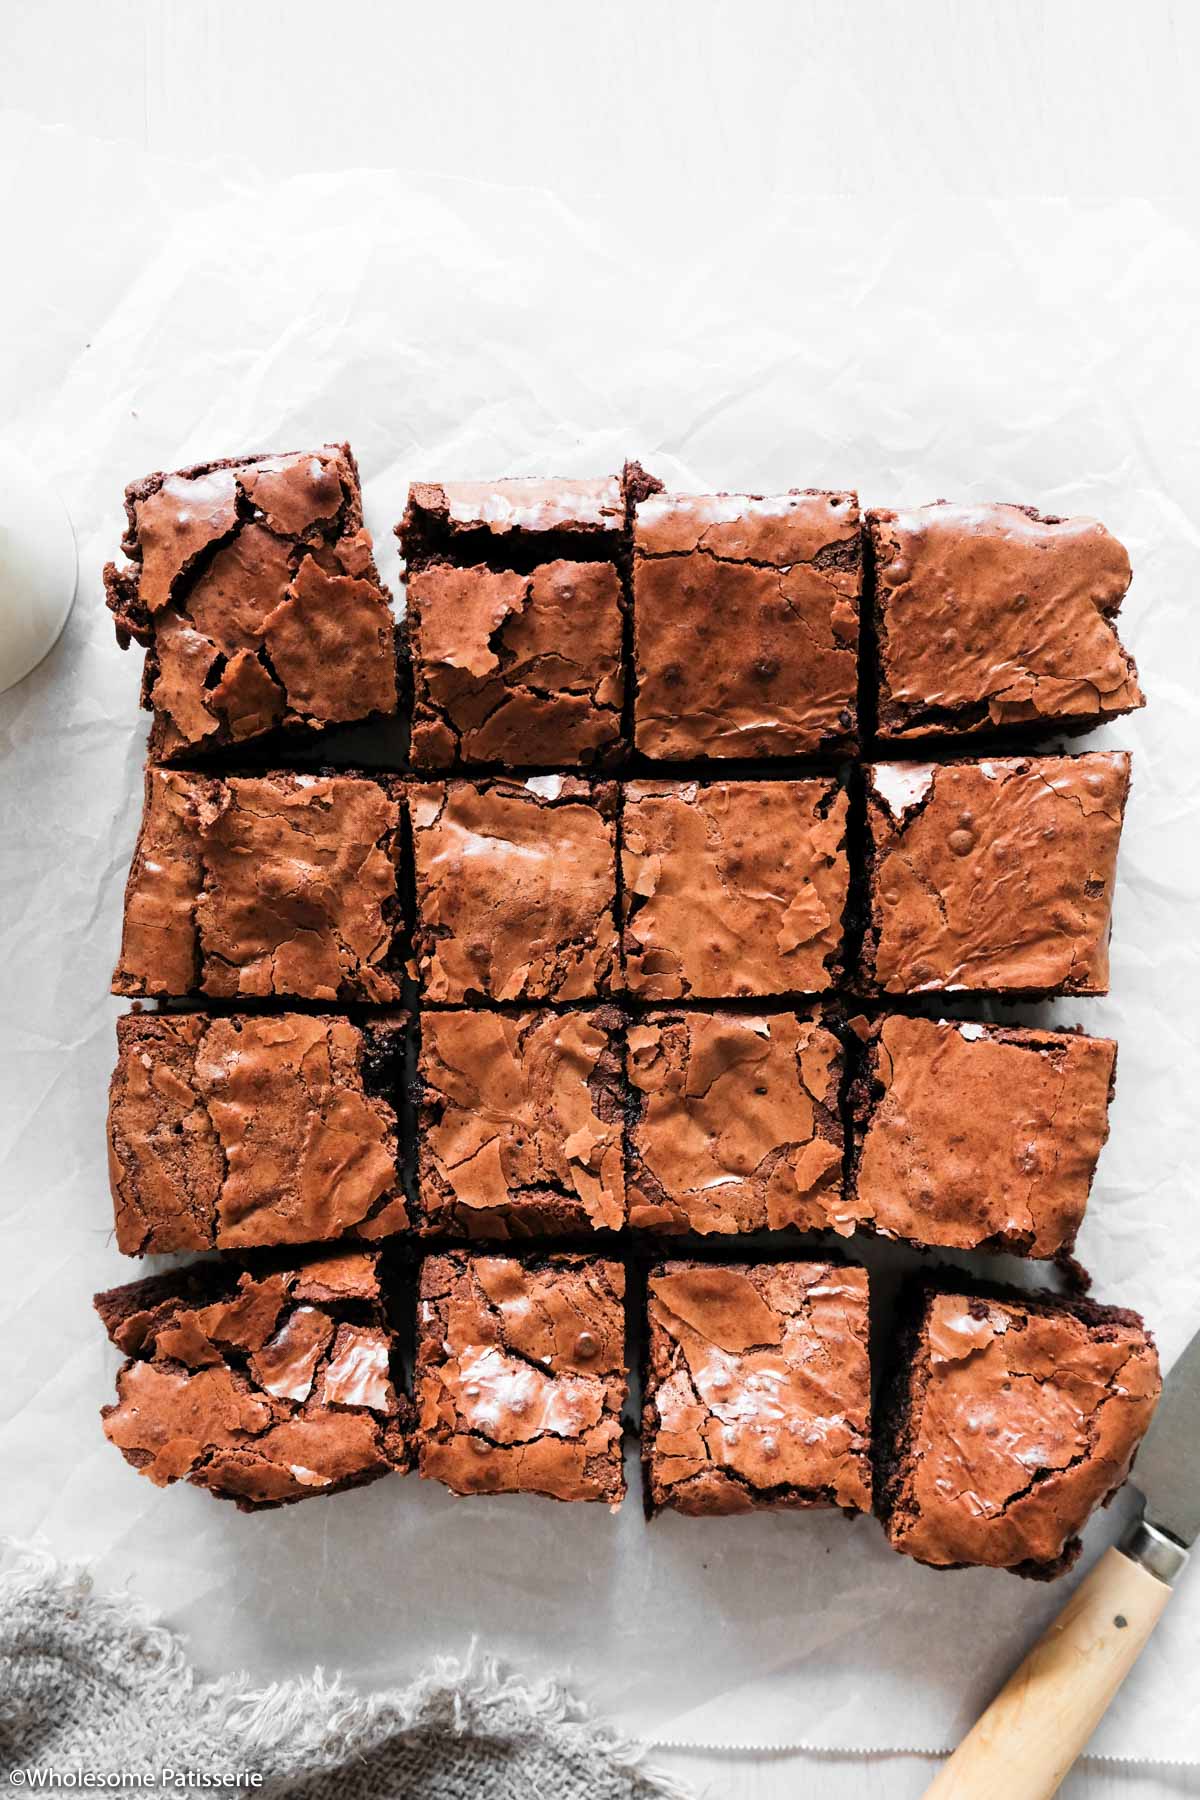
Crinkle Top Fudge Chocolate Brownies
These Crinkle Top Brownies are your ultimate homemade brownies with a shiny flakey top and the most scrumptious and rich chocolate fudge middle!
If you’re curious about how to make crinkle top brownies or you have never been able to master the iconic flakey top, I’ll guide you through exactly how to achieve it.
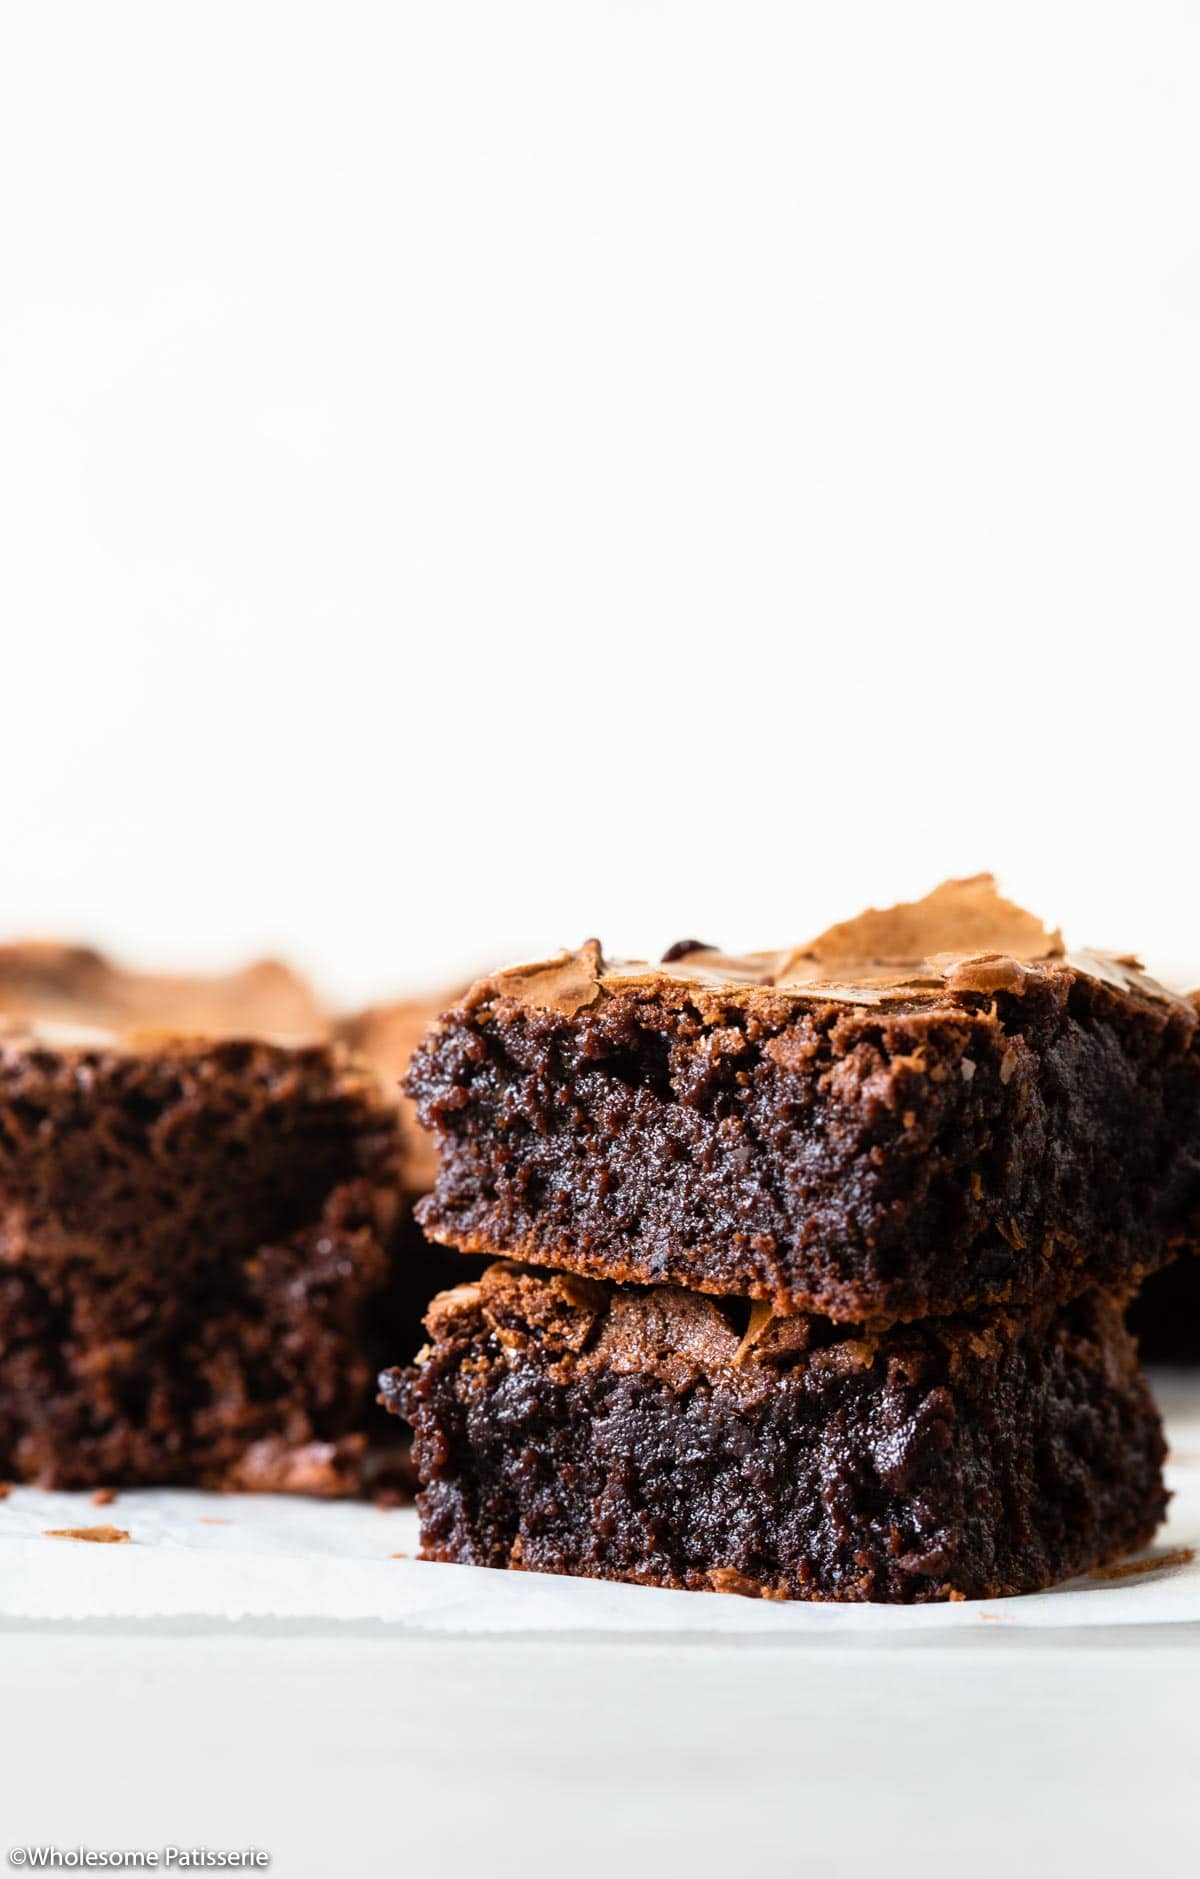
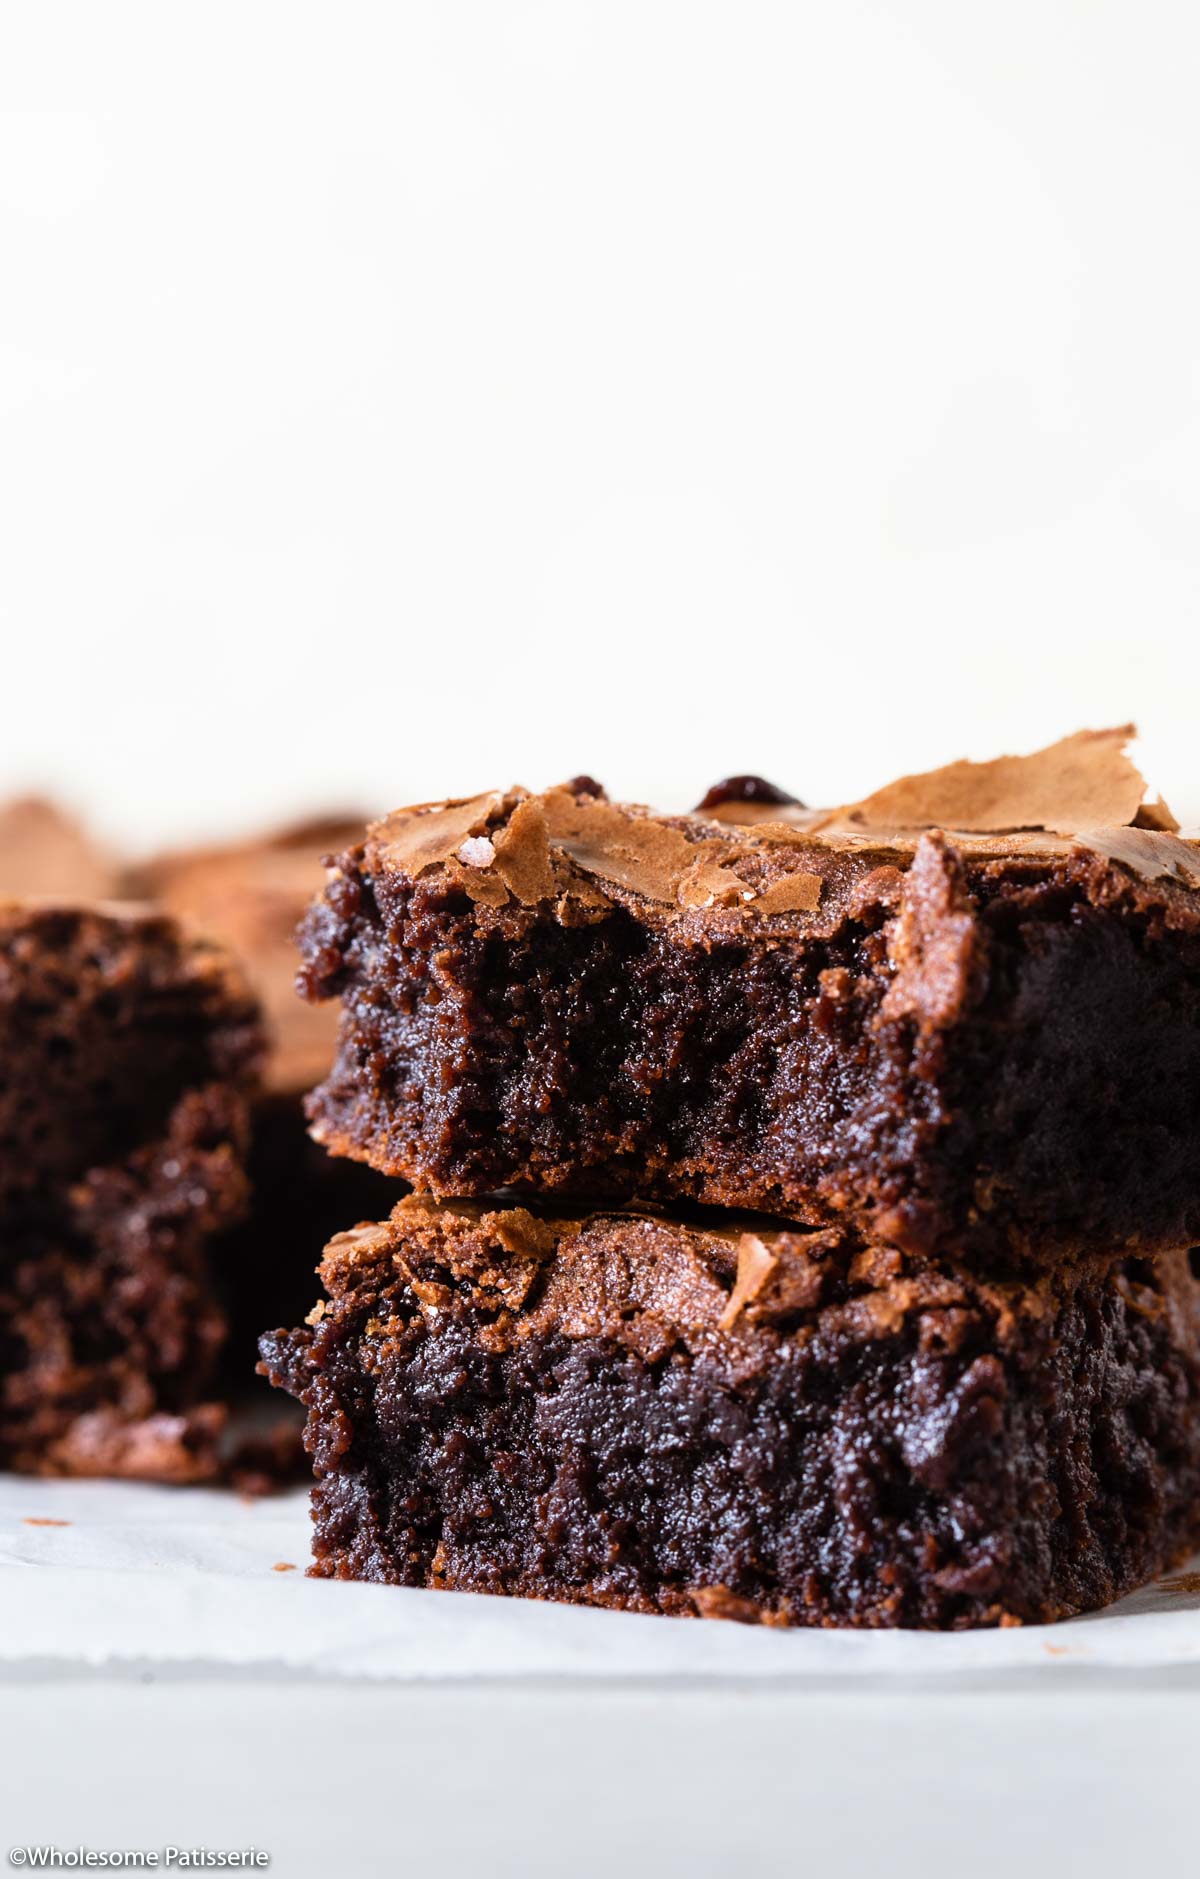
These brownies are glorious to look at and taste. They have a rich chocolate flavor with an indulgent texture.
For those with dietary preferences, there’s no need to miss out. Try my Gluten-Free & Vegan Chocolate Mint Brownies.
For celebration brownies, these Easy Birthday Brownies with Cream Cheese Frosting are indulgent!
So are these delicious Chocolate Brownies with Homemade Caramel Sauce.
Why You Will Love This Recipe
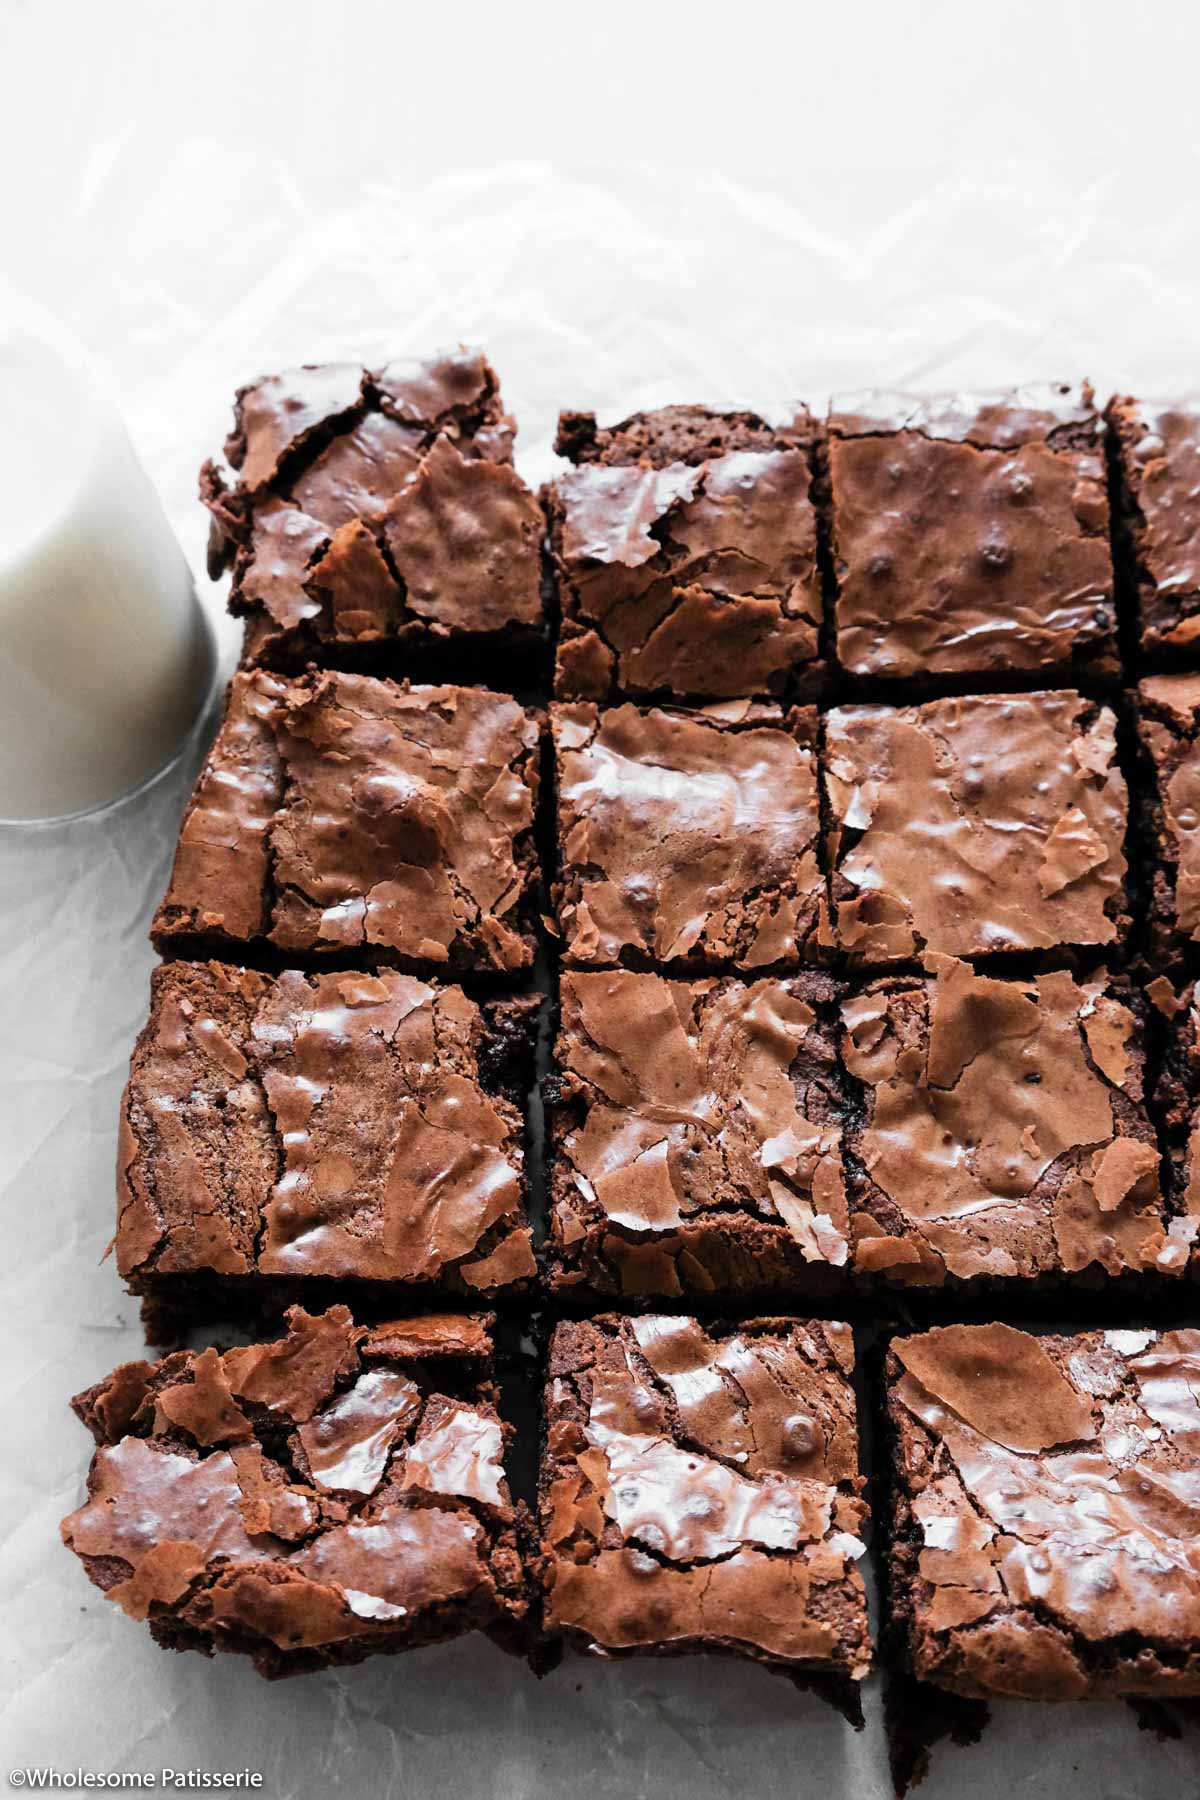
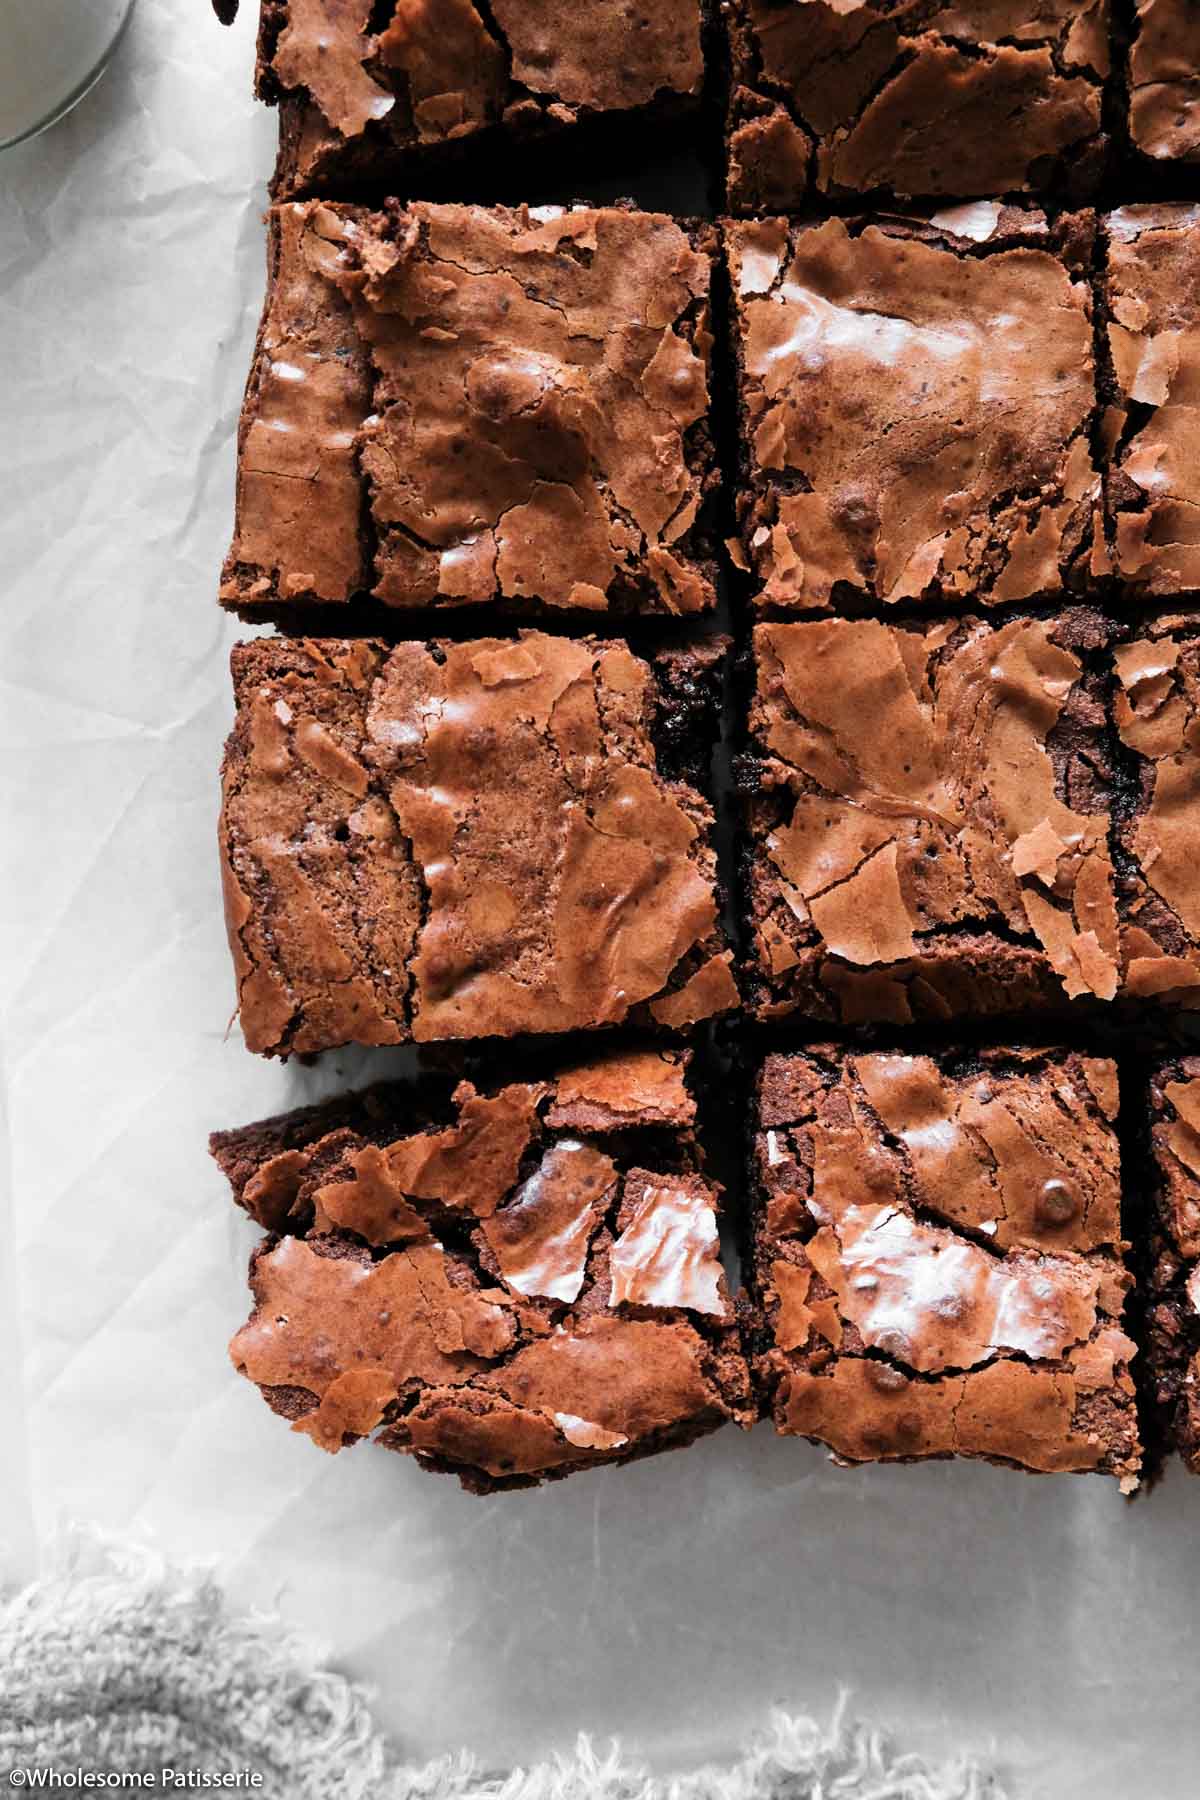
- Crinkle & shiny crust is iconic and it’s simple to create. The wafer thin topping is the perfect complement to the fudgy center.
- The fudgy texture in the middle of these brownies is rich and indulgent.
- Real dark chocolate & Dutch-process cocoa powder makes these brownies truly rich in chocolate and they’re absolutely scrumptious.
Ingredient Notes
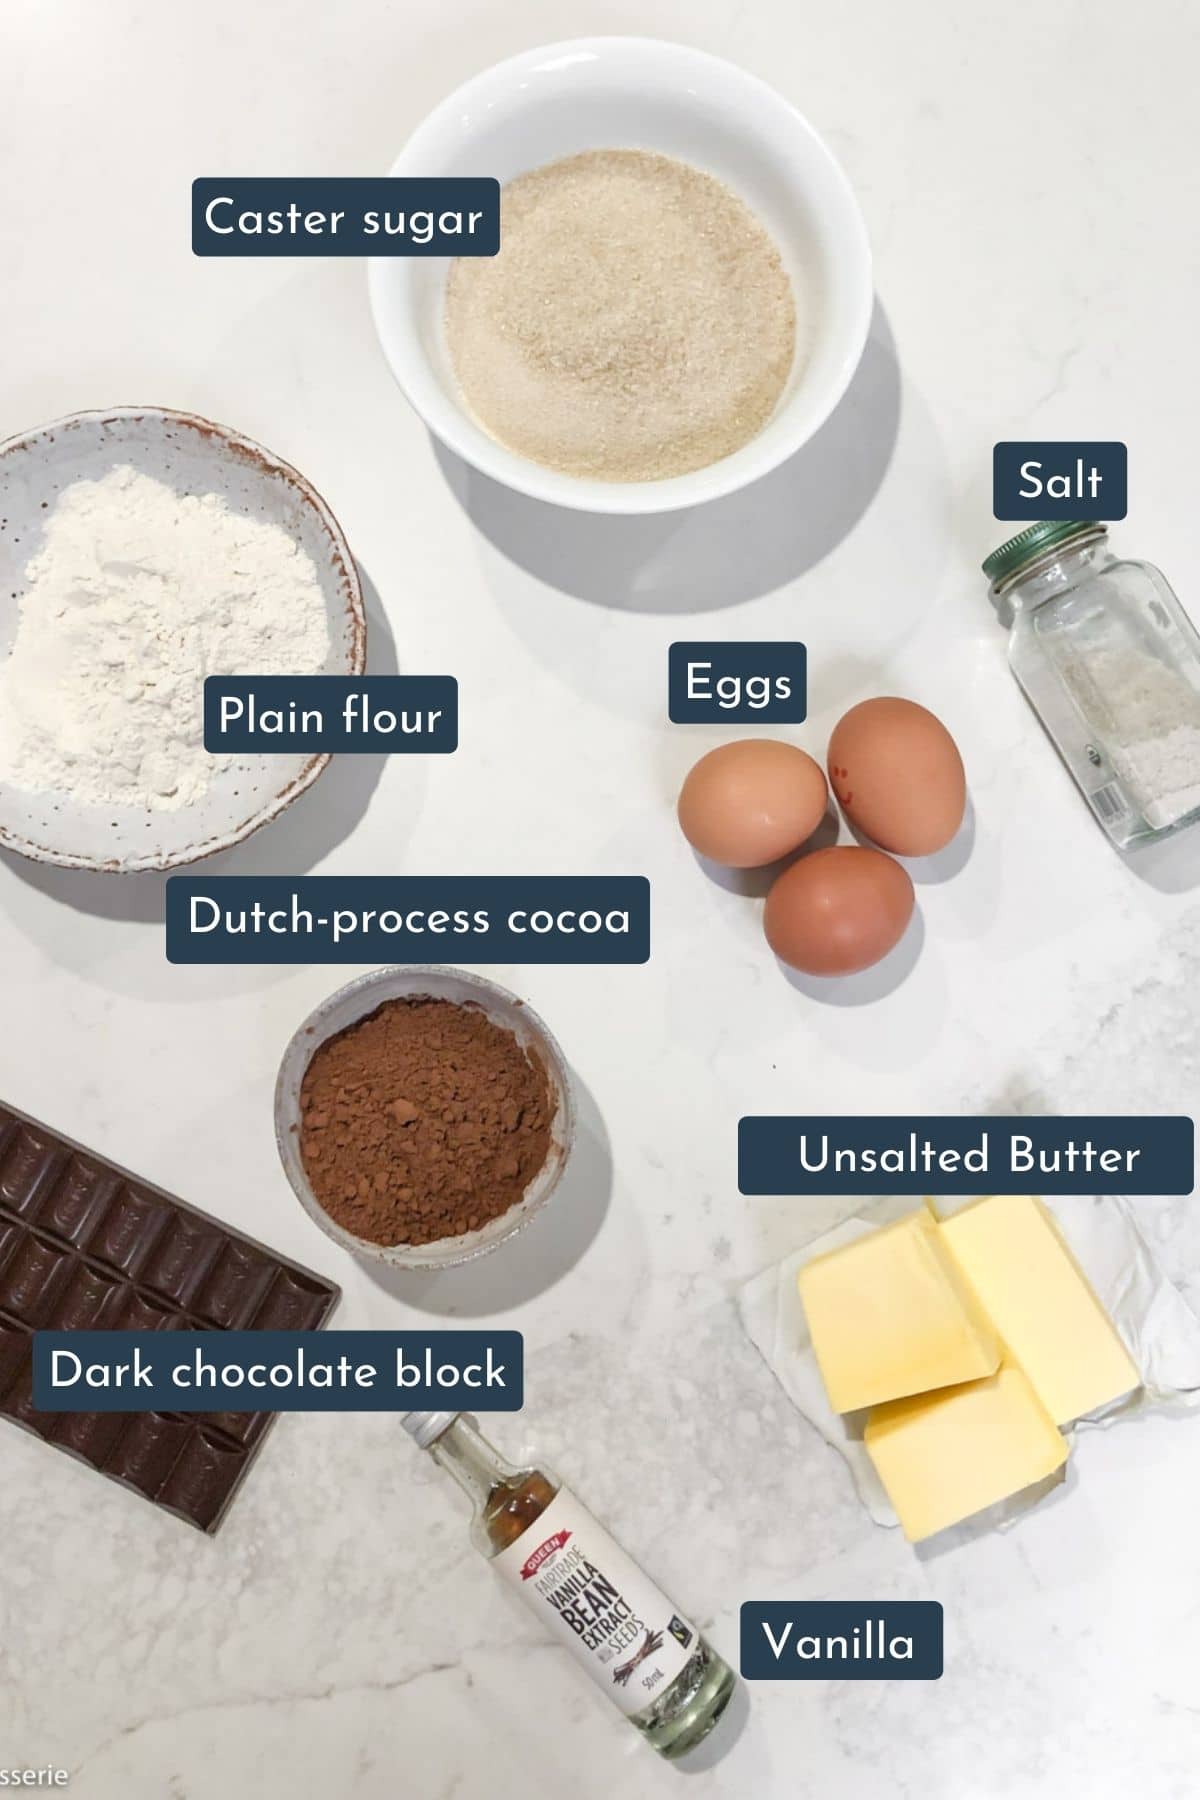
- Dutch-process cocoa powder: This is the best cocoa to use for this recipe. It’s rich in flavor and color. However, you can substitute it with natural unsweetened cocoa powder using the same quantity.
- Hot Tip: you can use Dutch-process and natural cocoa interchangeably in a recipe when there is no baking soda or baking powder included. I wouldn’t recommend it if a raising agent is added because each of these cocoa powders requires a certain leavener to work properly.
- Unsalted butter: Stick to the unsalted butter over salted butter because this way, we can control the amount of salt added in a recipe, especially when there is salt already included. Salted butter is not recommended as the quantity of salt in cooking butter varies from brand to brand.
- Dark chocolate block: I love to use dark chocolate as opposed to milk chocolate because it offers a rich flavor and color. It’s bitter in flavor compared to milk chocolate, which prevents these brownies from becoming too sweet.
- Eggs: These must be at room temperature before adding them to your recipe. Cold eggs do not whip well and will be harder to emulsify with the sugar.
- Caster sugar: You can use either golden caster sugar (my preferred option, also known as raw caster sugar) or regular white caster sugar for this recipe. The golden version contains molasses which gives these brownies an extra depth of flavor. Be sure not to use granulated sugar as the grain is too large to dissolve in the eggs.
Step By Step Instructions (with photos)
(1) In a small mixing bowl, add flour, cocoa, and salt. Whisk until well combined and no big lumps of flour or cocoa remain. Set aside.

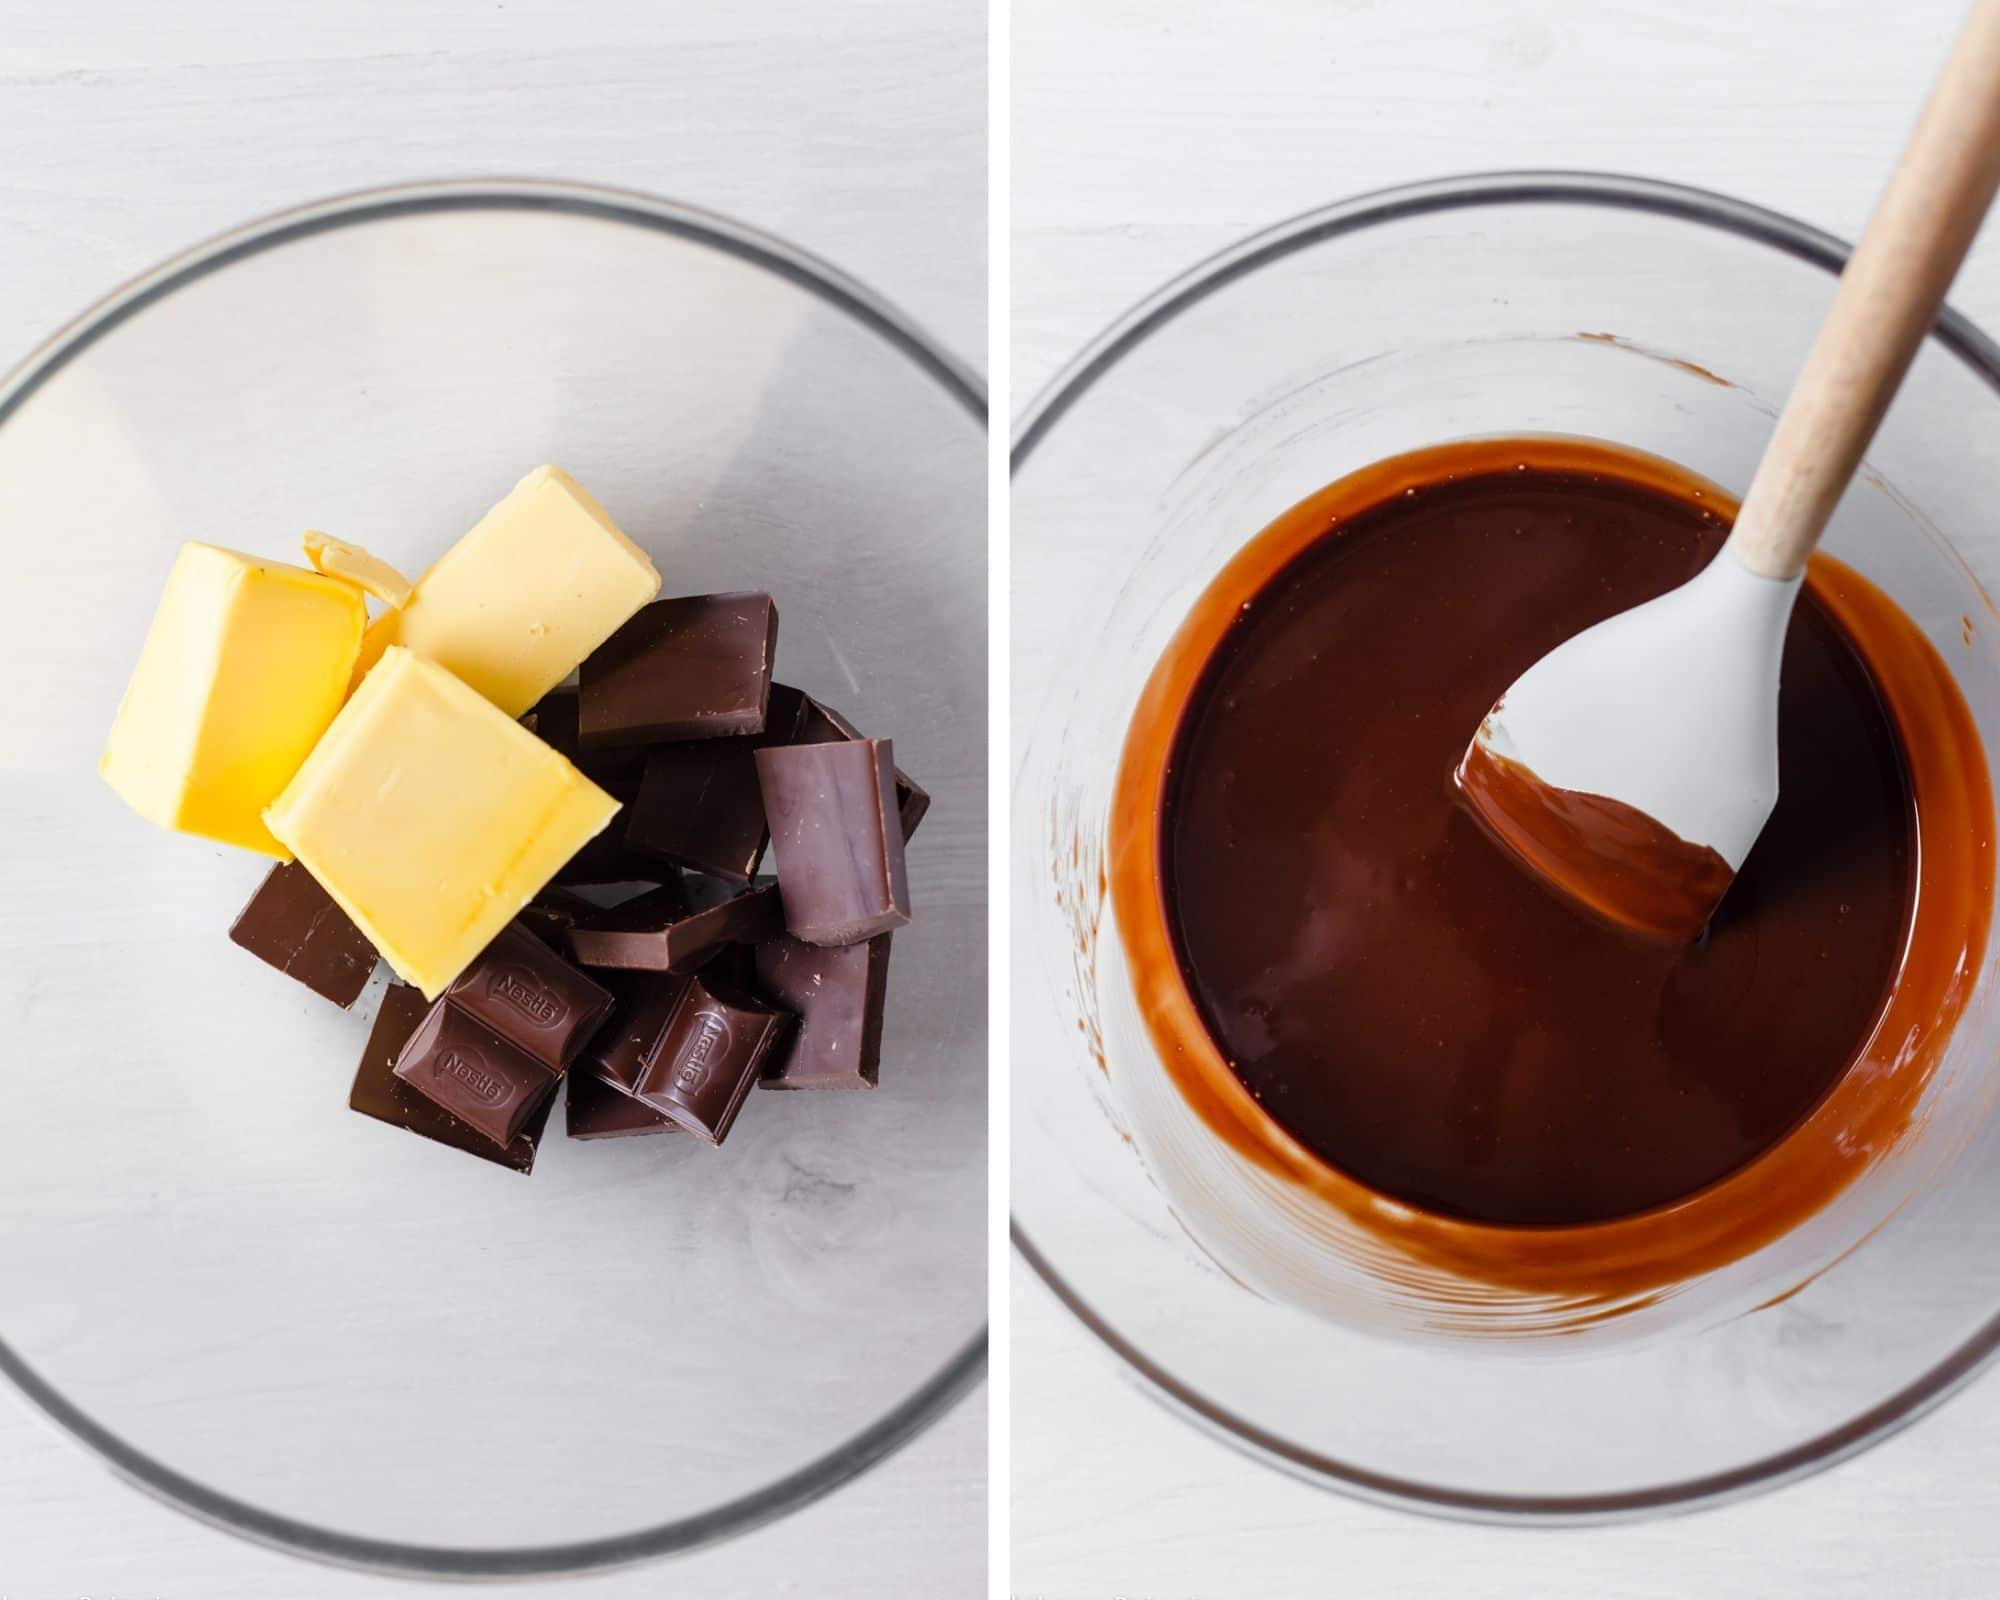
(2) Gently melt the chocolate block and butter in a double boiler over low-medium heat, stirring occasionally. Once completely melted and smooth, cool this mixture down for 10-15 minutes until it’s only slightly warm.
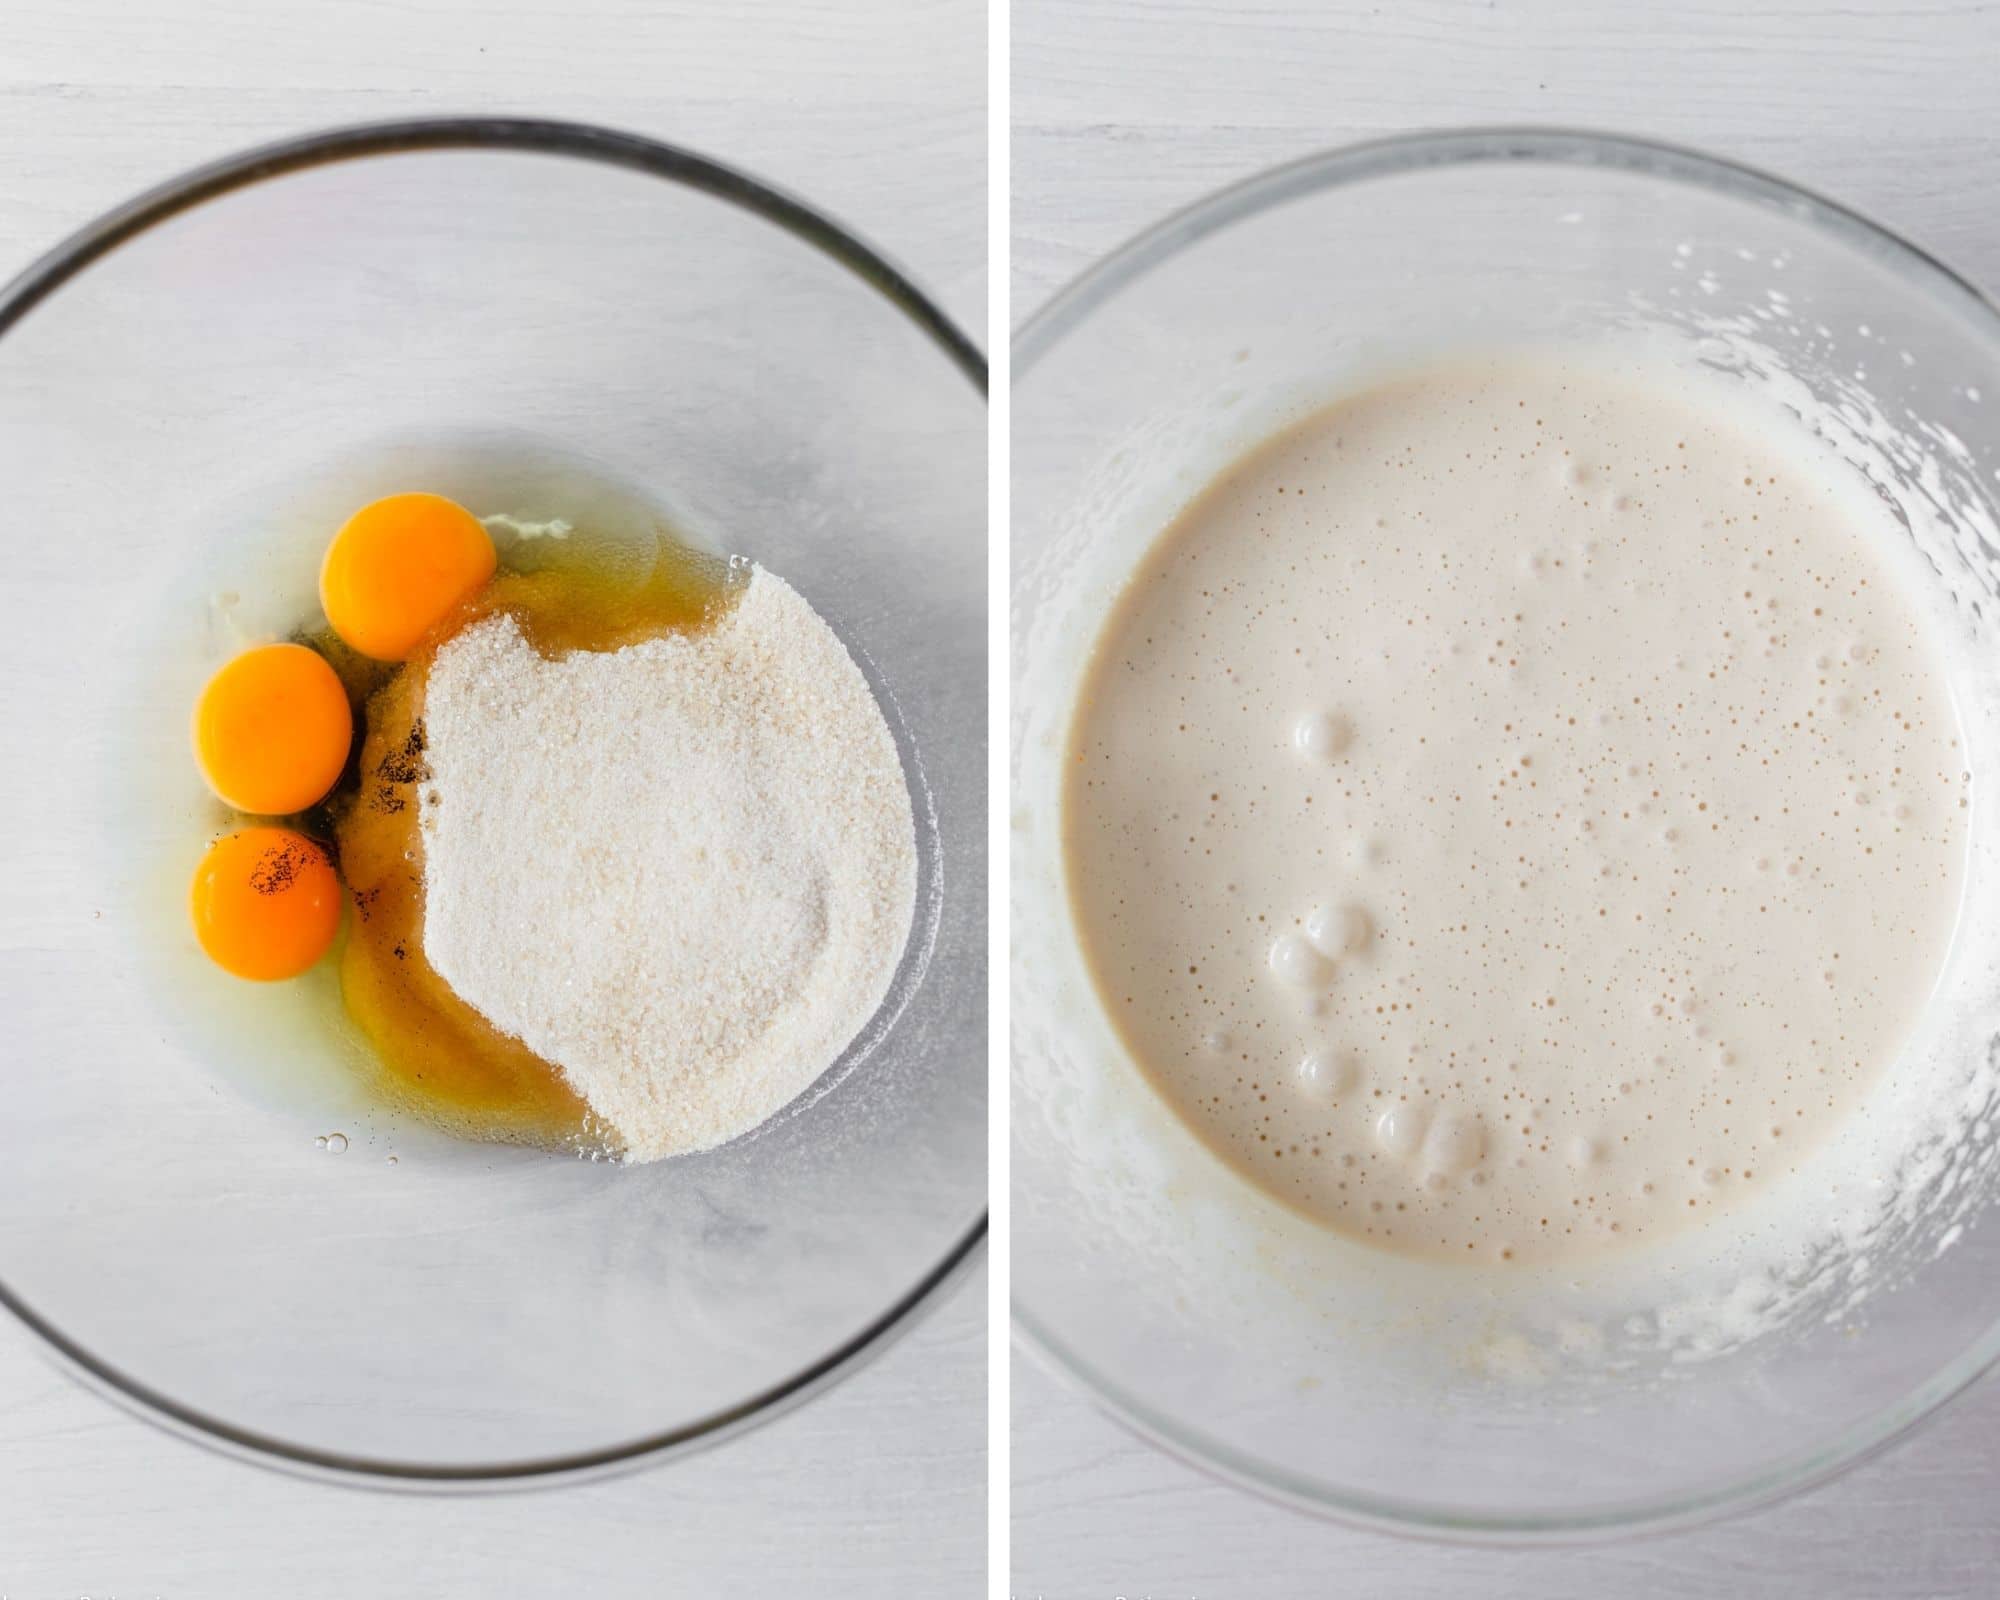
(3) In a large mixing bowl add room temperature eggs, sugar, and vanilla. Using an electric handheld beater, beat eggs for 3 minutes, scraping down the sides when needed.
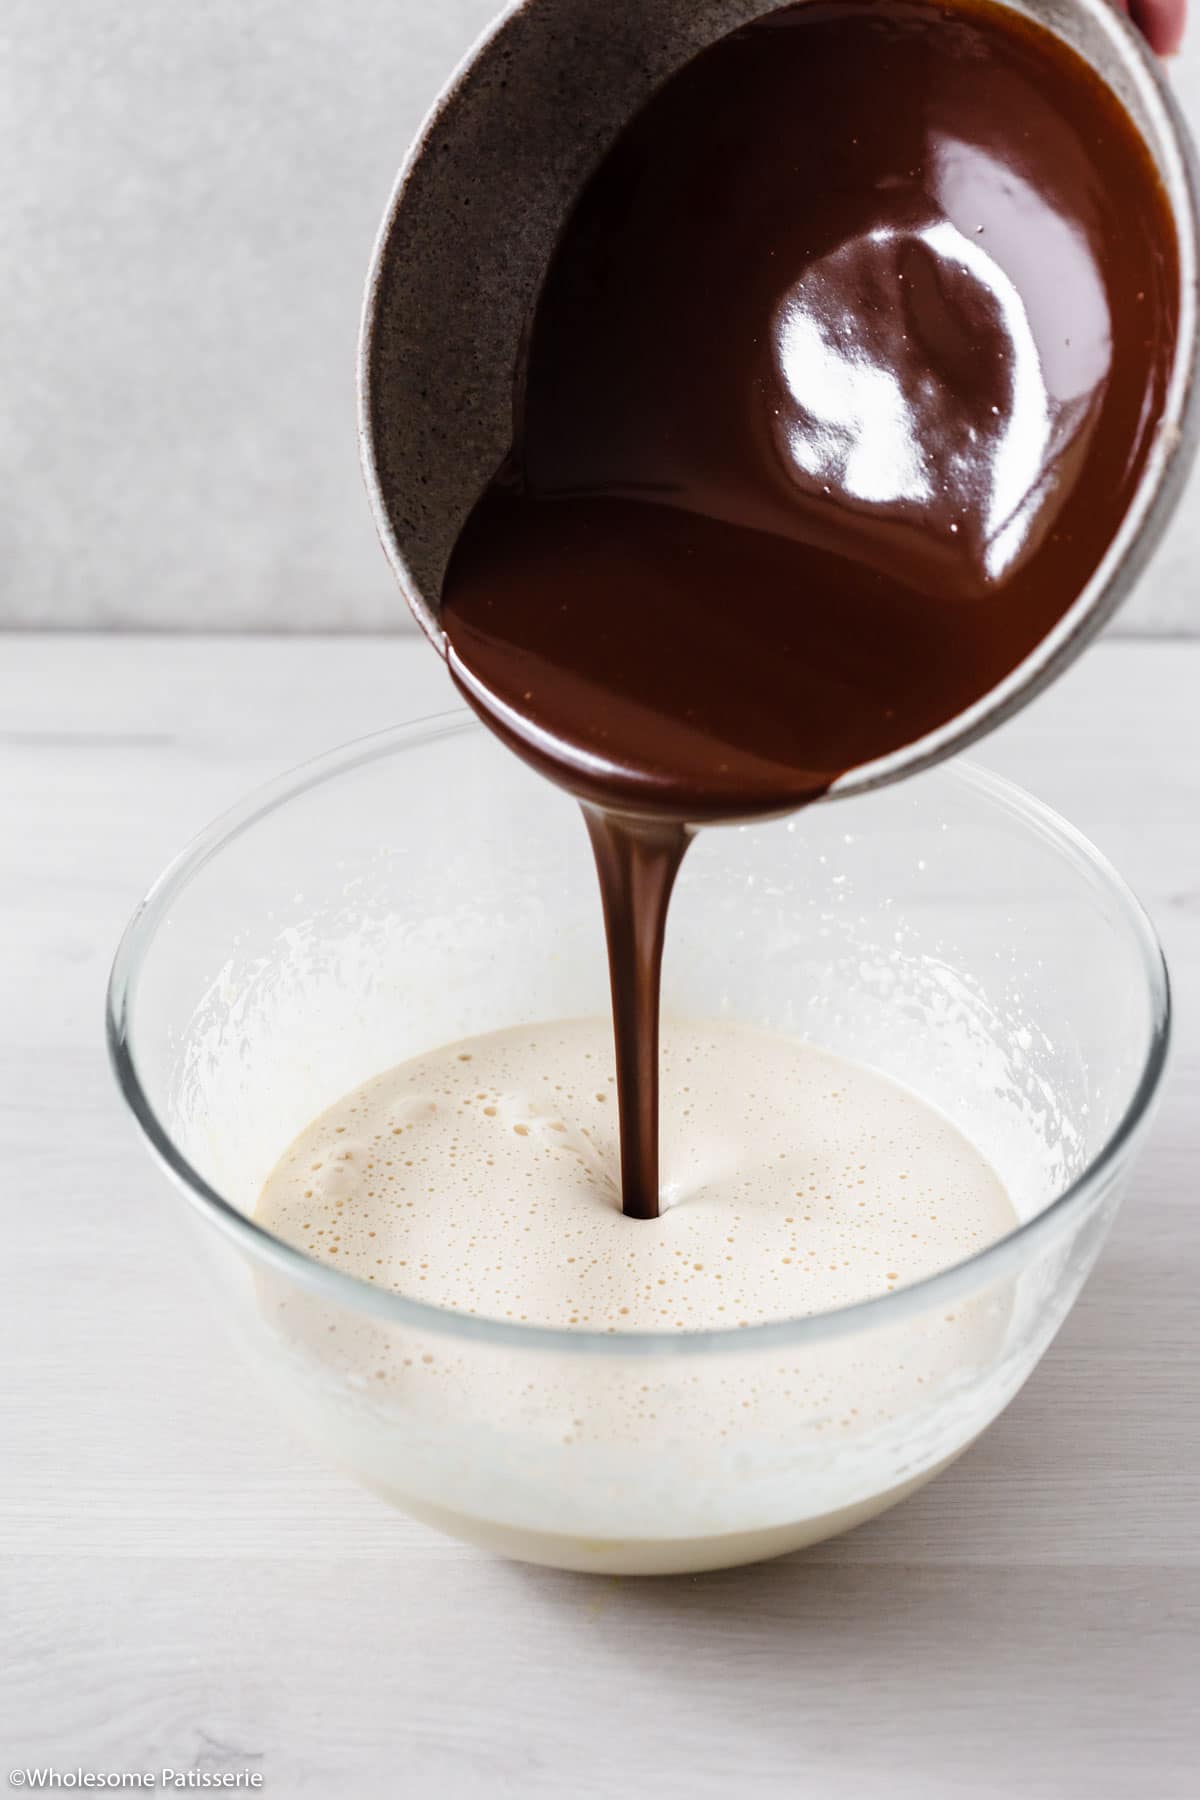
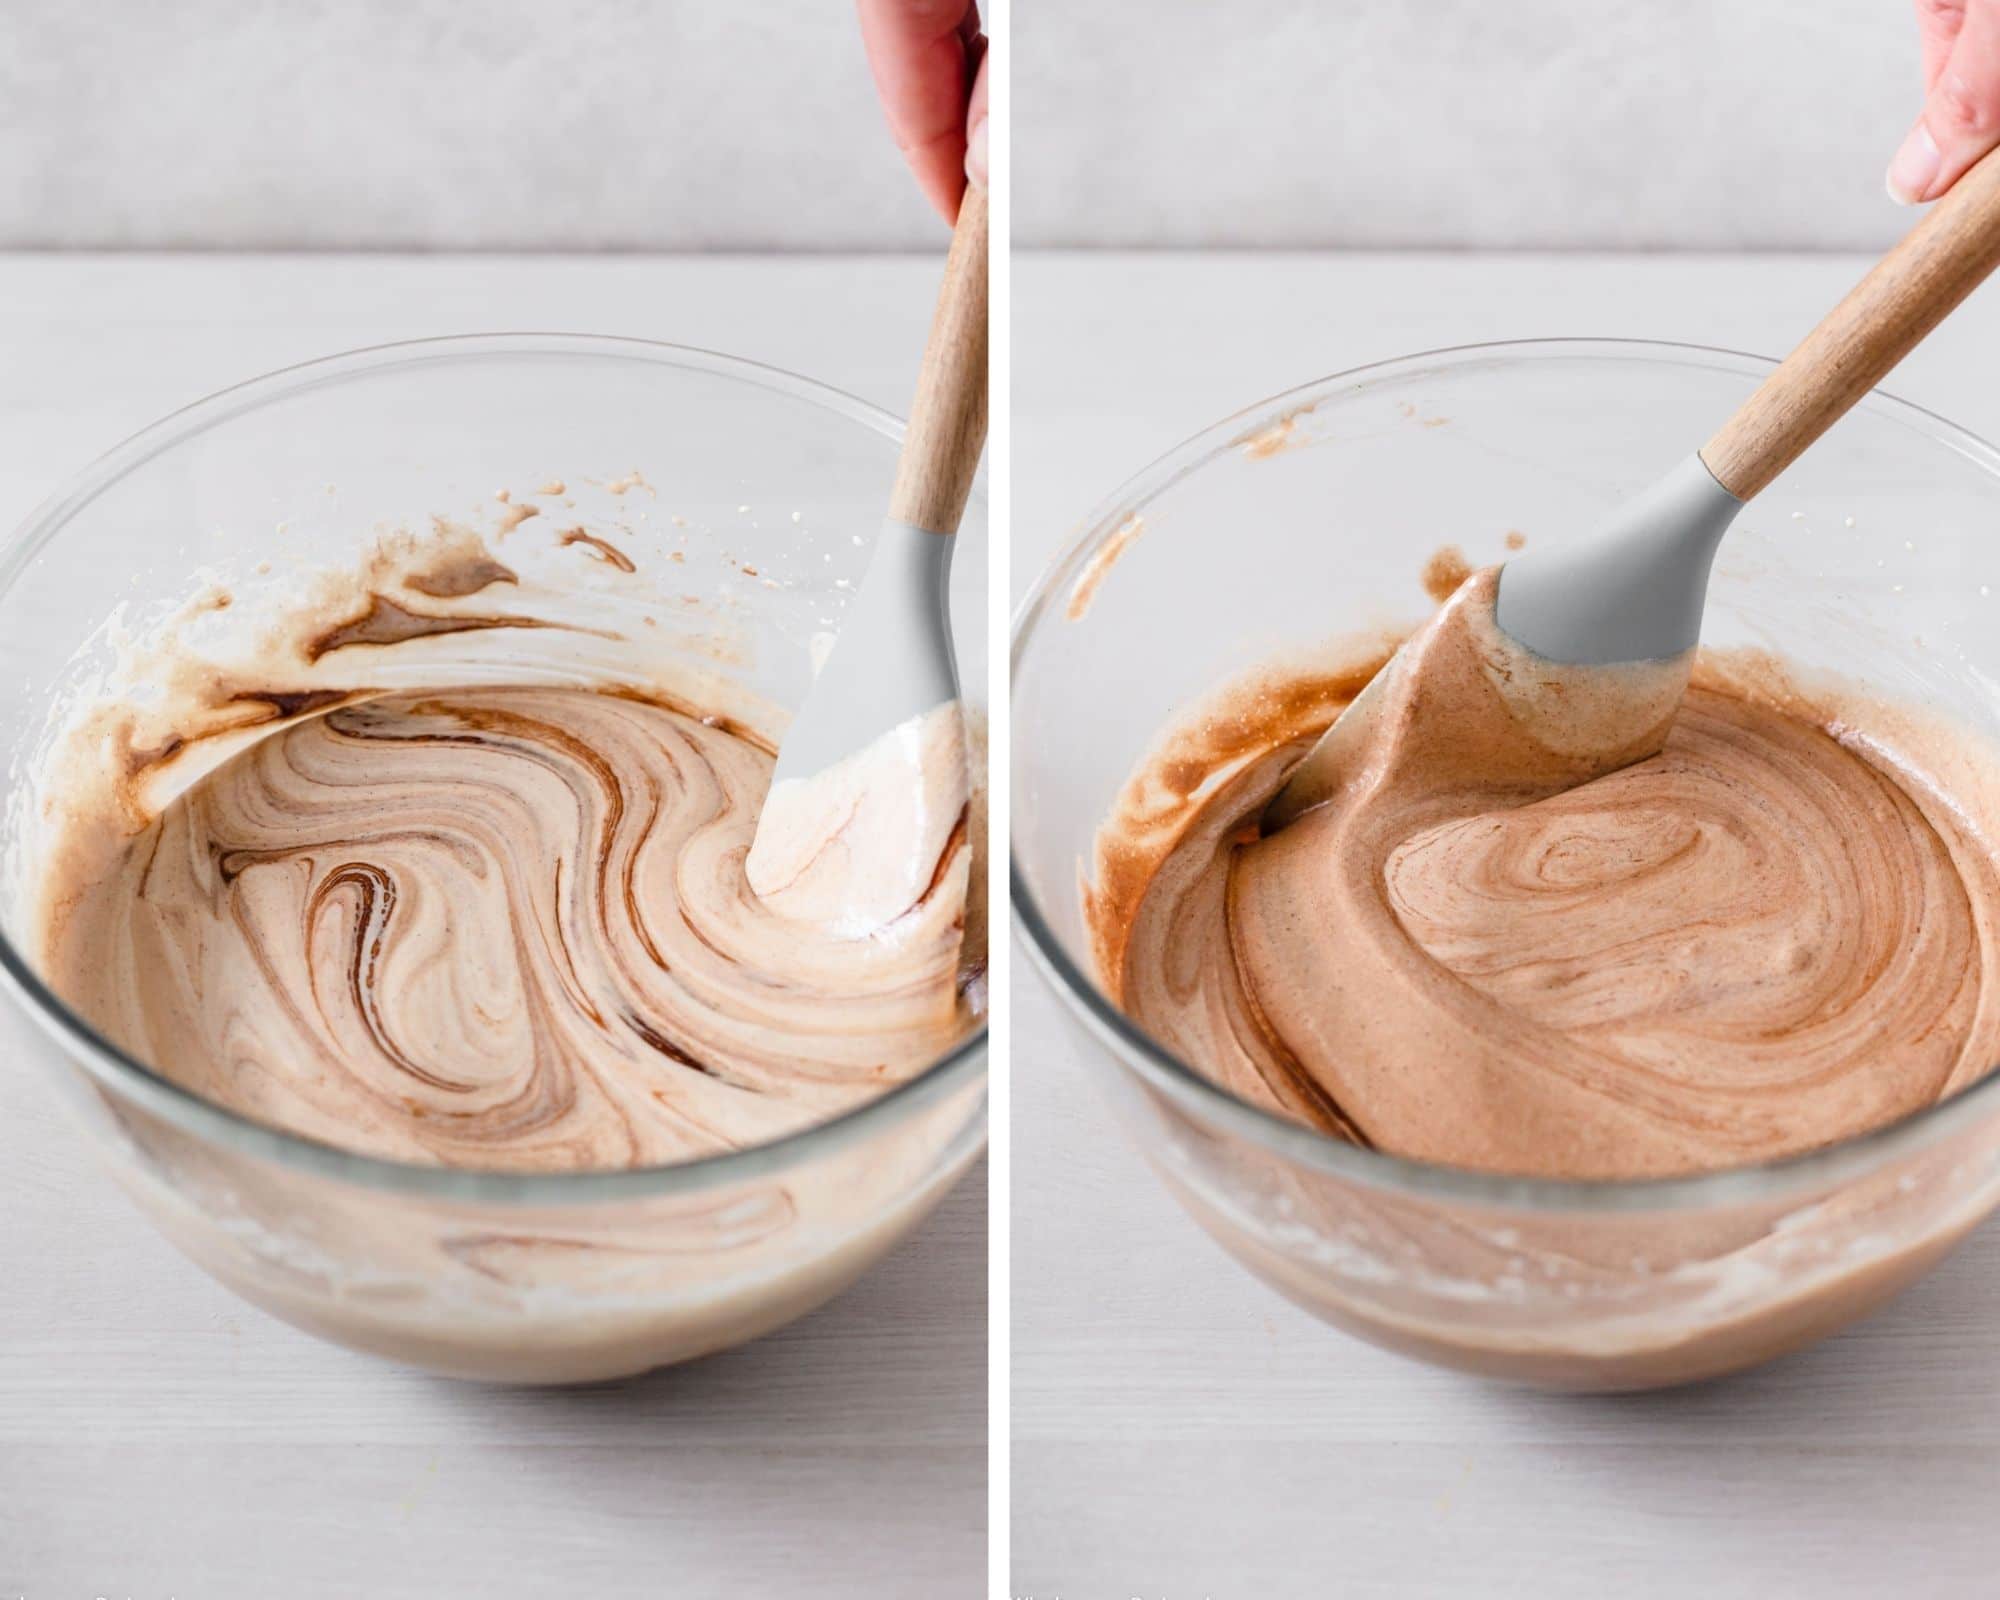
(4) Pour the melted chocolate and butter mixture into the beaten eggs. Gently fold until they’re well combined, it will take you between 3-5 minutes. This ensures less air is lost from the whipped eggs.
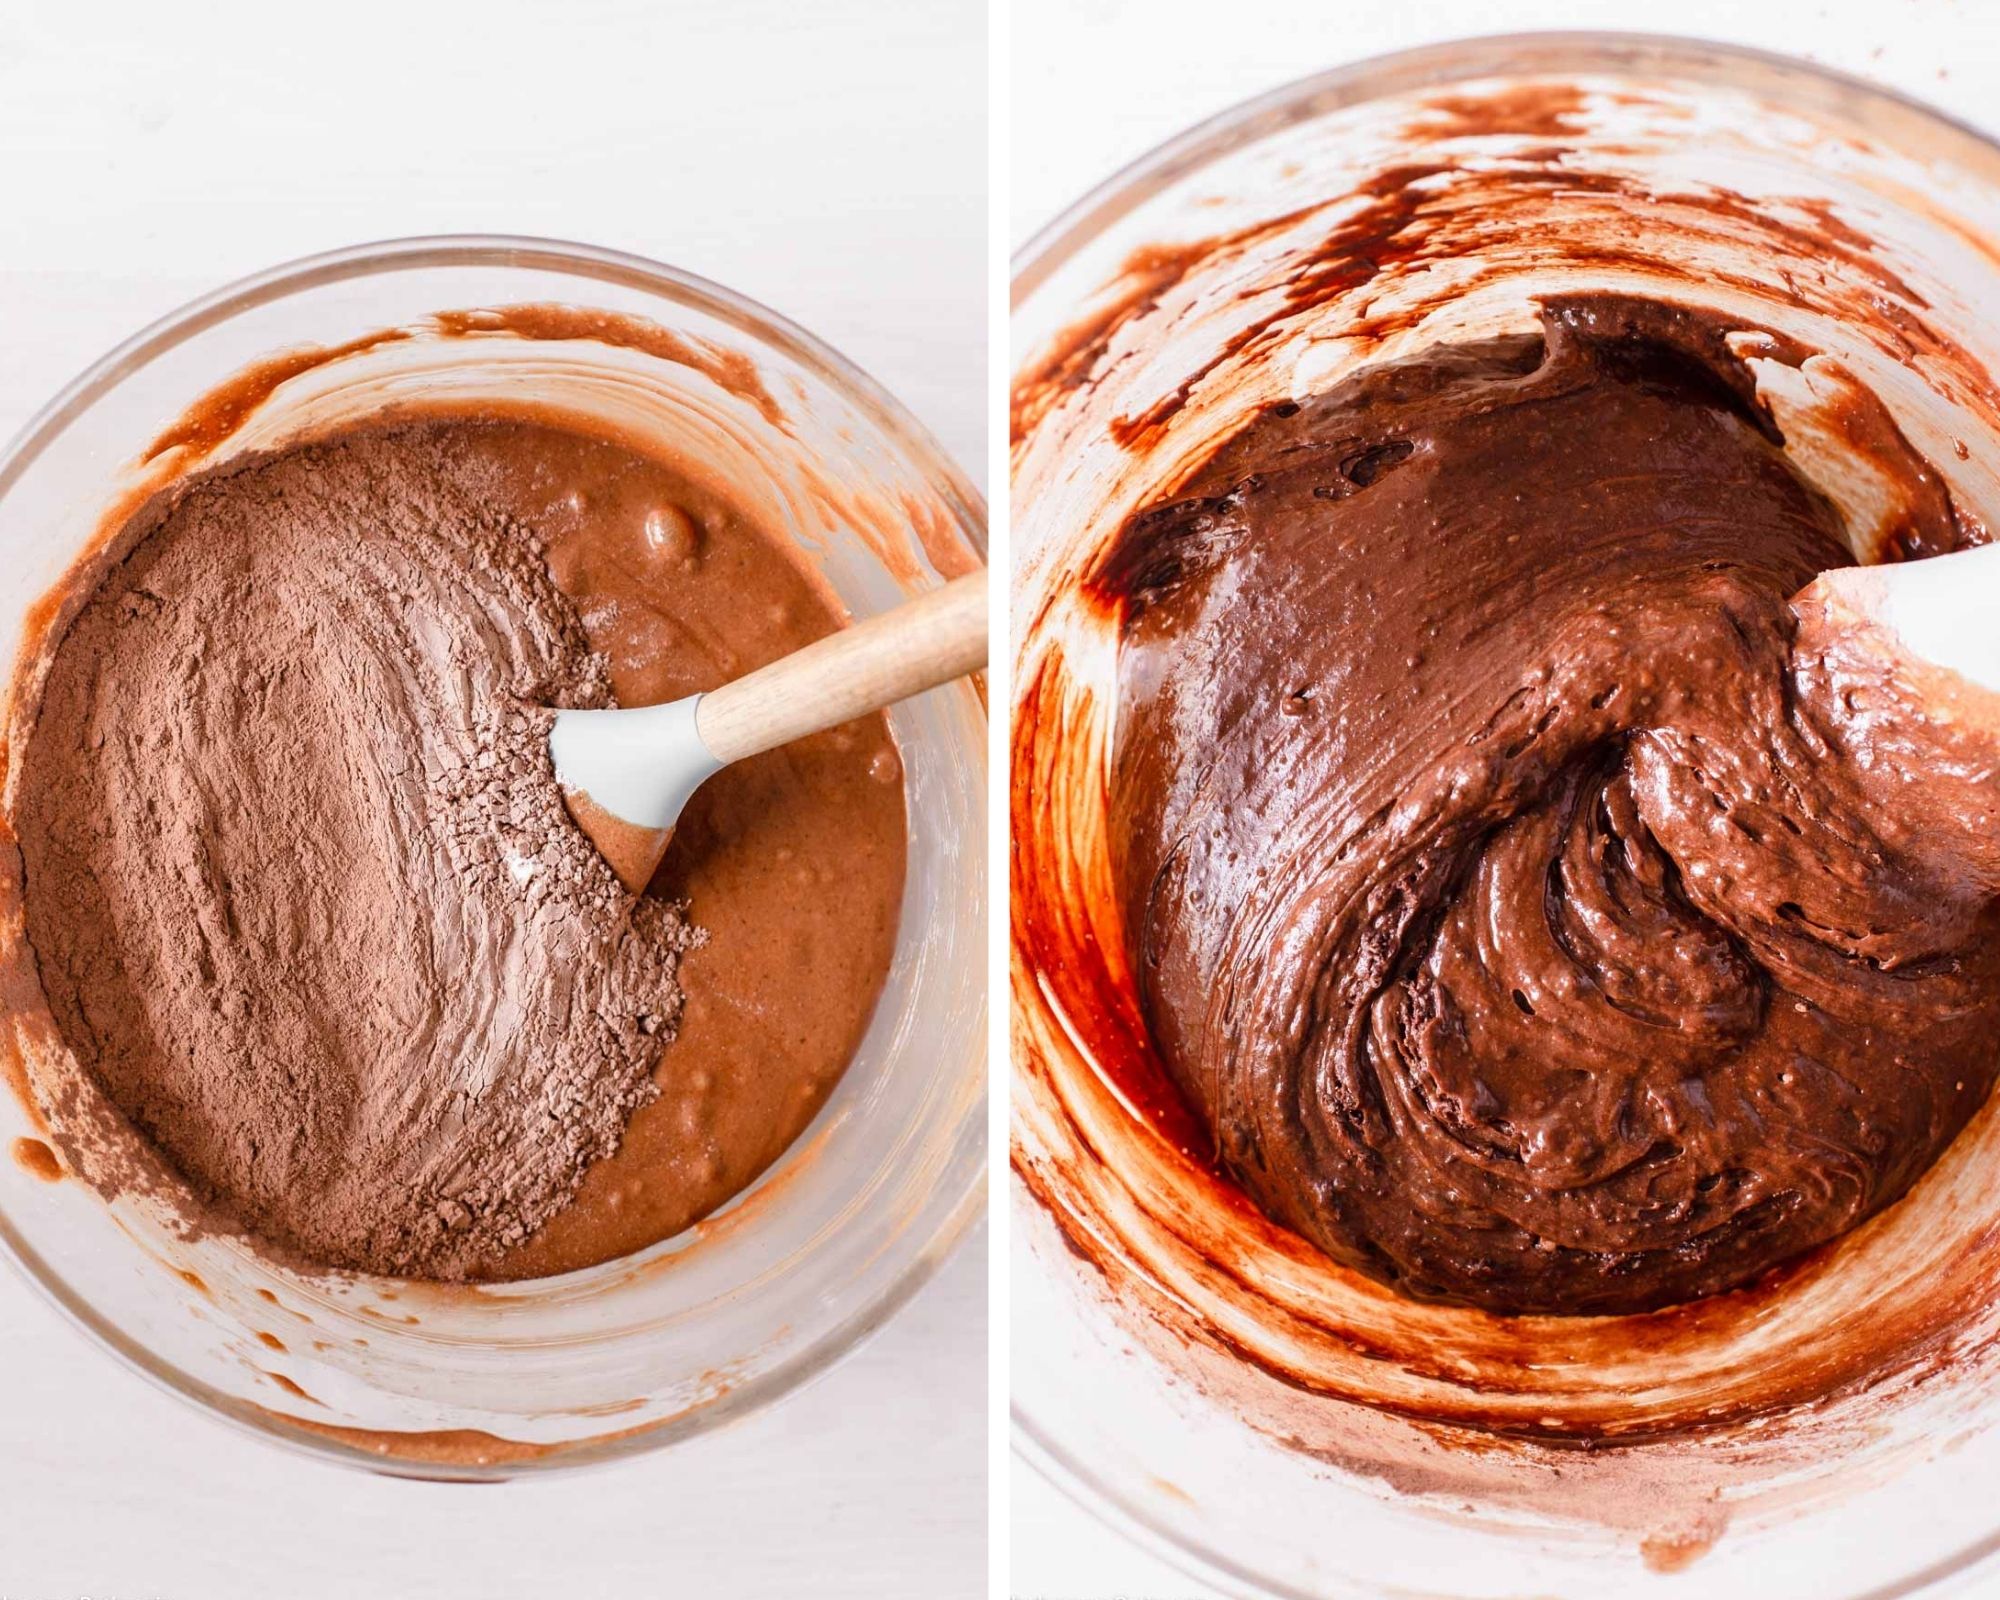
(5) Add dry flour mixture and gently fold it through until it’s well combined and no lumps of flour or cocoa remain. Ensuring not to over-mix.
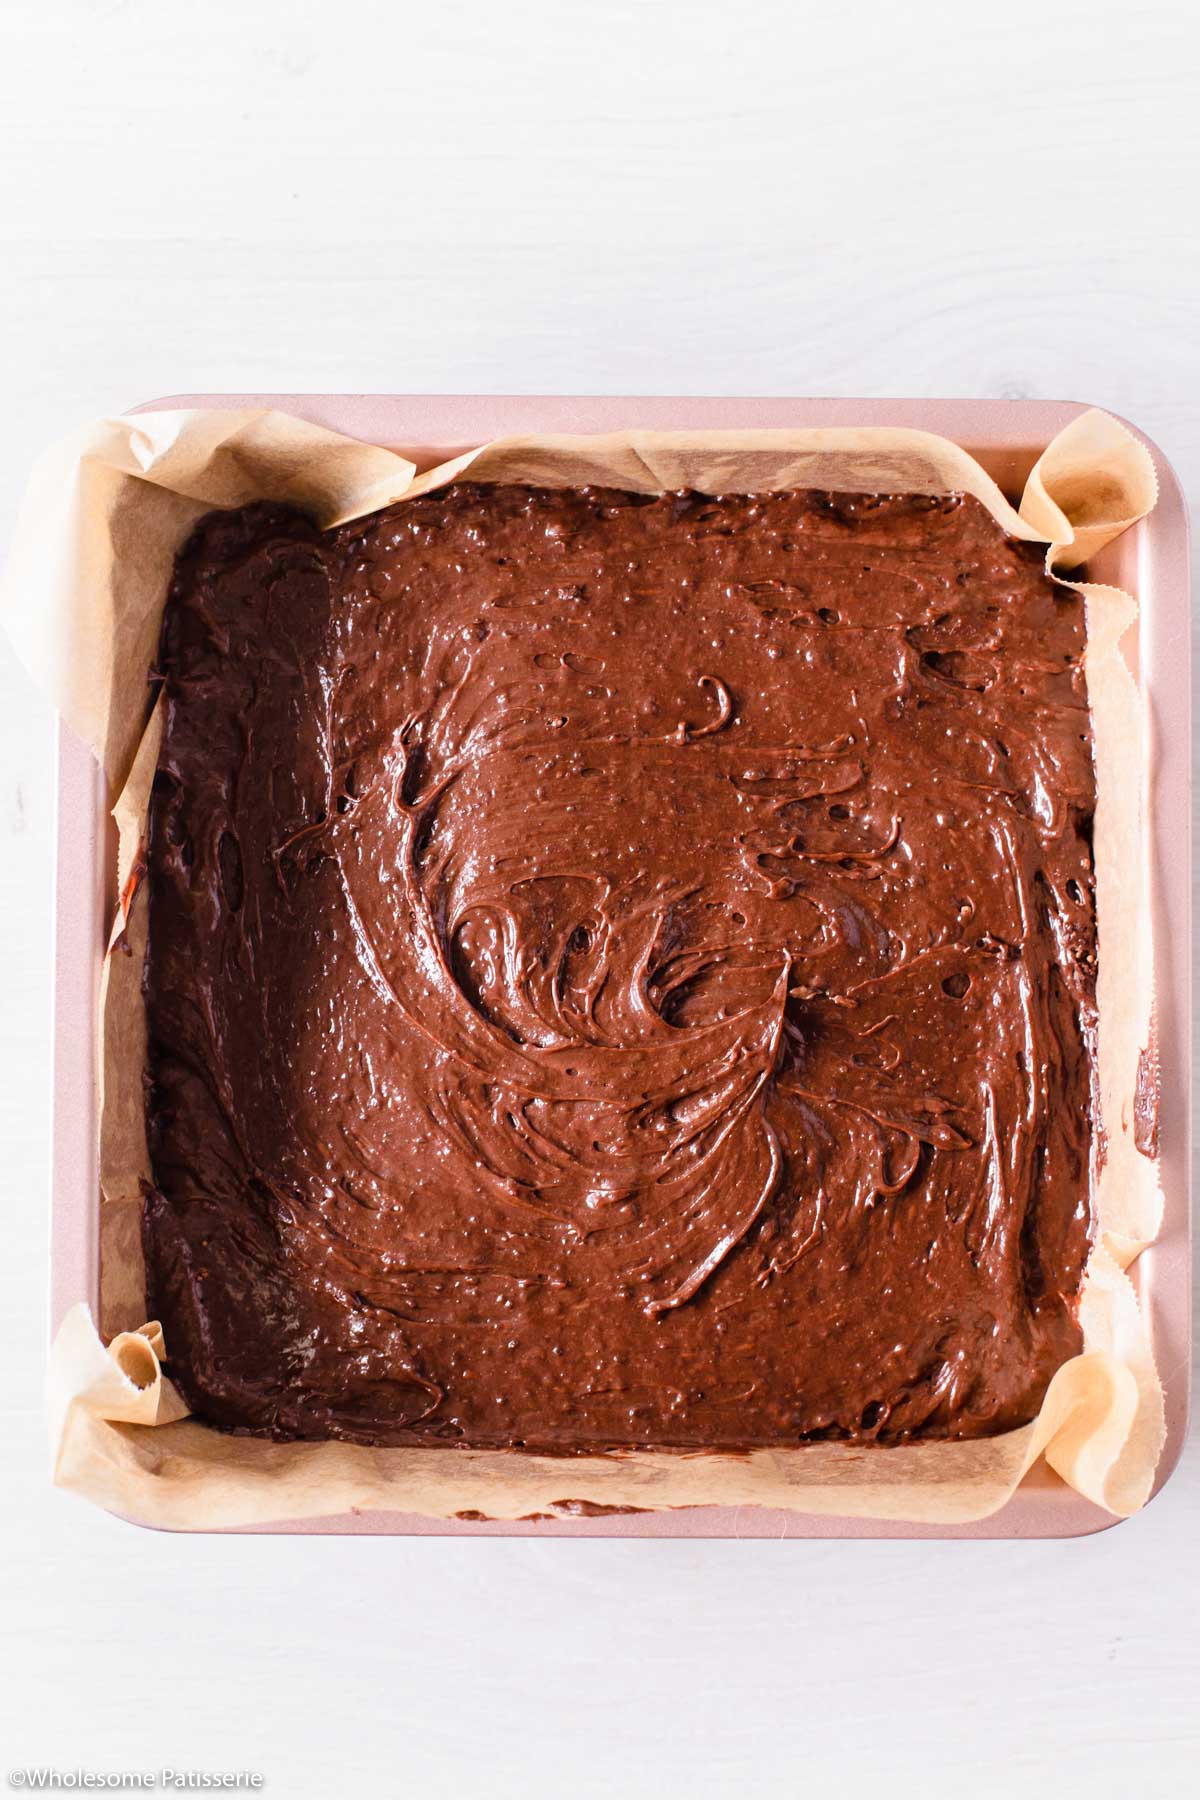
(6) Pour batter into lined pan, spreading it out evenly with a spatula.
(7) Bake for 35-40 minutes until the crinkle crust has formed and a toothpick inserted into the middle comes out with some moist crumbs, not completely clean.
Slightly under-baking these brownies will create that fudgy middle we’re after. Overbaking these brownies will dry them out which results in a cakey texture.

(8) Remove from the oven and allow them to cool in the pan for 15 minutes. Then gently lift the brownie out using the baking paper and transfer it to a wire rack to cool completely.
(9) Slice into squares and enjoy!
Expert Tips & Substitutions
- Store brownies in an airtight container, in a cool, dry, dark pantry, for 3-4 days. Then transfer to the refrigerator to keep fresh if needed.
- The melted chocolate and butter mixture needs to be cooled down until it’s close to room temperature or still very slightly warm, not hot, before being added to the beaten eggs. If the chocolate mixture is too warm, it will curdle/cook the eggs and you’ll end up with bits of solid cooked egg in your brownies, no thanks!
- Whip eggs and sugar together for the full 3 minutes. This is crucial as it’s this process that creates the crinkle crust we desire.
- Folding the melted chocolate gently into the beaten eggs will take 3-5 minutes and we must not rush this step. You just spent 3 minutes aerating your eggs, don’t lose that precious air by deflating them by quickly trying to fold in the chocolate. This step can be quite therapeutic 😉
- Folding in the dry mixture also takes time. Again, we don’t want to deflate our eggs if we want that glorious crinkle-shiny top.
- Substitute dutch-process cocoa powder for natural unsweetened cocoa powder in this particular recipe. As there is no baking soda or baking powder added, it’s safe to swap these two in this recipe. Although I highly recommend you use dutch-process cocoa as it makes the best brownies that aren’t overpowering with sweetness. Dutch cocoa is less sweet and more bitter with mellow/woodsy undertones.
- Slightly under-baking these brownies will create that fudgy middle we’re after. Overbaking these brownies will dry them out which results in a cakey texture.
Recipe FAQ’s
The crinkle topping is essentially a thin meringue crust on top of brownies. It’s created by beating your eggs and sugar together for 3 whole minutes, which aerates them beautifully. The sugar will dissolve into the eggs whilst you beat them together, creating stability and shine. In the oven, the brownies rise and the crust forms as the meringue element in the brownies dry out.
The second secret to crinkle top brownies with a shiny top is to use real melted chocolate in addition to cocoa powder.
Shiny top brownies are the result of dissolving sugar into the beaten eggs. The shiny top develops when the crinkle crust forms. As mentioned above, sugar stabilizes and adds shine to beaten eggs and is exactly how a basic meringue is created.
Fudge brownies contain more fat/liquid ingredients than dry flour ingredients. The secret to fudgy brownies is to also under-bake them. Remove brownies from the oven when a toothpick inserted into the middle comes out with some moist crumbs on it and is not completely clean. This will guarantee you a fudgy textured brownie.
If you enjoy this recipe, please consider leaving a ⭐️ star rating and a comment review below. I love to hear what you think and it’s much appreciated. Thank you! Your email address will not be published. Sam x

Crinkle Top Fudge Chocolate Brownie Recipe
Ingredients
Method
- Preheat oven to 170ºC (340ºC). Line a 8 inch x 8 inch (20cm x 20cm) square baking pan with parchment paper, set aside.
- In a small mixing bowl, sift together flour and cocoa. Whisk through salt an set aside.
- Prepare a double boiler with a heat proof mixing bowl over simmering water.
- Place butter in the bowl then break the chocolate block up into squares and place into the bowl with the butter. Gently melt over a low-medium heat, stirring occasionally. Remove bowl and set aside to cool mixture down for 10-15 minutes until it’s only slightly warm.
- In a large mixing bowl, using either electric hand beaters or a stand mixer with the paddle attached, add room temperature eggs, sugar and vanilla. Beat together for 3 minutes, scraping down the sides as needed. The mixture will turn thick and pale.
- Once melted chocolate mixture has cooled and is only slightly warm to the touch, pour it into your beaten eggs.
- Gently fold chocolate into eggs for about 3-5 minutes until they’re well blended. Take your time as you don't want to lose too much air in those beaten eggs.
- Add dry flour mixture and gently fold through until well combined and no pockets of flour remain, ensuring not to over-mix.
- Pour batter into lined pan, spread out evenly with a spatula.
- Bake for 35-37 minutes or until a toothpick inserted into the middle comes out with some moist crumbs, not completely clean. Slightly under-baking this brownie will create a fudgy center.
- Remove from oven and allow to cool in pan for 15 minutes.
- Gently lift up sides of the baking paper to remove brownie from the pan. Transfer to a wire rack to cool completely. Still leaving the baking paper on but peeled down completely from the sides.
- Slice brownie into squares.
- Serve and enjoy!