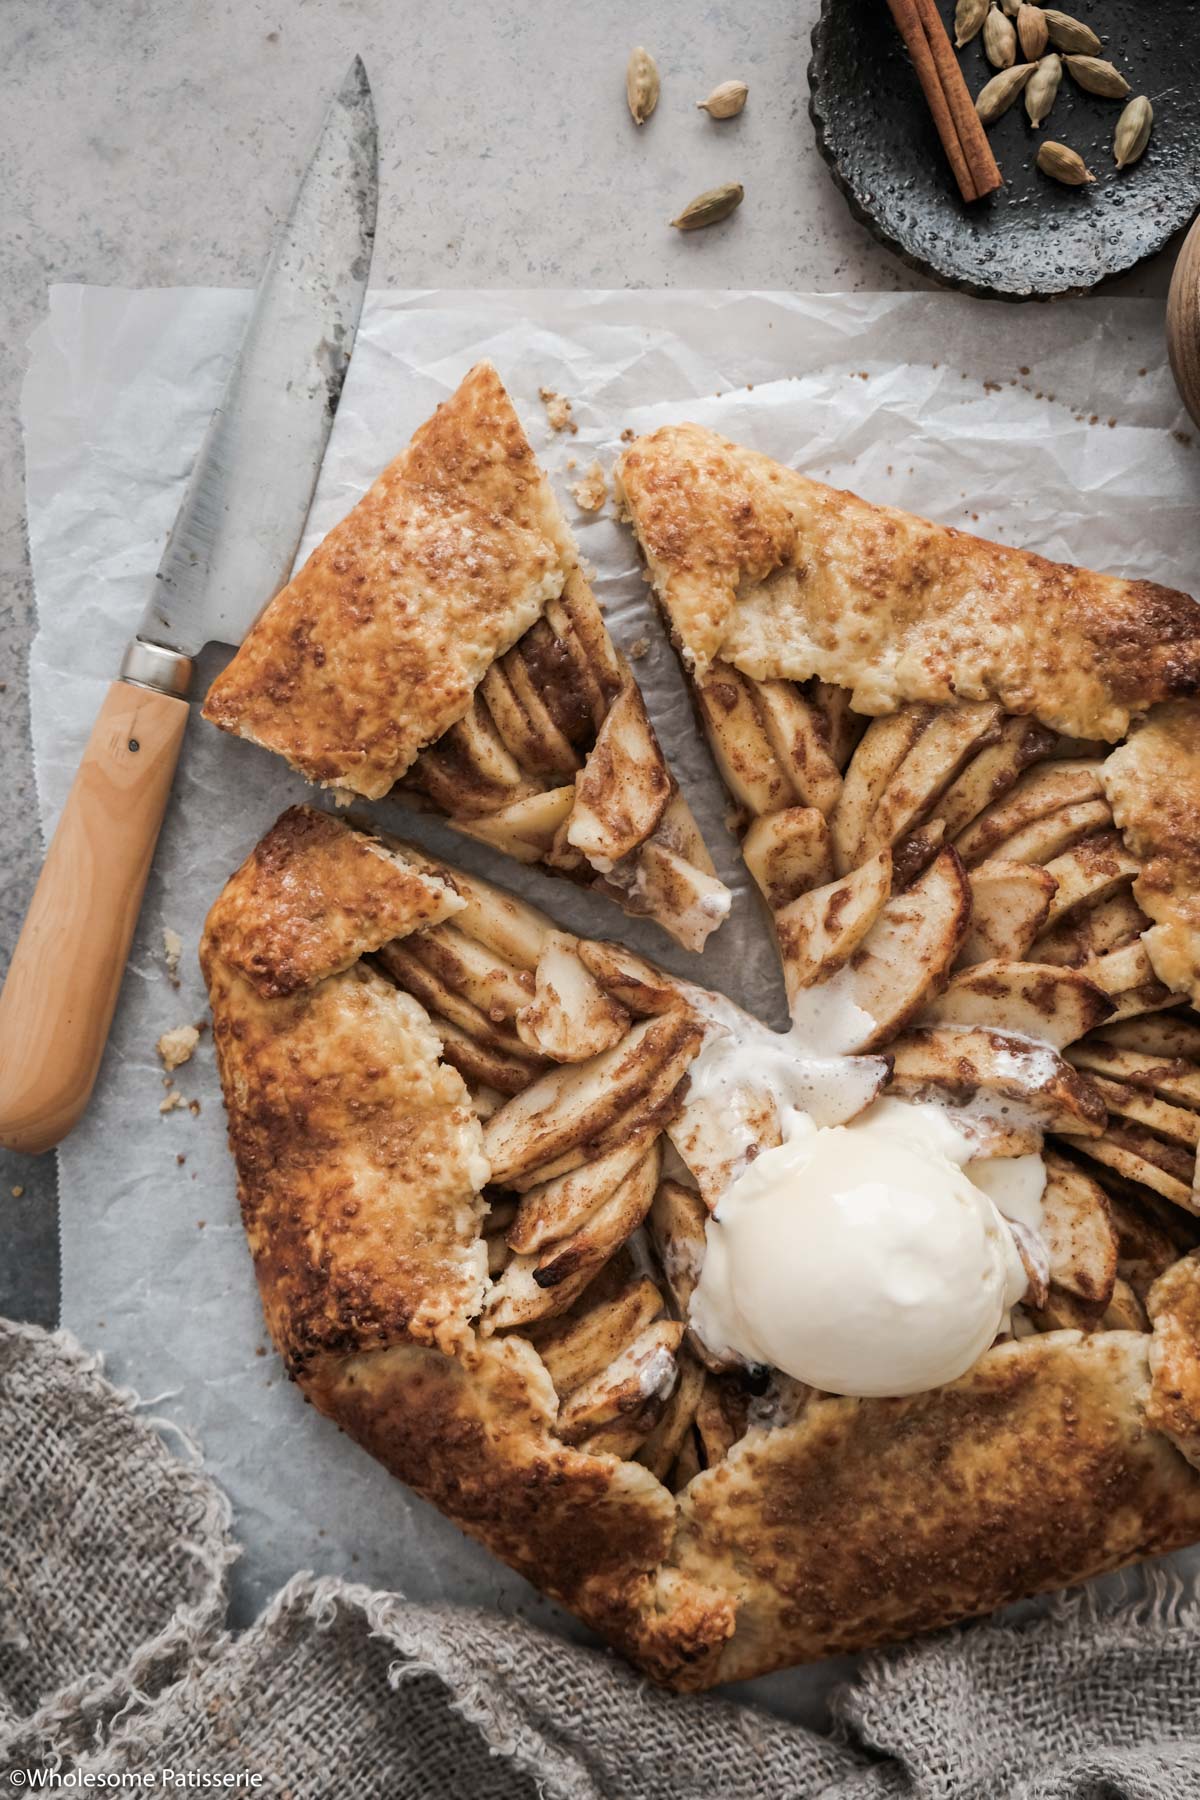
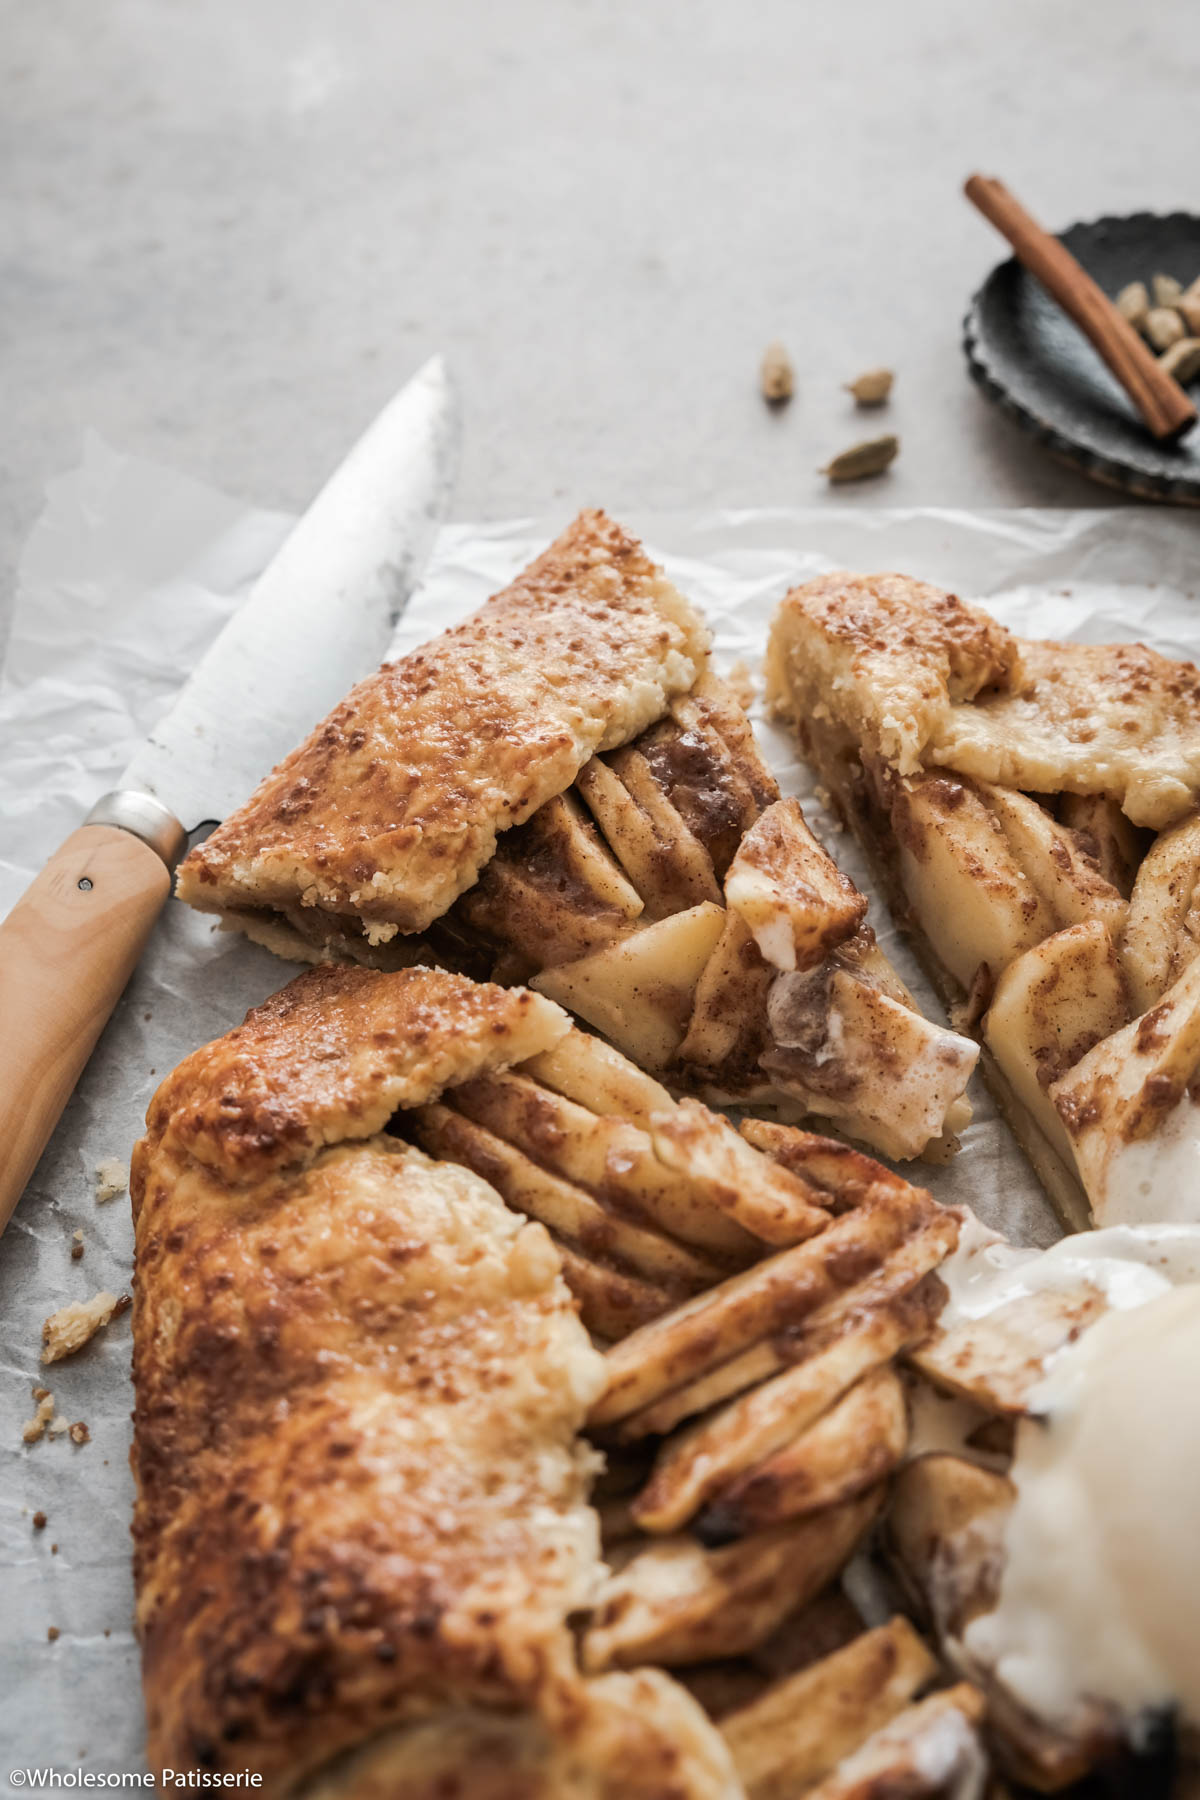
Simple Rustic Apple Tart
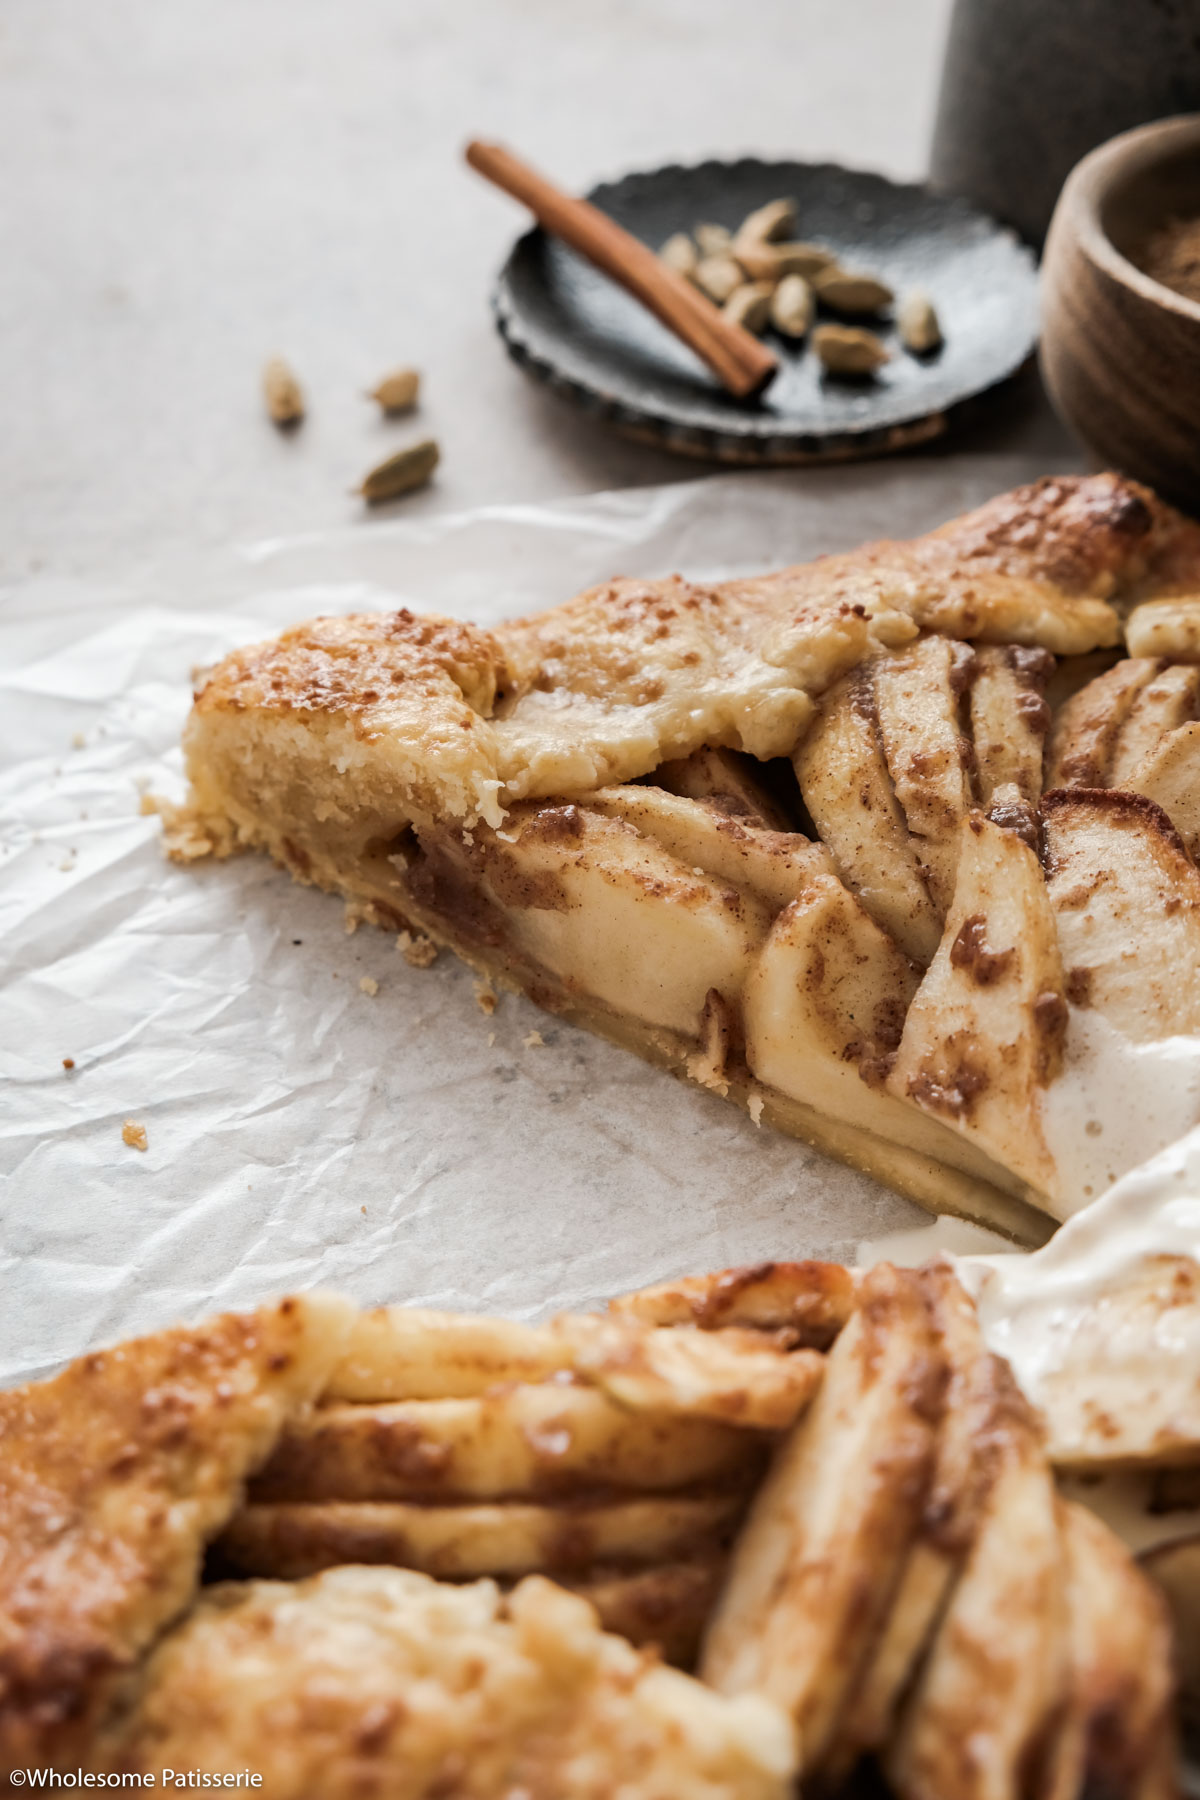
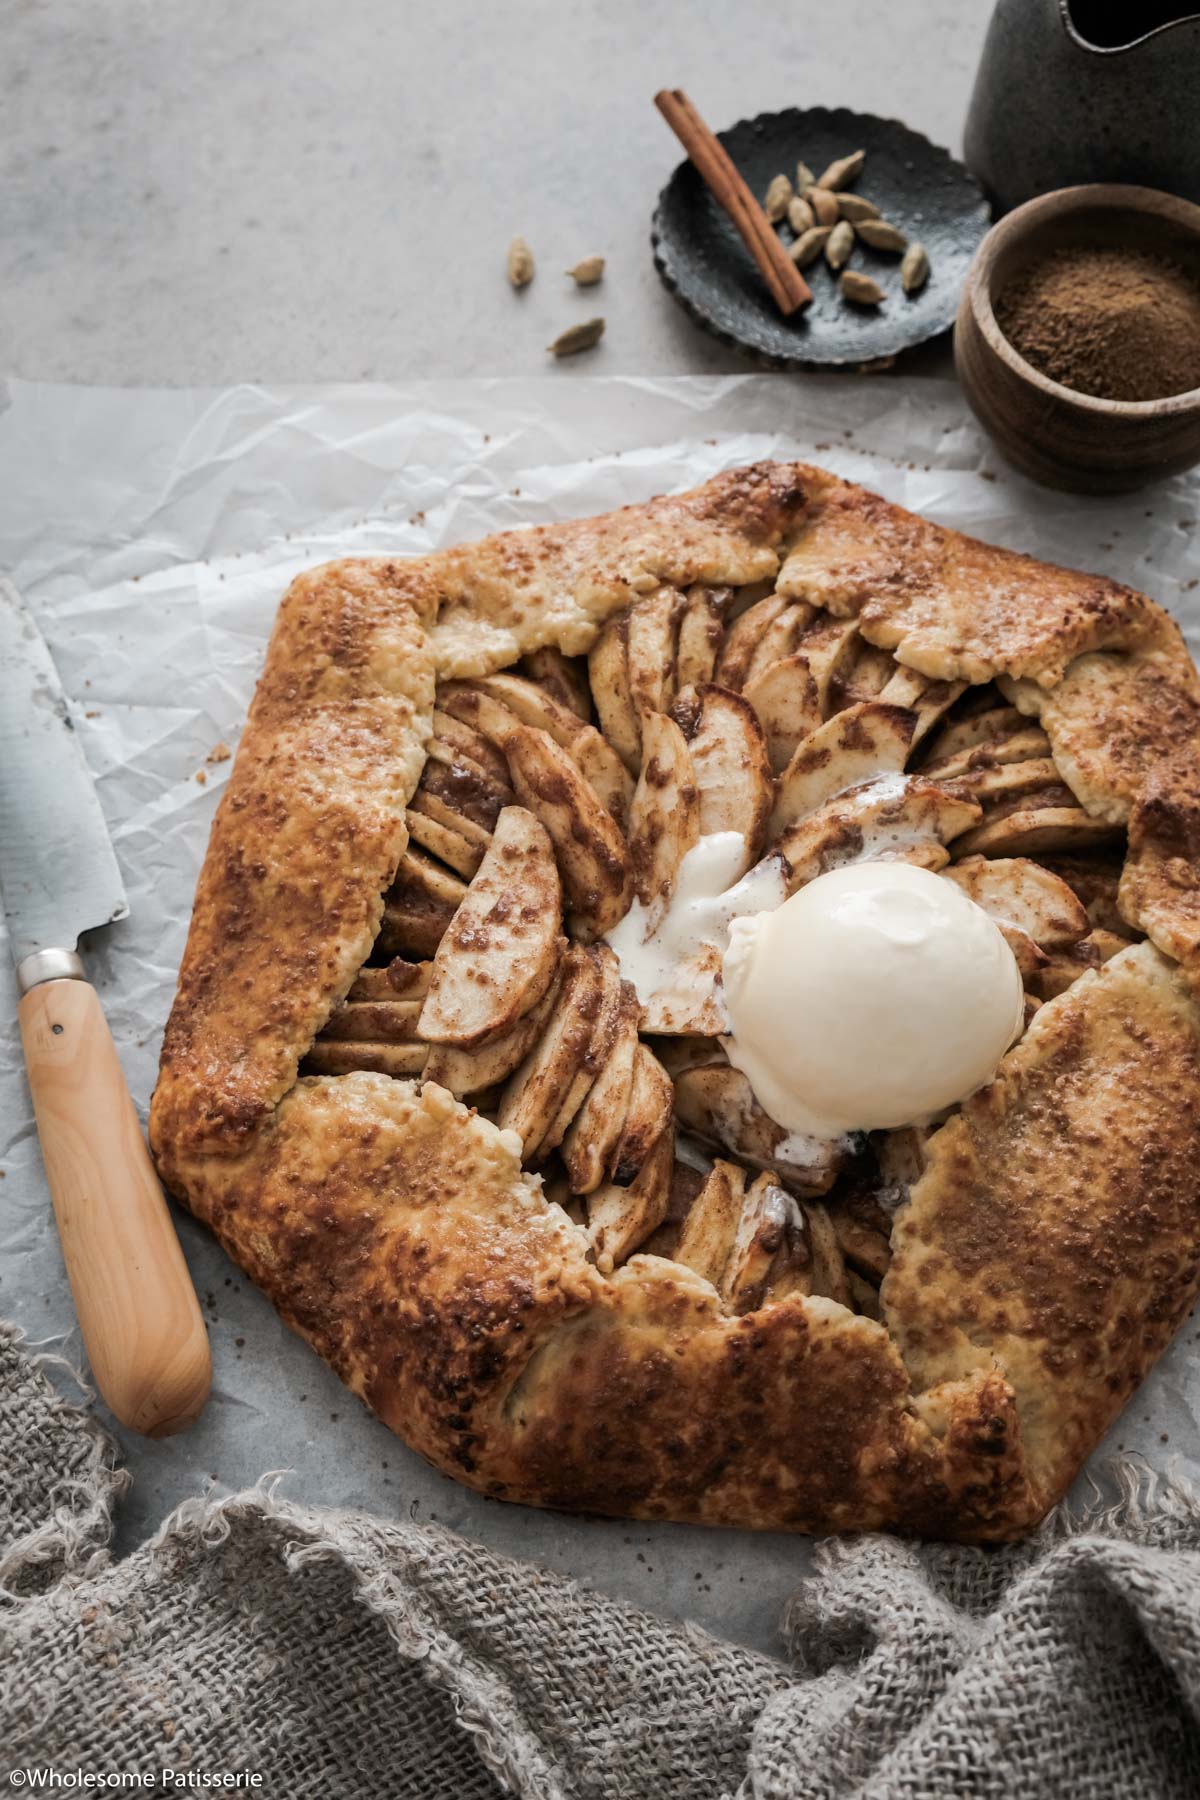
This Simple Rustic Apple Tart has a buttery shortcrust pastry base filled with a spiced apple filling. Bakes for 40 minutes and is delicious when served warm with scoops of vanilla ice cream.
If you’re interested in more fall and Thanksgiving recipes for this season, you have got to try out these cozy Easy Small Batch Cinnamon Cupcakes, these Pumpkin Pie Spice Cookies without Pumpkin Puree, and this fall favorite dessert Quick & Easy Apple Crumble.
🍏 Why You Will Love This Recipe
- Easier than apple pie.
- Simple & rustic.
- Infused with cinnamon, cardamom & nutmeg.
- Bakes in 40 minutes.
- Made with homemade shortcrust pastry.
- A wonderful and delicious fall, Thanksgiving, and Christmas dessert.
You may be familiar with the names apple galette and French apple tart. These are just two other names this rustic apple tart can be referred to as.
Think of it as a deconstructed apple pie. Made without a pie dish or puff pastry.
Similar to my Mini Apple Pies with Shortcrust Pastry.
There is no need to fiddle around with a pie dish or tart tin with this recipe. That’s what is so wonderful about galettes, you can whip them up in no time and it doesn’t have to be perfect.
It’s the same with my Blueberry Crumble and Apple Crumble, they’re easy desserts to make fast and they don’t have to look perfect.

This apple tart is made with a quick 5 ingredient pie crust, which is made in a food processor. Don’t have a food processor? No problem! I have a simple solution for you in the recipe notes below.
📋 Ingredient Notes & Substitutions
Below are the ingredients that you need to make this rustic apple tart:
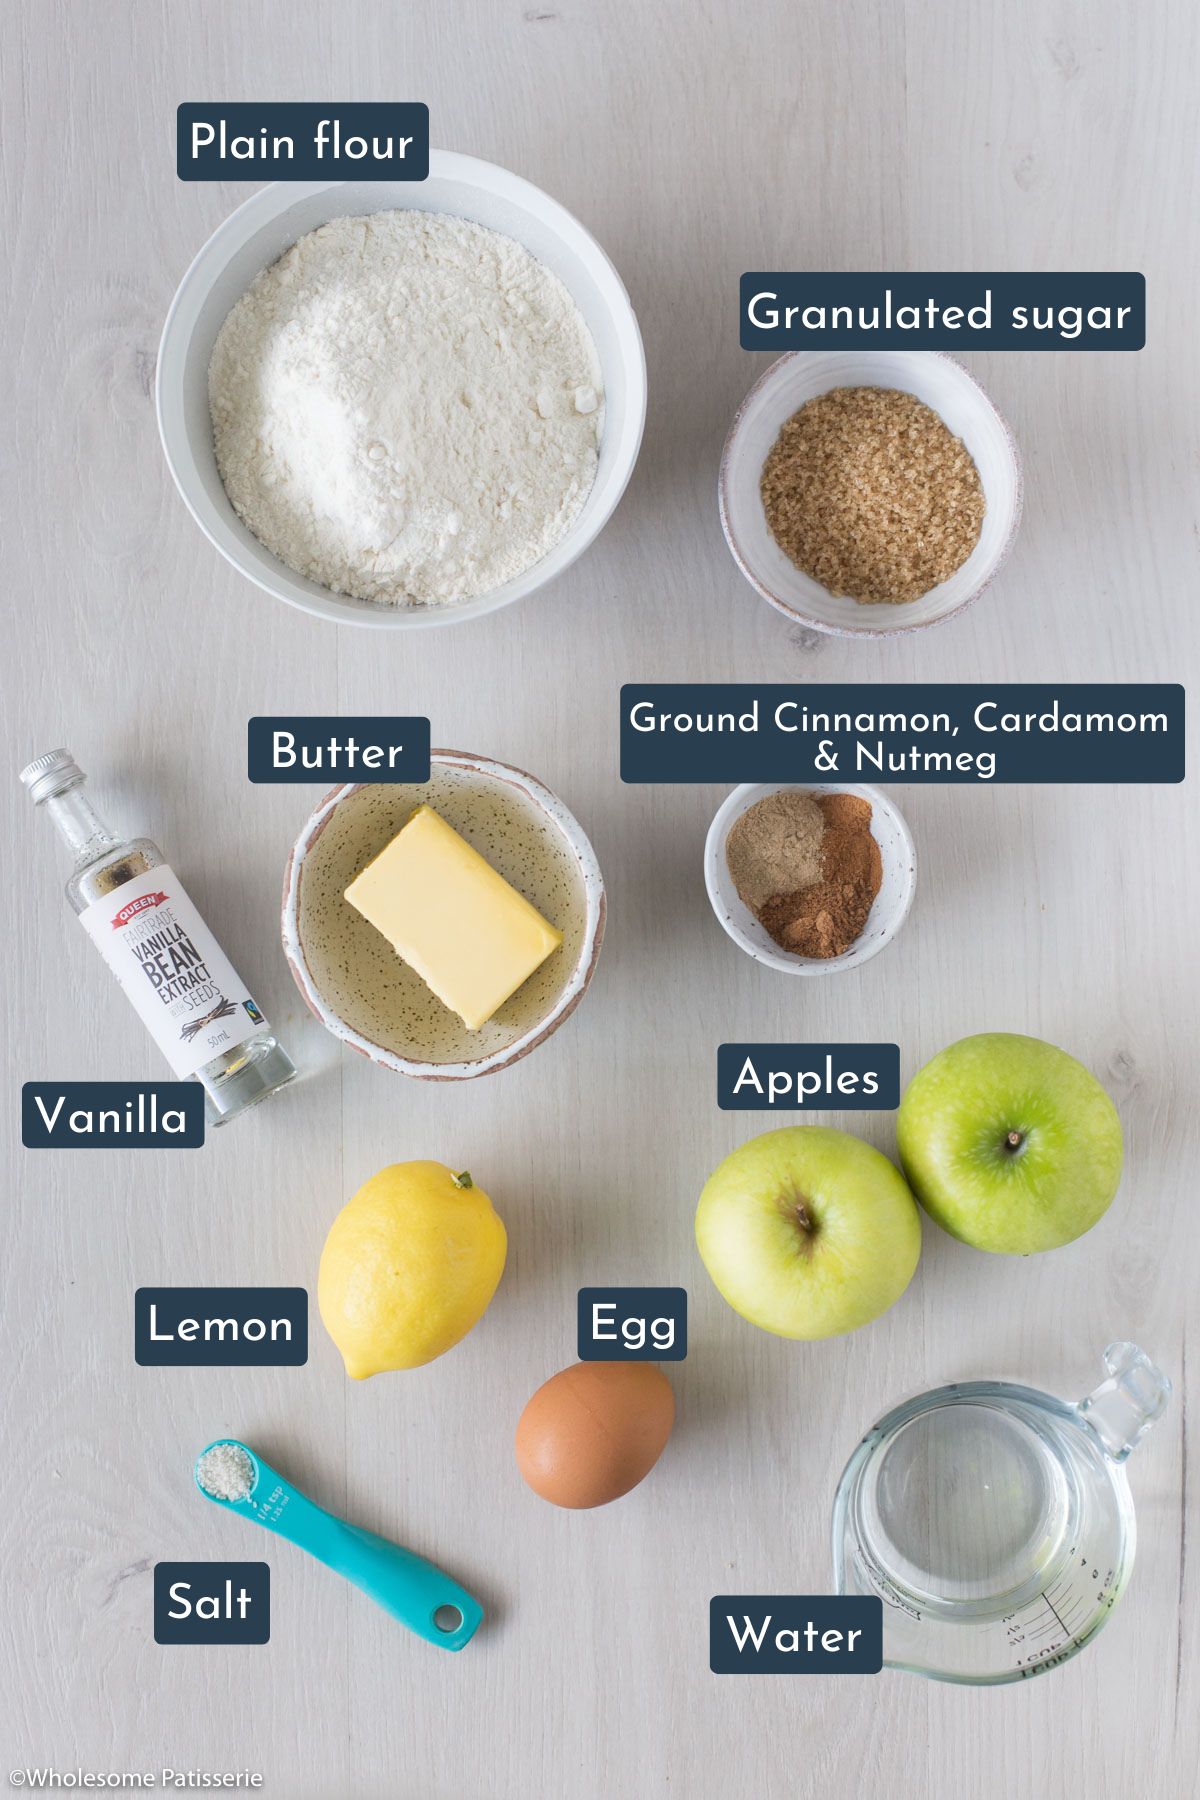
Apples – I use Granny Smith apples as they’re crispy, not too soft, and not too sweet. You can also use Honeycrisp Apples, Golden Delicious, Pink Lady Apples. Use crispier apples and not softer ones as those can turn mushy when baked in the apple tart.
All purpose flour – is also known as pain flour in Australia.
Unsalted Butter – can be substituted with salted butter, just omit the added salt in the pastry.
🥣 Step By Step Instructions (with photos)
How to make this easy apple tart recipe from scratch in 7 easy steps!
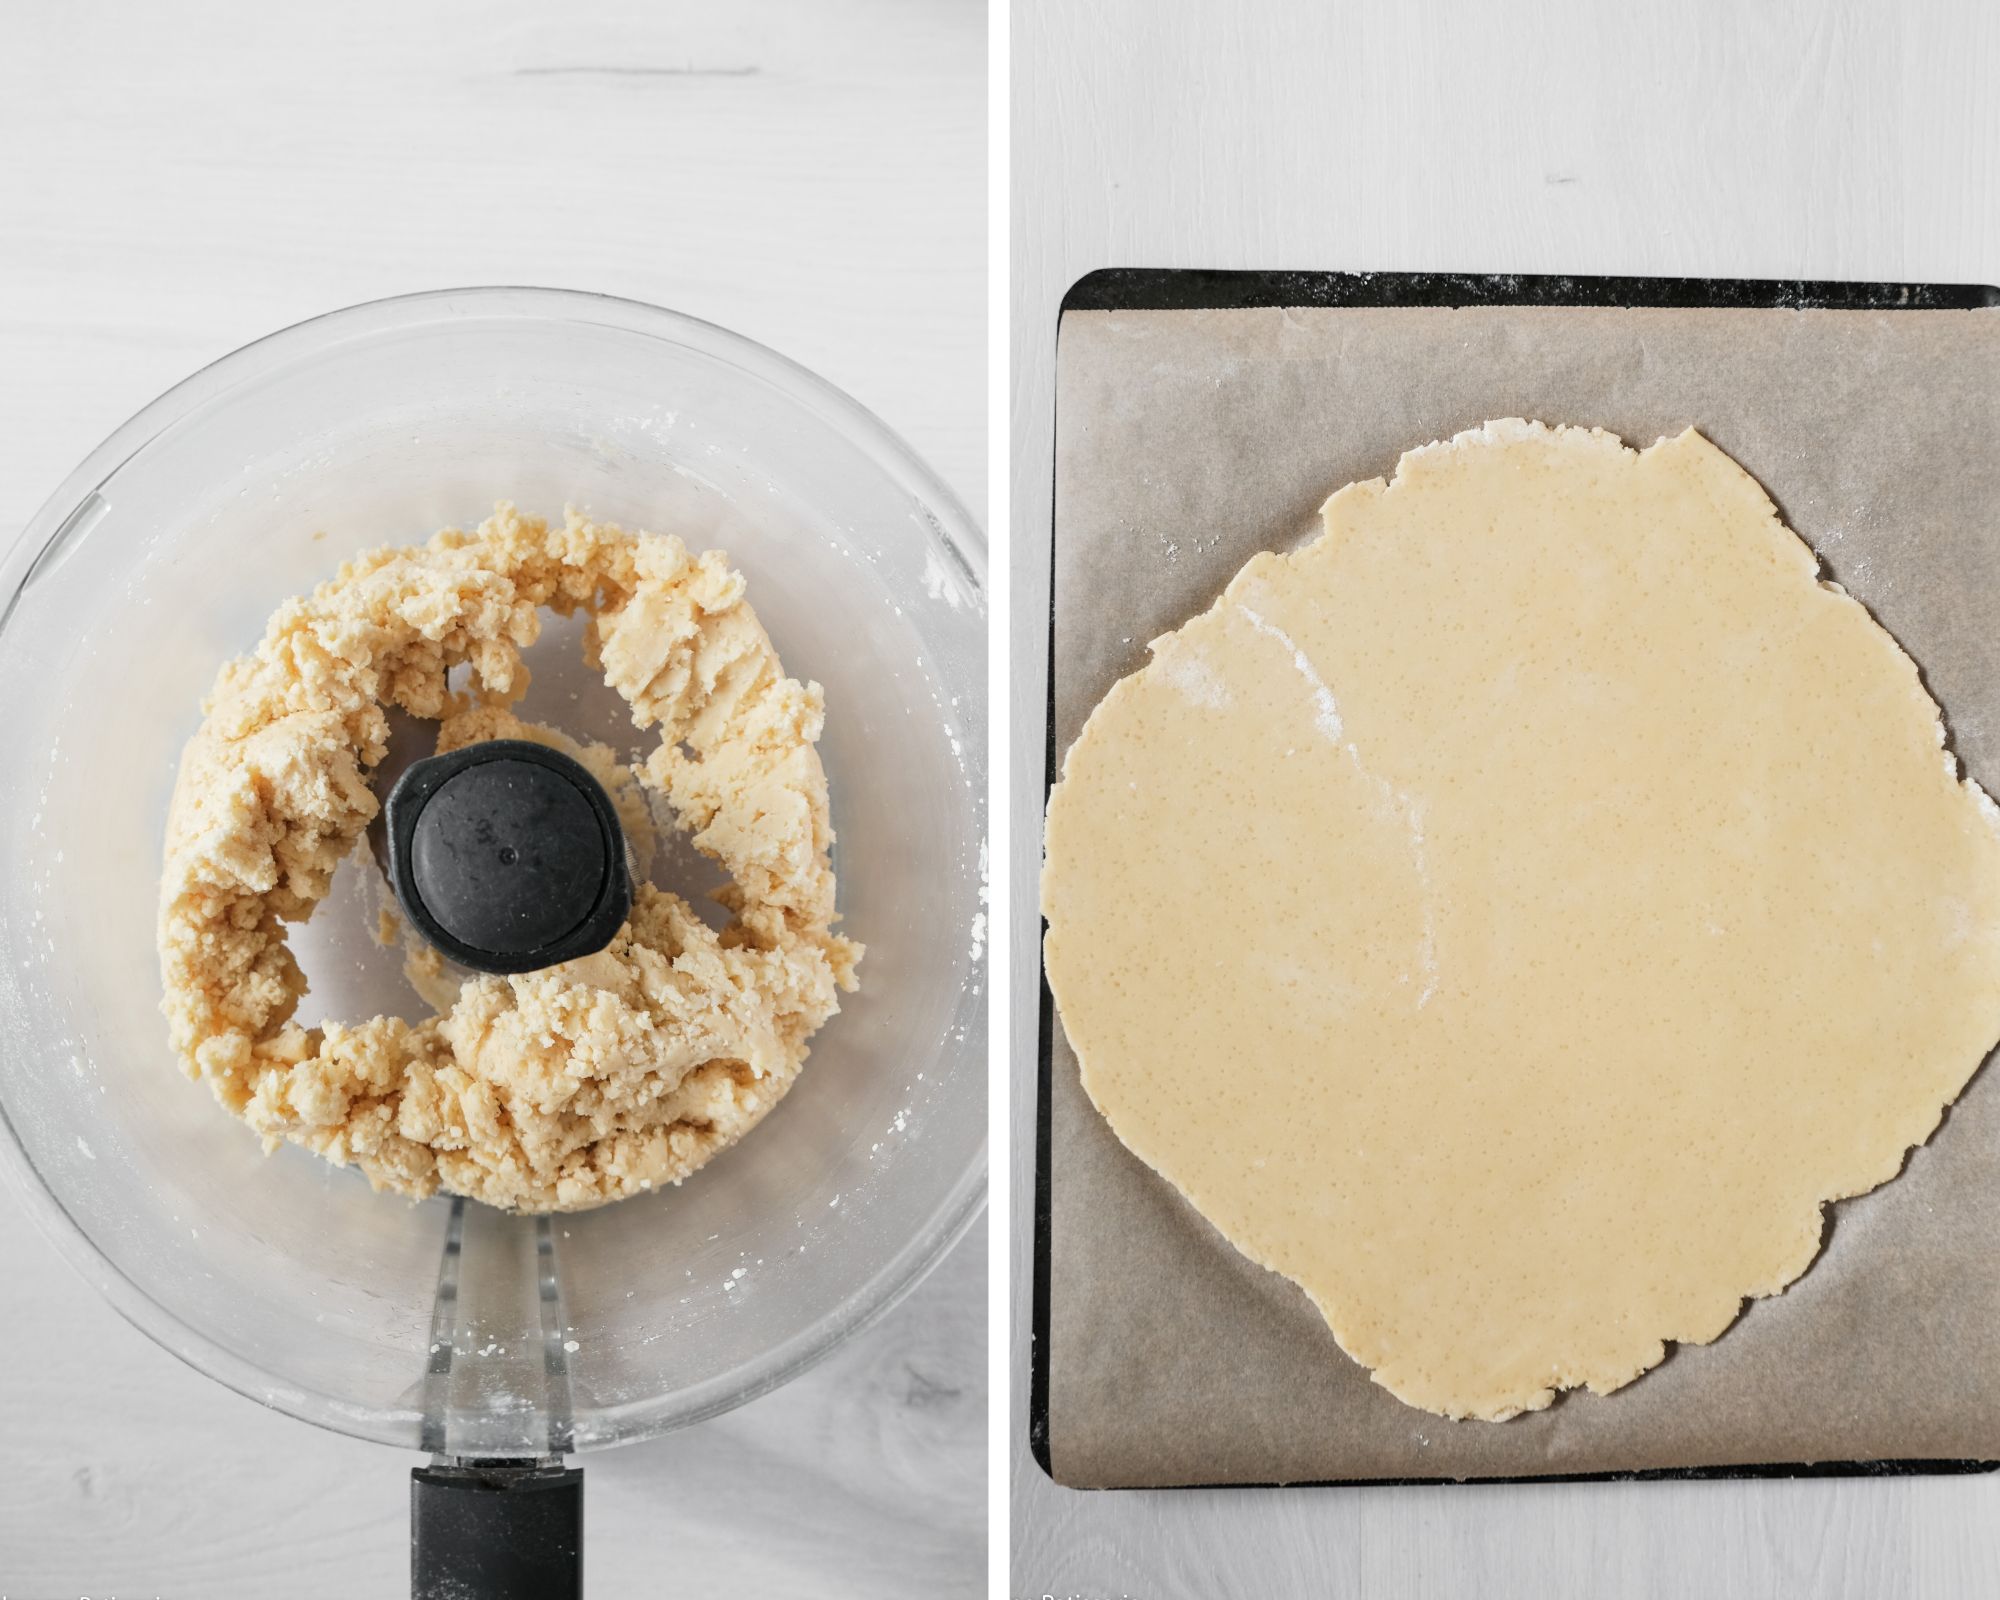
Step one: In a high-speed food processor, pulse together the flour, sugar, and salt until well combined. Add the cubed butter, blend, then drizzle in the water and blend to form the dough.
Step two: Lightly knead the dough and then refrigerate while you make the apple tart filling. Then roll the dough out and transfer it to the lined baking sheet.
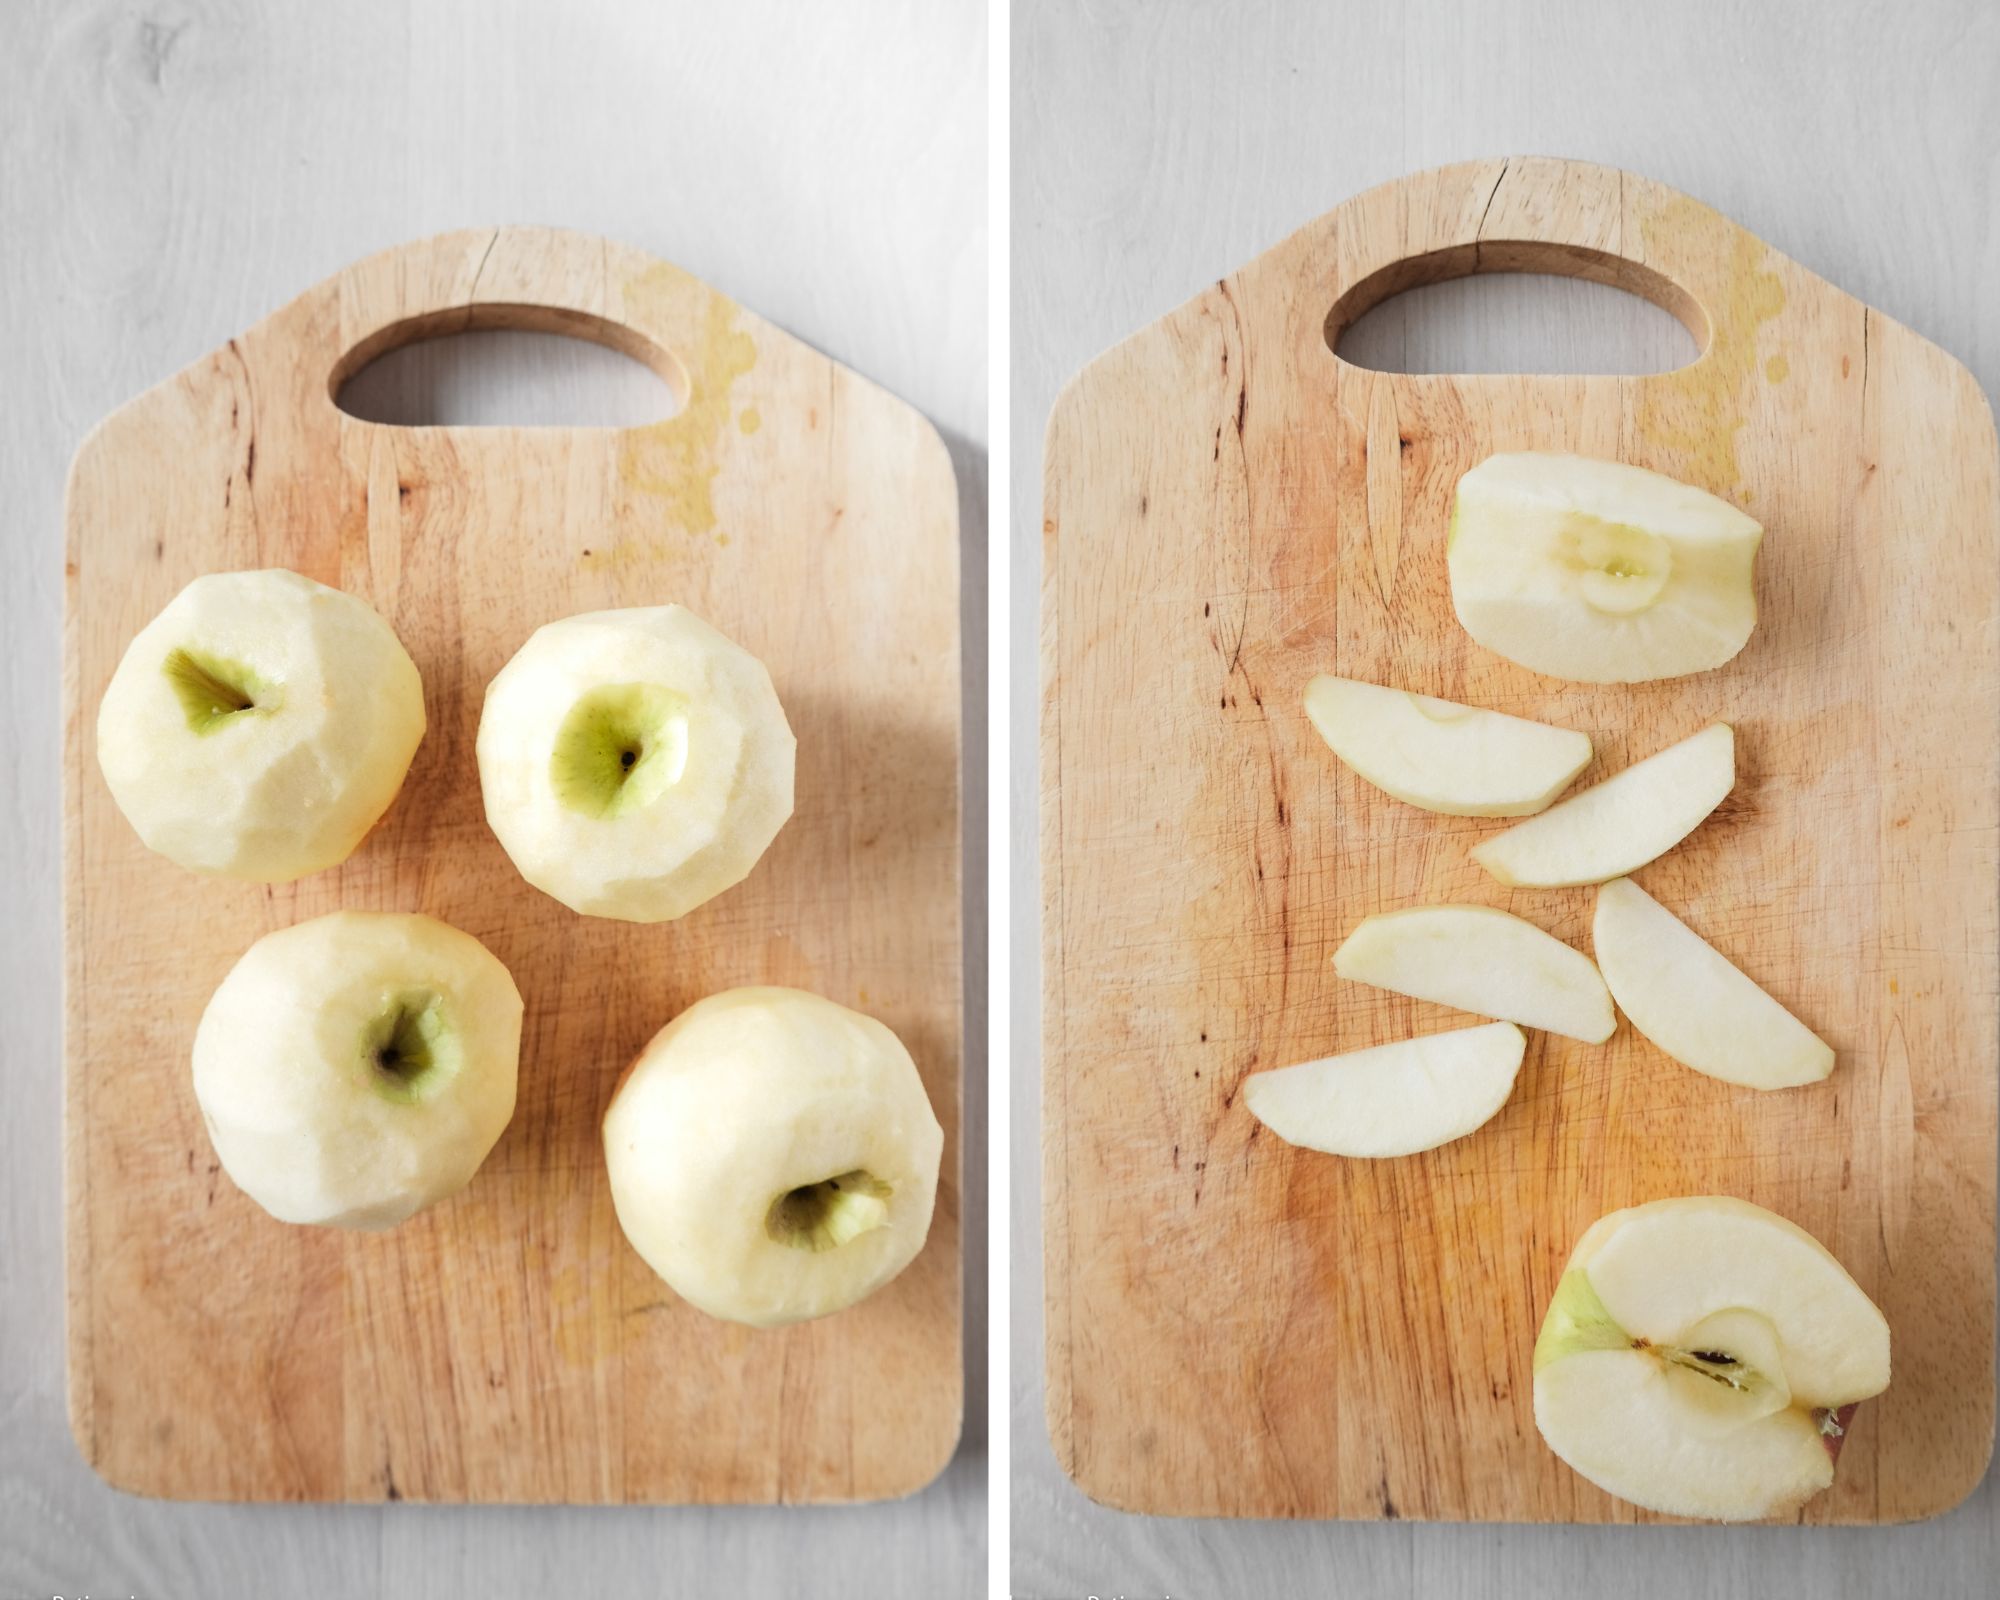
Step three: Peel apples, cut them in quarters, and slice off the inner core. Thinly slice the apples into wedges and place them in a large mixing bowl.
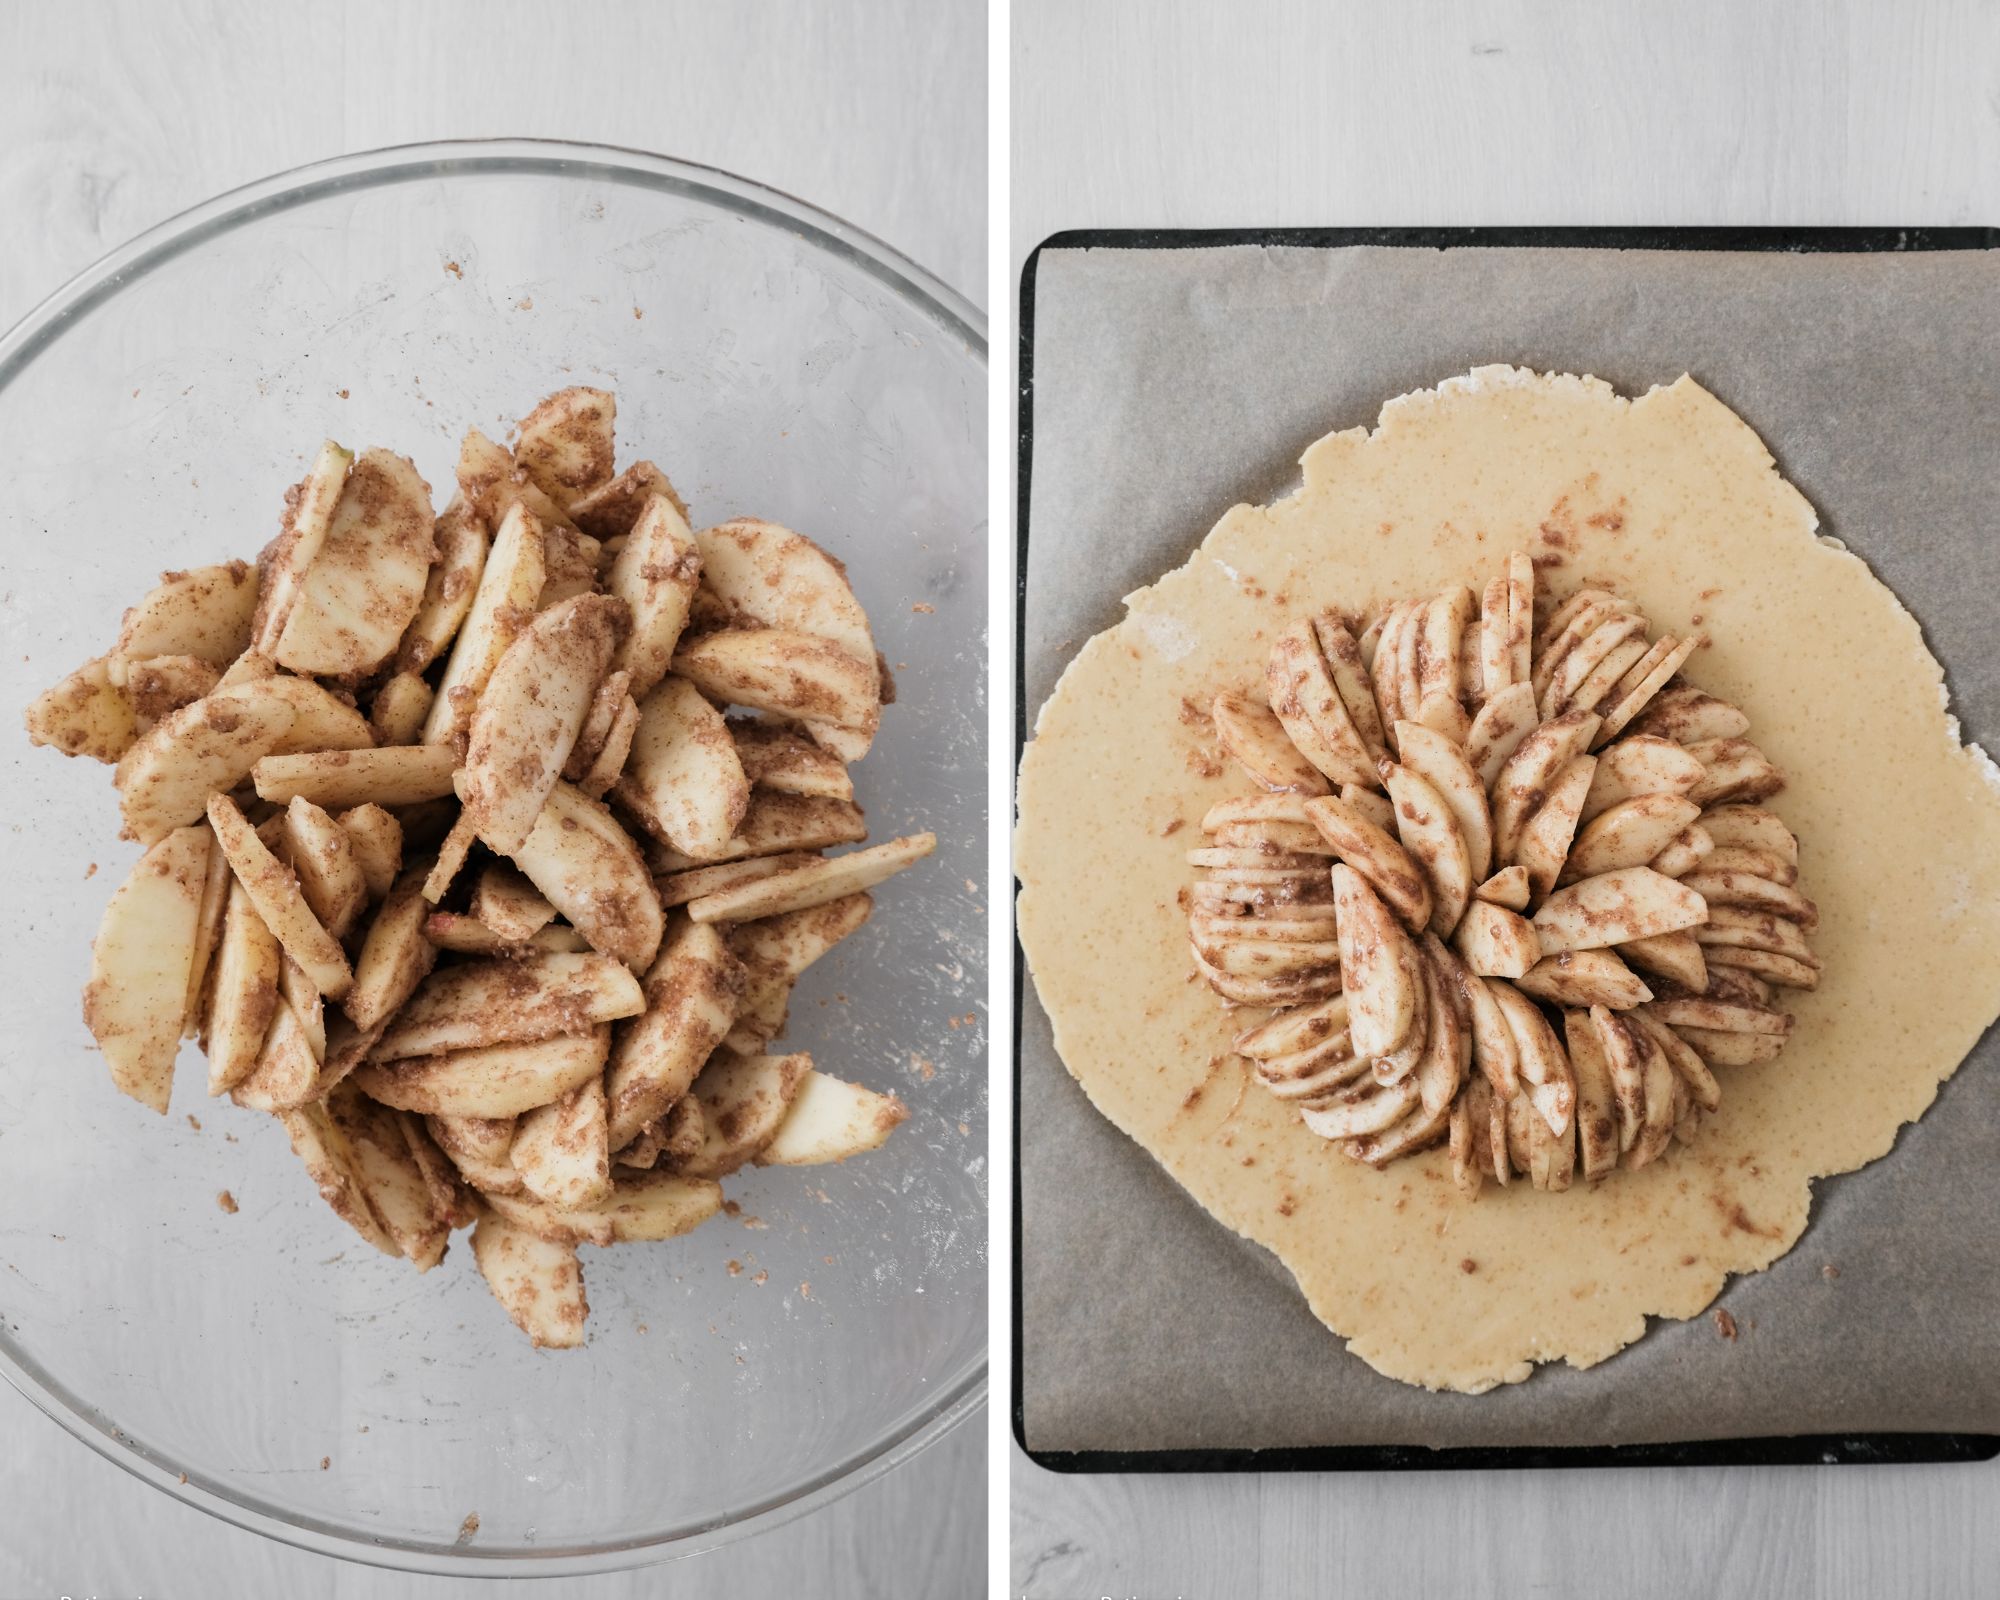
Step four: Sprinkle over the sugar, cinnamon, cardamom, nutmeg, lemon juice, and vanilla. Mix until the apples are all coated.
Step five: Arrange apple slices in the middle of the pastry, leaving a 7-inch (6cm) border all around.
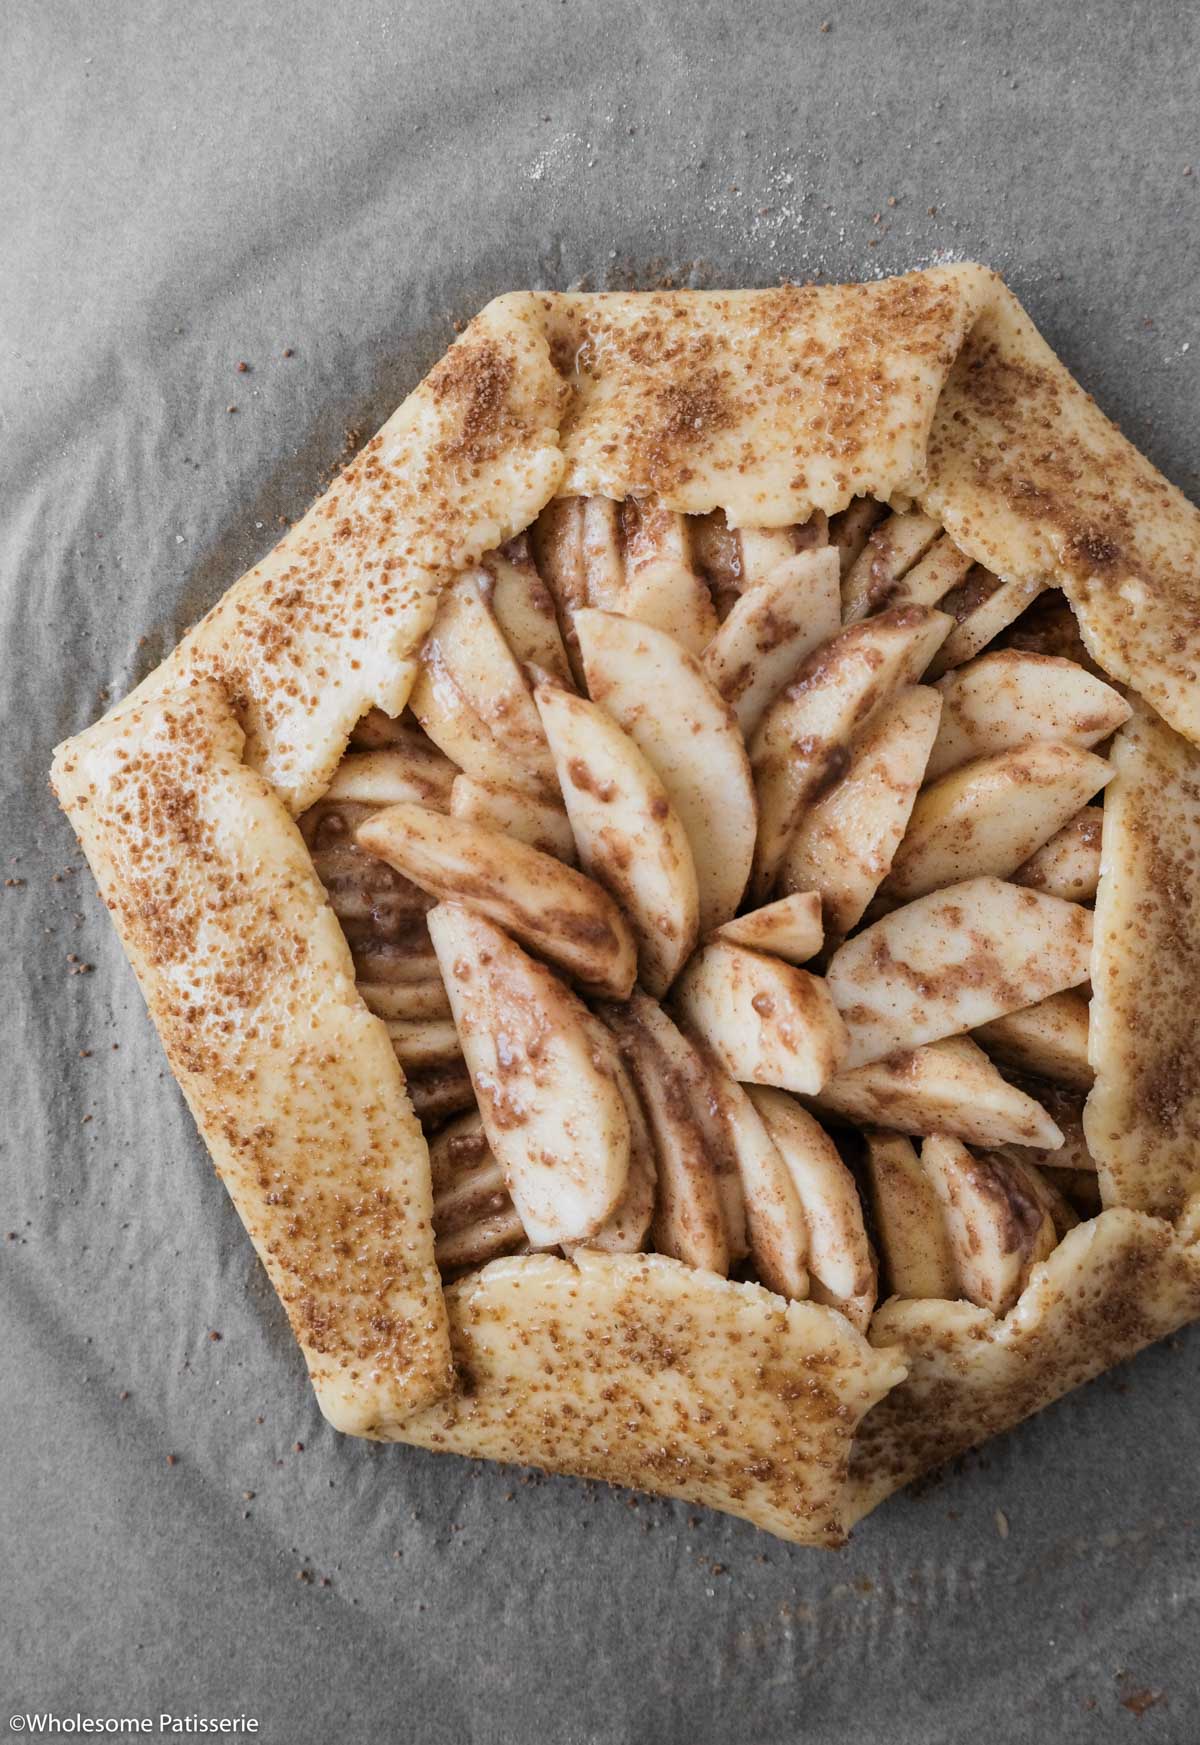
Step six: Gently fold the dough up and over the apples, overlapping the dough where needed and pressing down to seal. Brush the pastry with the beaten egg and sprinkle over the sugar.
Step seven: Bake for 35-40 minutes or until the apples are tender and the pastry is golden.
💭 Tips For Recipe Success
- Use Granny Smith Apples – or a variety of apple that are crispy, not too soft, and not too sweet such as Honeycrisp or Golden Delicious.
- Slice the apples thinly – too thick and they’ll take longer to turn tender during baking. No one loves crunchy pieces of apple in their French apple tart!
- Don’t have a food processor? – use a large mixing bowl instead and rub the butter into the flour using your hands or a pastry cutter until it resembles a coarse crumb. Then drizzle in the water and mix with your hands or a wooden spoon until the dough forms.
- Don’t refrigerate the dough for too long – only have it in the fridge while you prepare the apple tart filling. If your dough is too firm to roll, sit it at room temperature for 10-15 minutes or until it’s pliable enough to roll out.
- You don’t need to be a perfectionist when folding the dough over your apples – it’s not called a rustic apple tart for nothing!
- The apple tart is cooked – when the apple slices are tender, the liquid is bubbling and the pastry is golden and crisp.
⏲️ Storage Instructions
Store leftovers – in a sealed airtight container or wrapped in cling film or foil and refrigerated for 1-2 days. Refer to the notes below for additional storage and freezing instructions.
To freeze cooked apple tart:
- Allow it to cool completely then place it back on the lined baking sheet and into the freezer for several hours or until it’s solid.
- Remove, wrap it gently and tightly in cling film and then in foil. Label it with the date and what it is.
- Return to the freezer and freeze for up to 3 months.
- Reheat from frozen in the oven at the same temperature this recipe calls for. Cook until heated through. To avoid the pastry from getting too dark, reheat your tart wrapped in foil until heated through.
To make the dough ahead of time:
- Make the dough as per the recipe instructions, wrap it tightly in cling film and refrigerate for no longer than 3 days.
- When ready, remove from the refrigerator and allow the dough to sit at room temperature, unwrapped, for 15-30 minutes or until it’s soft enough to roll out.
- Make the tart as per the recipe instructions.
To make the tart ahead of time, I recommend storing and freezing it uncooked following these instructions:
- Assemble your apple tart as per the recipe instructions and stop before you’re meant to brush the pastry with the egg.
- Place the uncooked tart on the baking sheet and into your freezer for several hours or until it’s solid.
- Remove, wrap it gently and tightly in cling film and then in foil. Label it with the date and what it is.
- Return to the freezer and freeze for up to 3 months.
- To cook, remove from the freezer and brush the pastry with the beaten egg and sprinkle over the sugar.
- Bake per the recipe instructions, with an additional 1-2 minutes added to the bake time, as it was frozen. Don’t let the tart thaw, best baked from frozen.
💬 Recipe FAQ’s
I make this apple tart with Granny Smith apples as they’re crispy, not too soft, and not too sweet. You can also use Honeycrisp, Golden Delicious, Pink Lady, or any apple you have access to.
Yes! Use your favorite gluten-free all purpose flour that works well for baking. Use the same quantity of flour as the recipe calls for. This recipe has not been tested using gluten-free flour.
Related Recipes
If you enjoy this recipe, please consider leaving a ⭐️ star rating and a comment review below. I love to hear what you think and it’s much appreciated. Thank you! Your email address will not be published. Sam x

Simple Rustic Apple Tart
Ingredients
Method
- Pre-heat oven to 200ºC (400ºF). Line a large flat baking sheet with parchment paper, large enough to fit the tart on, about a 12-inch (30cm) circle. Set tray aside.
- In a high-speed food processor, add flour, sugar, and salt. Pulse for a few seconds to combine.
- Add chilled cubed butter and blend on high for 15 seconds until the mixture resembles a coarse crumb.
- Through the feed shoot, drizzle a tablespoon at a time of the chilled water whilst pulsing the mixture, until it forms a rough dough, not a complete ball of dough. Adding a little more water if the dough hasn’t formed.
- Turn out the dough onto a lightly floured surface. Gently bring it together and lightly knead until it forms a smooth ball of dough, ensuring not to over-knead.
- Slightly flatten the dough into a thick disc using your hands, wrap it in plastic cling film, and place it in the refrigerator to chill while you make the filling.
- Peel apples, cut in quarters, and slice off the inner core.
- Thinly slice apples into wedges and place them in a large mixing bowl.
- Sprinkle over the sugar, cinnamon, cardamom, nutmeg, lemon juice, and vanilla. Mix until apples are coated.
- Remove the dough from the refrigerator and place it on a lightly floured surface.
- Roll the dough out to a 12-inch (30cm) circle. Roll the pastry over the rolling pin or pick it up gently and transfer it to the lined baking sheet.
- Arrange apple slices in the middle of the pastry, leaving a 7-inch (6cm) border all around.
- Gently fold the dough up and over the apples, overlapping the dough where needed and pressing down to seal.
- Brush the pastry with the beaten egg and sprinkle over the sugar.
- Bake for 35-40 minutes or until the apples are tender and the pastry is golden.
- Remove from oven and allow to rest on the tray for 10 minutes before serving it warm.
- Serve warm with a scoop of vanilla ice cream and enjoy!
- Store leftovers in a sealed airtight container or wrapped in cling film or foil and refrigerated for 1-2 days. Refer to the notes below for additional storage and freezing instructions.
Nutrition
Notes
Tried this recipe?
Let us know how it was!If you enjoy this recipe, please consider leaving a ⭐️ star rating and a comment review below. I love to hear what you think and it’s much appreciated. Thank you! Your email address will not be published. Sam x