Peanut Butter Jelly Cups
You guys! Something serious is about to happen….
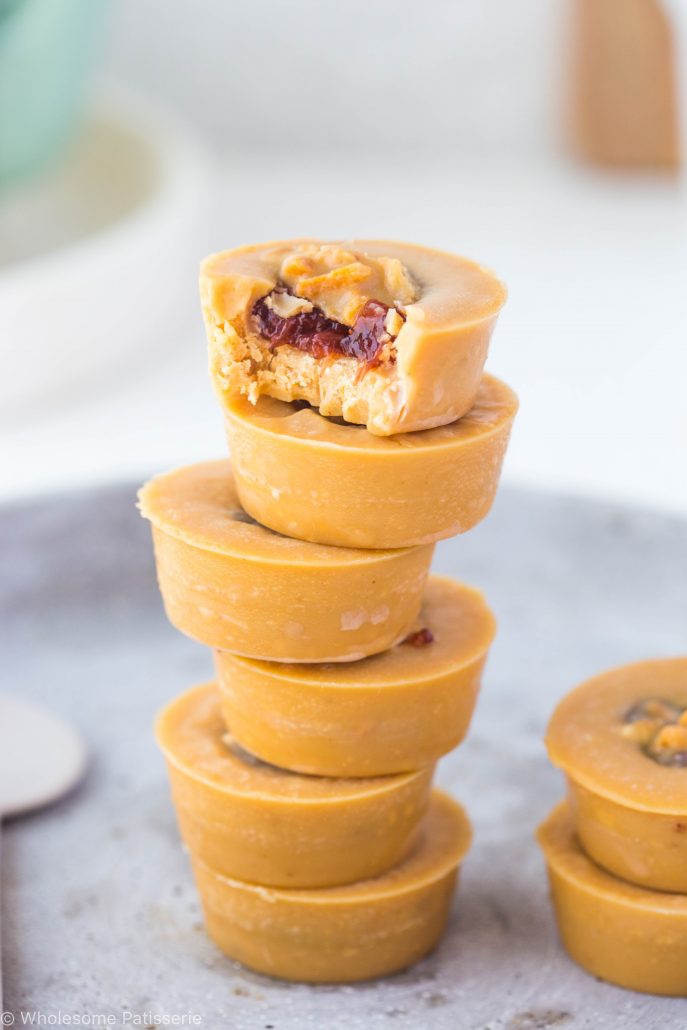
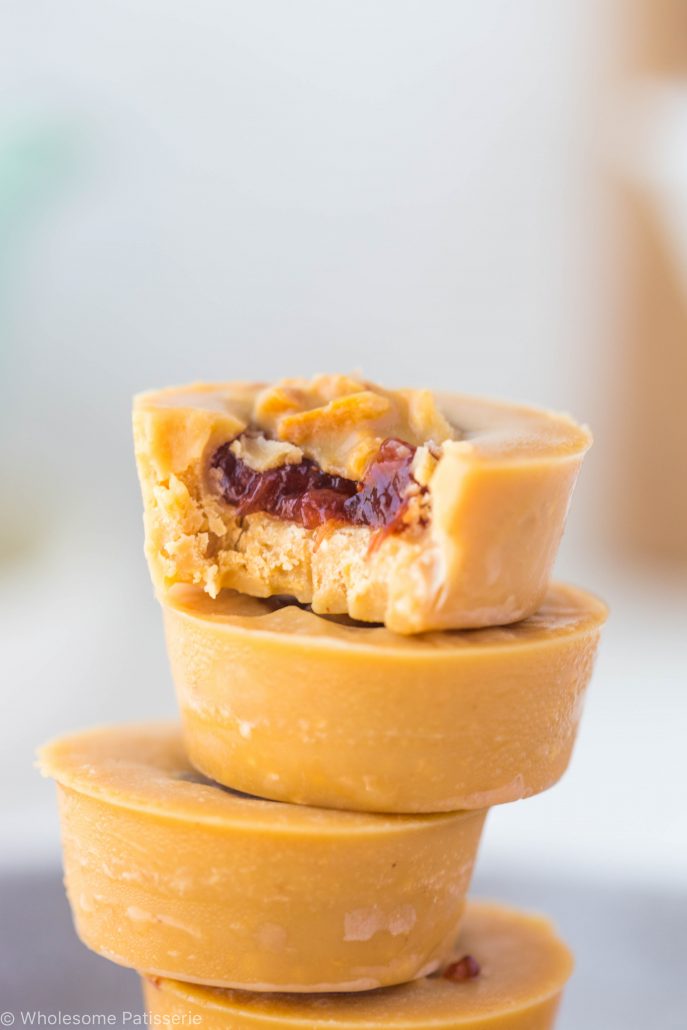
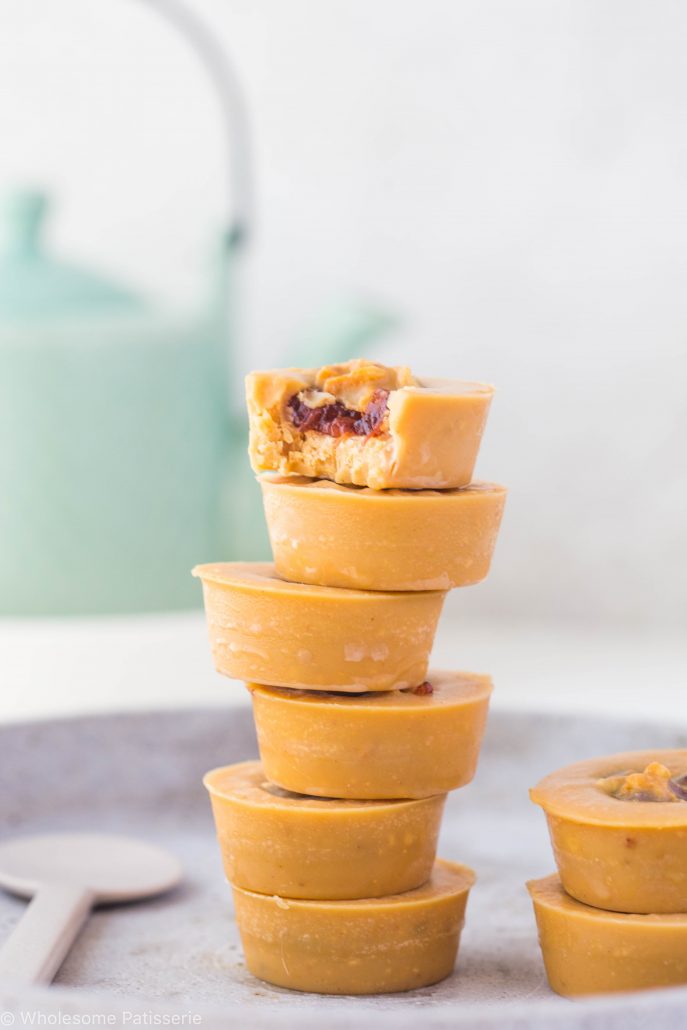
PB&J CUPS! Can you believe it??!! Ok ok, so my childhood didn’t consist of peanut butter and jelly sandwiches because I was too busy eating vegemite toast for breakfast and lunch! Now as an adult who is a complete foodie, I cannot keep my hands off of these peanut butter cups filled with jam – they.are.so.good. Yes I am into more extravagent recipes than peanut butter and jelly cups when I say I’m a “foodie”, but can you pass up one of these bad boys? No, didn’t think so 😉
I was nearly going to make the base of these cups a chocolate one but I found this recipe from Danijela from Healthy Always and I just to replicate them because Danijela made her images of her PB cups so heavenly, I needed to try them for myself!
As these peanut butter jelly cups have to set in the freezer, once they’re hardened, you can store them in the refrigerator. This way, you won’t have to let them sit at room temperature to thaw because they will already be slightly softened, perfect to eat! Are you salivating yet?!
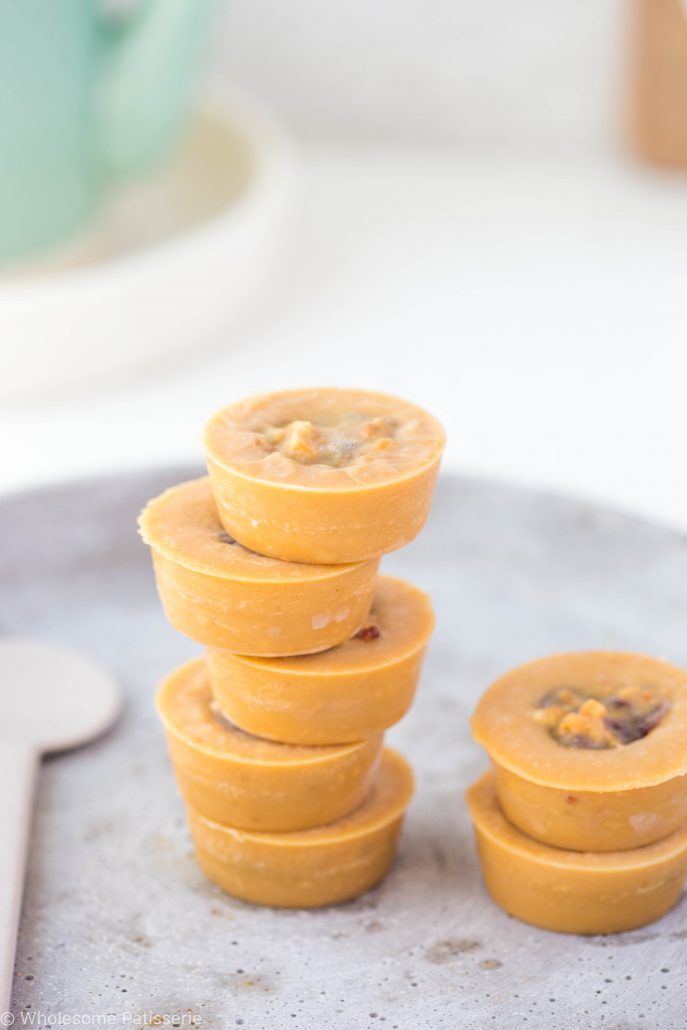
Recently I discovered silicone pans, well I knew of them but never used them for baking/cooking. Let me tell you, silicone moulds are THE BEST when making frozen treats such as these cups. The product just pops out of the moulds and there is no need to be fussing around with peeling any liners off the product you made. I HIGHLY suggest investing in a silicone pan for frozen treats, they are super inexpensive. I use this one here. Do you have a silicone pan?
I hope you enjoy this delicious and delightful peanut butter and jelly cups! Perfect for the kids and adults alike, at the end of the day, aren’t we all just big kids?
- ⅔ cup smooth or crunchy peanut butter
- ½ cup coconut oil, melted
- 2 Tbsp maple syrup
- ½ - ¾ cup strawberry or raspberry jam, store bought or homemade
- Line a mini muffin pan with mini cupcake liners. You can also use a mini muffin silicone pan, which works best.
- In a medium sized mixing bowl, whisk together peanut butter, melted coconut oil and maple syrup.
- Spoon approx. 2½ teaspoons of mixture into each mini cup.
- Place in the freezer for 10-15 minutes or until the bases are just set but not completely hardened. You still want them to be soft to the touch.
- Spoon approx. ½ - 1 tablespoon of the jam onto the centre of each peanut butter base, ensuring it doesn’t spread to touch the sides.
- Fill the cups up with remaining peanut butter mixture, covering the jam layer.
- Freeze for a further 30 minutes - 1 hour or until completely hardened.
- To serve, let the cups thaw for 10 minutes at room temperature.
- Enjoy!
When you’re setting the bases in the freezer, don’t let them go completely hard. You want them to still be soft to the touch, this will help the top layer stick to the base layer when freezing the cups at the end.
I used strawberry jam for my cups. When dolloping the jam onto the bases, make sure that your jam doesn’t spread to the sides. You want to leave a small gap between the edges and the jam, so the jam doesn’t spill out and it’s all encased.
Hi Samantha, Boy, ohm boy do these look AMAZING! Love the tip about not letting the layers firm up all the way in the freezer. I run into the problem of the sides not sticking together when making cups, and this tip is GOLD!
Hi Laurel! Thanks so much! I learnt that hard way also, annoying right?! They work out so much better not letting the base harden completely, just a little more fiddly but well worth it in the end! Hope you make a batch! xx
Hi Samantha – these look fantastic! I love that they are vegan and gluten-free. Great photos too! 🙂
Hi Alia! Thanks so much! They’re super tasty and incredibly easy to make and such a bonus they’re V/GF hey?! Glad you like them, I hope you make a batch for yourself, delicious! xx
Hi Sam! Thanks for the remake and linking it to my blog <3 These look delicious, and a speedier option with using the pre-made jam. They're fun huh? Danijela x
Hi Danijela! They have been a huge hit so far and I myself am obsessed with them! Thanks for sharing the recipe, I will definitely be making them on a regular basis and I’m sure everyone else will be too! x